Skip to content
Andwin Circuits
  • Home
  • ProductsExpand
    • HDI multilayer PCB
    • Rigid Flex PCB
    • Flex pcb
    • Special PCBExpand
      • High Frequency PCBExpand
        • Rogers RO4350B PCB
        • Rogers RO4003 pcb
        • Rogers RO3003 PCB
        • Rogers 5880 PCB
        • DICLAD 527 PCB
        • Taconic TLX series
        • Taconic TLX-8 RF PCB
        • Taconic TLX-9 RF PCB
      • High speed pcbExpand
        • Megtron 6 High Speed PCB
        • TU-872 SLK Sp High Speed
      • High TG PCBExpand
        • SHENGYI SH260 PCB
        • ISOLA 370HR PCB
        • ISOLA IS410 PCB
        • ISOLA IS420 PCB
      • Heavy copper PCB
      • Copper coin pcb
      • Copper inlay PCB
    • Metal Core PCBExpand
      • Copper core pcb
      • Aluminum PCB
      • 2 Layers Aluminum PCB
      • Direct thermal MCPCB
      • 2 Layers Direct Thermal
    • Ceramic PCBExpand
      • DPC ceramic PCB
      • DBC ceramic PCB
      • Thick film Ceramic PCB
      • Al2O3 Alumina PCB
      • AIN ALN ceramic PCB
      • IGBT Ceramic PCB
  • ServiceExpand
    • PCB Assembly
    • Quick turn PCB assembly
    • PCBA conformal coating
  • IndustryExpand
    • Telecommunication
    • IoT and Wireless
    • Industrial Control
    • Thermal management
    • Power and Energy
    • IC test board
    • Automative
    • Medical
  • CapabilityExpand
    • Rigid PCB
    • Rigid flex PCB
    • Metal core PCB
    • PCB Assembly
  • TechnologyExpand
    • Blogs
    • Via in pad
    • PCB E-test
    • PCB stack up
    • MCPCB panelization
    • Controlled impedance PCB
  • AboutExpand
    • About us
    • Certification
    • Factory Tour
  • Contact
Andwin Circuits
Home / Step-by-Step Guide to Double-Sided PCB Reverse Engineering

Step-by-Step Guide to Double-Sided PCB Reverse Engineering

ByGrace May 16, 2025May 16, 2025

Introduction

Reverse engineering a double-sided printed circuit board (PCB), commonly referred to as “PCB copying” or “cloning,” involves carefully analyzing and replicating an existing PCB design. This process is essential for repairing legacy systems, conducting competitive analysis, or reproducing obsolete boards when original documentation is unavailable.

This guide provides a detailed, step-by-step breakdown of the operations required to reverse-engineer a double-sided PCB accurately.

1. Preparation and Tools Required

Before starting, gather the necessary tools and materials:

  • Digital camera or scanner (high resolution for capturing PCB details)
  • Multimeter (for continuity testing)
  • Soldering iron & desoldering tools (to remove components if needed)
  • PCB design software (e.g., Altium Designer, KiCad, Eagle)
  • Magnifying glass or microscope (for inspecting fine traces)
  • Chemical etching solutions (if removing solder mask is necessary)

2. Documenting the Original PCB

Step 1: High-Resolution Imaging

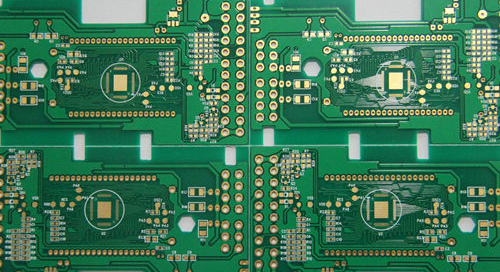
  • Take clear, well-lit photographs of both sides of the PCB.
  • Ensure no shadows or reflections obscure traces or components.
  • Use a scanner for flat PCBs to get precise images.

Step 2: Component Inventory

  • List all components (resistors, capacitors, ICs, connectors, etc.).
  • Note their values, part numbers, and orientations (polarity).
  • Identify any proprietary or hard-to-find components.

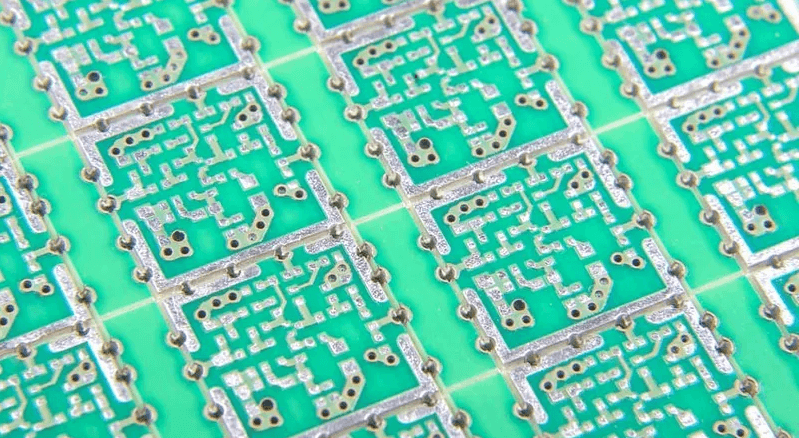
Step 3: Trace Mapping

  • Visually track all copper traces on both sides.
  • Use a multimeter in continuity mode to verify connections.
  • Mark vias (holes connecting top and bottom layers).
Contact us for PCB quote now |

3. Removing Components (If Necessary)

If the PCB must be stripped for better trace visibility:

  • Desolder components carefully to avoid damaging pads.
  • Group components by type and label them for reassembly.
  • Clean the board to remove solder residue.

4. Creating the Schematic Diagram

Step 1: Drawing the Circuit Schematic

  • Using PCB design software, recreate the circuit connections.
  • Start with power and ground networks.
  • Add ICs, passives, and connectors based on the component list.

Step 2: Verifying Connections

  • Cross-check with the original PCB using continuity tests.
  • Ensure all vias and jumpers are correctly mapped.

5. PCB Layout Design

Step 1: Setting Up the Design Software

  • Define board dimensions based on the original PCB.
  • Set layer properties (top and bottom copper layers).

Step 2: Placing Components

  • Position components as per the original layout.
  • Match footprints and pad sizes accurately.

Step 3: Routing Traces

  • Manually route traces following the original PCB’s paths.
  • Ensure trace widths match for power and signal lines.
  • Replicate vias and through-hole connections.
Contact us for PCB quote now |

Step 4: Adding Silkscreen and Solder Mask

  • Mark component designators (R1, C2, U3, etc.).
  • Apply solder mask openings where needed.

6. Design Verification

Step 1: Design Rule Check (DRC)

  • Run DRC in the PCB software to detect errors.
  • Verify spacing, trace widths, and via placements.

Step 2: Comparing with Original PCB

  • Overlay the new design on scanned images for accuracy.
  • Check for missing or incorrect connections.

7. Prototyping and Testing

Step 1: Manufacturing the Cloned PCB

  • Export Gerber files and send them to a PCB fab house.
  • Order a prototype for testing.

Step 2: Assembling the PCB

  • Solder components onto the new board.
  • Double-check orientations and placements.

Step 3: Functional Testing

  • Power up the board and check for expected voltages.
  • Test signal paths with an oscilloscope if necessary.
  • Debug any issues by revisiting the schematic or layout.

8. Final Adjustments and Production

  • If the prototype works, proceed with full-scale production.
  • Document all changes for future reference.
Contact us for PCB quote now |

Conclusion

Reverse engineering a double-sided PCB requires meticulous attention to detail, from initial documentation to final testing. By following these structured steps—imaging, component mapping, schematic recreation, layout design, and verification—you can accurately clone a PCB without original design files.

This process is invaluable for maintaining outdated electronics, conducting hardware analysis, or recreating proprietary designs legally. With the right tools and patience, even complex double-sided PCBs can be successfully reverse-engineered.

Contact us for PCB quote now |
Post Tags: #aluminum clad pcb#aluminum core pcb#aluminum pcb#assemble pcb#Double-Sided PCB

Post navigation

Previous Previous
Basic Guidelines for Mixed-Signal PCB Layout Design
NextContinue
Thermal Management Methods for High-Power PCBs

Search

Search

Products

  • HDI Multilayer PCB
  • Rigid Flex PCB
  • Flex pcb
  • High Frequency PCB
  • High speed pcb
  • Heavy copper PCB
  • Metal Core PCB
  • Ceramic PCB

Address

Andwin Circuits Co.,Limited
Email: sales@andwinpcb.com
Tel: +86 755 2832 9394
Fax:+86 755 2992  6717
ADD:1-2F-1217,HouDeQun Industrial park,
NanTing RD NO.56,ShaJing,BaoAn,Shenzhen 518104,GuangDong,China

Products

  • HDI Multilayer PCB
  • Rigid Flex PCB
  • Flex pcb
  • High Frequency PCB
  • High speed pcb
  • Heavy copper PCB
  • Metal Core PCB
  • Ceramic PCB

Technology

  • Blogs
  • Via in pad
  • PCB E-test
  • PCB stack up
  • Metal core PCB panelization
  • Controlled impedance PCB

CERTIFICATION

Certification >>


Copyright© 2003 - 2026 Andwin | All Rights Reserved | Powered by Andwin

Scroll to top
  • Home
  • Products
    • HDI multilayer PCB
    • Rigid Flex PCB
    • Flex pcb
    • Special PCB
      • High Frequency PCB
        • Rogers RO4350B PCB
        • Rogers RO4003 pcb
        • Rogers RO3003 PCB
        • Rogers 5880 PCB
        • DICLAD 527 PCB
        • Taconic TLX series
        • Taconic TLX-8 RF PCB
        • Taconic TLX-9 RF PCB
      • High speed pcb
        • Megtron 6 High Speed PCB
        • TU-872 SLK Sp High Speed
      • High TG PCB
        • SHENGYI SH260 PCB
        • ISOLA 370HR PCB
        • ISOLA IS410 PCB
        • ISOLA IS420 PCB
      • Heavy copper PCB
      • Copper coin pcb
      • Copper inlay PCB
    • Metal Core PCB
      • Copper core pcb
      • Aluminum PCB
      • 2 Layers Aluminum PCB
      • Direct thermal MCPCB
      • 2 Layers Direct Thermal
    • Ceramic PCB
      • DPC ceramic PCB
      • DBC ceramic PCB
      • Thick film Ceramic PCB
      • Al2O3 Alumina PCB
      • AIN ALN ceramic PCB
      • IGBT Ceramic PCB
  • Service
    • PCB Assembly
    • Quick turn PCB assembly
    • PCBA conformal coating
  • Industry
    • Telecommunication
    • IoT and Wireless
    • Industrial Control
    • Thermal management
    • Power and Energy
    • IC test board
    • Automative
    • Medical
  • Capability
    • Rigid PCB
    • Rigid flex PCB
    • Metal core PCB
    • PCB Assembly
  • Technology
    • Blogs
    • Via in pad
    • PCB E-test
    • PCB stack up
    • MCPCB panelization
    • Controlled impedance PCB
  • About
    • About us
    • Certification
    • Factory Tour
  • Contact
Search