
How to Desolder from a Circuit Board: A Comprehensive Guide
Desoldering is a fundamental skill in electronics repair and prototyping. Whether you’re replacing a faulty component, salvaging parts from an old board, or correcting a soldering mistake, knowing how to desolder effectively is essential. This guide will walk you through the tools, techniques, and best practices for desoldering components from a circuit board safely and efficiently.
1. Understanding Desoldering
Desoldering is the process of removing solder to disconnect a component from a circuit board. Unlike soldering, which involves melting solder to create a connection, desoldering requires you to remove the solder to break the connection. This process can be tricky, as it involves heat management, precision, and care to avoid damaging the circuit board or the component.
2. Tools and Materials Needed
Before you begin, gather the necessary tools and materials. Having the right equipment will make the process smoother and reduce the risk of damaging your circuit board.
Essential Tools:
- Soldering Iron: A temperature-controlled soldering iron is ideal for desoldering. Ensure the tip is clean and properly tinned.
- Desoldering Pump (Solder Sucker): A manual or spring-loaded tool that creates suction to remove molten solder.
- Desoldering Braid (Solder Wick): A braided copper wire coated with flux that absorbs molten solder.
- Flux: Helps improve solder flow and makes desoldering easier.
- Tweezers: Useful for handling small components and removing them after desoldering.
- Heat Gun (for SMD Components): For surface-mount devices, a heat gun can help melt solder across multiple pins simultaneously.
- Isopropyl Alcohol and Brush: For cleaning the circuit board after desoldering.
Optional Tools:
- Desoldering Station: A specialized tool that combines a soldering iron and a vacuum pump for efficient desoldering.
- Hot Air Rework Station: Ideal for removing surface-mount components.
- Magnifying Lamp: Helps with precision work on small components.
3. Step-by-Step Desoldering Process
Step 1: Prepare Your Workspace
- Ensure your workspace is clean, well-lit, and ventilated.
- Secure the circuit board in a holder or clamp to keep it steady during the process.
- Power off and unplug any devices to avoid electrical hazards.
Step 2: Identify the Component
- Locate the component you want to remove. Note its orientation and position on the board.
- For through-hole components, identify the solder joints on the opposite side of the board.
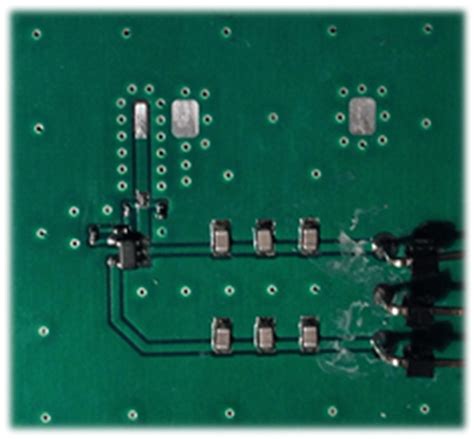
- For surface-mount components, identify the solder pads on the same side.
Step 3: Apply Flux
- Apply a small amount of flux to the solder joints. Flux helps the solder flow more easily and improves the efficiency of the desoldering process.
Step 4: Heat the Solder Joint
- Turn on your soldering iron and set it to the appropriate temperature (typically 300°C to 350°C for lead-based solder, or slightly higher for lead-free solder).
- Place the soldering iron tip on the solder joint and allow the solder to melt. Be careful not to overheat the joint, as this can damage the circuit board or the component.
Step 5: Remove the Solder
- Using a Desoldering Pump:
- Once the solder is molten, quickly place the tip of the desoldering pump over the joint.
- Press the plunger to create suction and remove the solder.
- Repeat if necessary until most of the solder is removed.
- Using Desoldering Braid:
- Place the braid over the molten solder joint.
- Press the soldering iron tip onto the braid to transfer heat and absorb the solder.
- Move the braid along the joint to remove as much solder as possible.
Step 6: Remove the Component
- For through-hole components, gently wiggle the component to loosen it from the board. Use tweezers to pull it out if necessary.
- For surface-mount components, use tweezers to lift the component once the solder is melted.
Step 7: Clean the Area
- Use isopropyl alcohol and a brush to clean any remaining flux or solder residue from the board.
- Inspect the solder pads and through-holes to ensure they are clean and undamaged.
4. Tips for Successful Desoldering
- Work Quickly but Carefully: Prolonged heat exposure can damage the circuit board or component. Work efficiently to minimize heat transfer.
- Use the Right Tip: Choose a soldering iron tip that matches the size of the solder joint for better heat transfer.
- Avoid Excessive Force: Forcing a component out can damage the board or the component. Ensure all solder is removed before attempting to remove the part.
- Practice on Scrap Boards: If you’re new to desoldering, practice on old or non-functional circuit boards to build your skills.
- Stay Organized: Keep track of small components and screws to avoid losing them during the process.
5. Common Challenges and Solutions
Challenge 1: Stubborn Solder
- Solution: Apply additional flux and reheat the joint. If the solder still won’t budge, consider using a desoldering station or a higher-temperature soldering iron.
Challenge 2: Damaged Pads or Traces
- Solution: Be gentle when heating and removing components. If a pad is damaged, you may need to repair it with a jumper wire or conductive epoxy.
Challenge 3: Multi-Pin Components
- Solution: For components with multiple pins, such as integrated circuits (ICs), use a desoldering braid or a hot air rework station to melt solder across all pins simultaneously.
Challenge 4: Surface-Mount Components
- Solution: Use a hot air rework station or a heat gun to evenly heat the component and lift it off the board. Alternatively, use tweezers to remove the component while heating each solder joint individually.
6. Safety Considerations
- Avoid Burns: Soldering irons and molten solder are extremely hot. Always handle them with care and use heat-resistant gloves if necessary.
- Work in a Ventilated Area: Soldering fumes can be harmful. Use a fume extractor or work near an open window.
- Protect Your Eyes: Wear safety glasses to protect against solder splashes or flying debris.
- Dispose of Waste Properly: Solder and flux residues should be disposed of according to local regulations.
7. Advanced Desoldering Techniques
Using a Desoldering Station
A desoldering station combines a soldering iron with a vacuum pump, making it easier to remove solder in one step. This tool is ideal for frequent desoldering tasks and provides better control over the process.
Hot Air Rework for SMD Components
For surface-mount devices, a hot air rework station allows you to heat the entire component evenly, making it easier to lift off the board without damaging the pads.
Repairing Damaged Pads
If a solder pad is damaged during desoldering, you can repair it by scraping away the solder mask to expose the trace and attaching a jumper wire to reconnect the component.
8. Conclusion
Desoldering is a valuable skill for anyone working with electronics. With the right tools, techniques, and practice, you can remove components from a circuit board safely and efficiently. Whether you’re repairing a device, salvaging parts, or correcting a mistake, mastering desoldering will enhance your ability to work with electronic circuits. Remember to work carefully, prioritize safety, and take your time to avoid damaging your components or board. Happy desoldering!