
How to Remove Solder from a Circuit Board: A Comprehensive Guide
Soldering is a fundamental skill in electronics, used to create strong electrical connections between components and circuit boards. However, there are times when you need to remove solder, whether to replace a faulty component, correct a mistake, or salvage parts from an old board. Removing solder can be tricky, especially for beginners, but with the right tools and techniques, it becomes a manageable task. This article will guide you through the process of removing solder from a circuit board safely and effectively.
1. Understanding the Basics of Solder Removal
Before diving into the process, it’s important to understand what solder is and why it can be challenging to remove. Solder is a metal alloy (typically made of tin and lead or lead-free alternatives) that melts at a relatively low temperature. When heated, it flows and creates a bond between components and the circuit board. Once cooled, it solidifies, forming a durable connection.
Removing solder requires reheating it to its melting point so it can be extracted or displaced. However, excessive heat or improper techniques can damage the circuit board or components, so precision and care are essential.
2. Tools and Materials Needed
To remove solder effectively, you’ll need the following tools and materials:
- Soldering Iron: A temperature-controlled soldering iron is ideal for precise heating.
- Solder Wick (Desoldering Braid): A braided copper wire used to absorb molten solder.
- Desoldering Pump (Solder Sucker): A vacuum tool that sucks up molten solder.
- Flux: Helps improve solder flow and makes removal easier.
- Tweezers: For handling small components.
- Isopropyl Alcohol and Brush: For cleaning the board after soldering.
- Safety Gear: Safety glasses and heat-resistant gloves to protect yourself.
- PCB Holder: To keep the circuit board steady during the process.
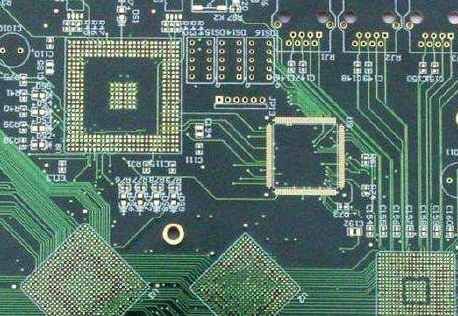
3. Step-by-Step Guide to Removing Solder
Step 1: Prepare Your Workspace
- Ensure your workspace is clean, well-lit, and free of clutter.
- Place the circuit board on a stable surface or secure it in a PCB holder.
- Put on safety glasses and heat-resistant gloves to protect yourself from burns and fumes.
Step 2: Identify the Solder Joints
- Examine the circuit board and identify the solder joints you need to remove.
- If you’re removing a component, note how many pins or leads are attached and where they are soldered.
Step 3: Heat the Solder Joint
- Turn on your soldering iron and set it to the appropriate temperature (typically 300-400°C or 572-752°F for lead-based solder).
- Place the tip of the soldering iron on the solder joint you want to remove. Hold it there for a few seconds to melt the solder.
Step 4: Use a Solder Wick (Desoldering Braid)
- While the solder is molten, place the solder wick over the joint.
- Press the soldering iron tip onto the wick to transfer heat and allow the wick to absorb the solder.
- Once the wick has absorbed the solder, remove both the iron and the wick. Trim the used portion of the wick if necessary.
Step 5: Use a Desoldering Pump (Solder Sucker)
- If you prefer using a desoldering pump, heat the solder joint with the soldering iron until the solder melts.
- Quickly place the tip of the desoldering pump over the molten solder and press the plunger to suck up the solder.
- Release the plunger to eject the collected solder from the pump.
Step 6: Repeat as Needed
- For larger joints or components with multiple pins, you may need to repeat the process several times to remove all the solder.
- Be patient and avoid applying excessive force, as this can damage the circuit board or components.
Step 7: Remove the Component
- Once the solder is removed, gently wiggle the component with tweezers to free it from the board.
- If the component is still stuck, reheat the joints and try again.
Step 8: Clean the Circuit Board
- After removing the solder and components, clean the board with isopropyl alcohol and a brush to remove any flux residue or debris.
- Allow the board to dry completely before proceeding with further work.
4. Tips for Effective Solder Removal
- Use Flux: Applying flux to the solder joint before heating can improve heat transfer and make solder removal easier.
- Avoid Excessive Heat: Prolonged exposure to high temperatures can damage the circuit board or components. Work quickly and efficiently.
- Practice Good Technique: Keep the soldering iron tip clean and tinned to ensure optimal heat transfer.
- Work in a Well-Ventilated Area: Soldering can produce fumes that may be harmful if inhaled. Use a fume extractor or work near an open window.
5. Common Challenges and Solutions
Challenge 1: Stubborn Solder
- Solution: Add a small amount of fresh solder to the joint before attempting to remove it. This can improve heat transfer and make the old solder easier to remove.
Challenge 2: Damaged Pads or Traces
- Solution: Be gentle when removing solder and avoid prying or scraping the board. If a pad or trace is damaged, you may need to repair it with a jumper wire or conductive pen.
Challenge 3: Large Components or Ground Planes
- Solution: For components with large thermal mass or connections to ground planes, use a higher-wattage soldering iron or a hot air rework station to provide sufficient heat.
6. Alternative Methods for Solder Removal
While solder wicks and desoldering pumps are the most common tools, there are other methods for removing solder:
- Hot Air Rework Station: Uses a stream of hot air to melt solder, ideal for surface-mount components.
- Desoldering Alloy: A low-melting-point alloy that can be mixed with existing solder to lower its melting point.
- Desoldering Tweezers: Specialized tweezers with heated tips for removing surface-mount components.
7. Safety Considerations
- Avoid Burns: Always handle the soldering iron and molten solder with care.
- Protect Your Eyes: Wear safety glasses to shield your eyes from splashes of molten solder.
- Minimize Fume Exposure: Work in a well-ventilated area or use a fume extractor.
- Dispose of Waste Properly: Solder and flux residues should be disposed of according to local regulations.
8. Conclusion
Removing solder from a circuit board is a skill that requires practice and patience. By using the right tools and techniques, you can safely and effectively remove solder without damaging the board or components. Whether you’re repairing, modifying, or salvaging electronics, mastering this process will make you a more confident and capable electronics enthusiast or professional. Remember to prioritize safety, work carefully, and don’t hesitate to seek help or advice if you encounter challenges.