Pcb mounting kit
Essential Components in a PCB Mounting Kit
A PCB mounting kit is an indispensable tool for anyone involved in the design, assembly, or repair of printed circuit boards (PCBs). These kits are meticulously curated to include a variety of essential components that facilitate the secure and efficient mounting of PCBs in various applications. Understanding the key elements within a PCB mounting kit can significantly enhance the quality and reliability of electronic assemblies.
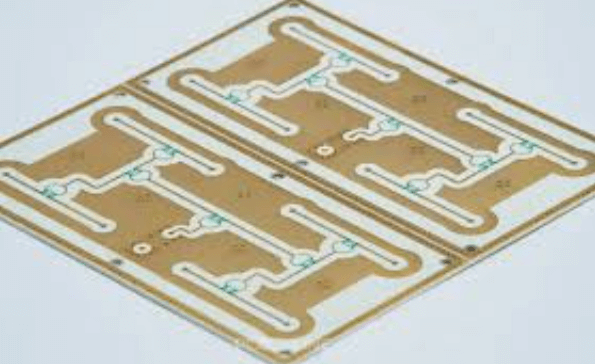
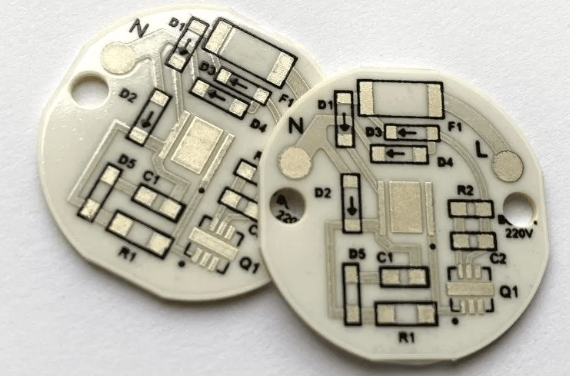
One of the primary components found in a PCB mounting kit is the standoff.
Standoffs are cylindrical spacers that create a gap between the PCB and the mounting surface. This gap is crucial for several reasons, including providing adequate airflow to prevent overheating, allowing space for components on the underside of the PCB, and ensuring electrical isolation. Standoffs come in various materials such as nylon, brass, and aluminum, each offering different levels of strength, conductivity, and resistance to environmental factors.
In addition to standoffs, screws and nuts are fundamental elements in a PCB mounting kit.
These fasteners are used to secure the PCB to the standoffs or directly to the mounting surface. The screws are typically made from materials like stainless steel or brass, which offer durability and resistance to corrosion. The nuts, often paired with washers, ensure a tight and stable connection, preventing any movement that could lead to electrical failures or mechanical damage.
Washers, another critical component, serve multiple purposes in a PCB mounting kit.
They distribute the load of the screw or nut over a larger area, reducing the risk of damage to the PCB. Additionally, washers can provide electrical insulation and prevent loosening due to vibrations. Nylon washers are particularly popular for their insulating properties, while metal washers are chosen for their strength and durability.
Moreover, adhesive mounts and clips are often included in PCB mounting kits to offer alternative mounting solutions.
Adhesive mounts provide a quick and easy way to secure PCBs without the need for drilling holes or using screws. These mounts typically feature a strong adhesive backing that can adhere to various surfaces, offering flexibility in mounting options. Clips, on the other hand, allow for easy removal and reinstallation of the PCB, which is particularly useful in applications where frequent access to the board is required.
Furthermore, spacers and bushings are integral to a comprehensive PCB mounting kit.
Spacers, similar to standoffs, create a gap between the PCB and the mounting surface but are typically used in applications where a precise distance is required. Bushings, often made from rubber or plastic, provide additional protection by cushioning the PCB and absorbing vibrations, thereby enhancing the longevity and reliability of the electronic assembly.
Lastly, grounding components such as grounding straps or pads are essential for ensuring the safety and functionality of the PCB.
These components provide a path for electrical currents to safely dissipate, preventing potential damage from static electricity or electrical surges. Grounding is a critical aspect of PCB design and assembly, and the inclusion of grounding components in a mounting kit underscores their importance.
In conclusion, a PCB mounting kit is a vital collection of components that ensures the secure and efficient installation of printed circuit boards. From standoffs and screws to adhesive mounts and grounding components, each element plays a crucial role in maintaining the integrity and functionality of electronic assemblies. Understanding the purpose and application of these components can greatly enhance the quality and reliability of PCB installations, making these kits an essential tool for professionals and hobbyists alike.
Step-by-Step Guide to Using a PCB Mounting Kit
A PCB mounting kit is an essential tool for anyone involved in electronics assembly, whether you are a hobbyist or a professional. This kit typically includes various components such as standoffs, screws, nuts, and washers, all designed to securely mount a printed circuit board (PCB) within an enclosure or onto a chassis. To effectively use a PCB mounting kit, it is crucial to follow a systematic approach, ensuring that each step is executed with precision and care.
To begin with, it is important to gather all necessary tools and components before starting the mounting process.
This includes the PCB mounting kit itself, a screwdriver, a pair of pliers, and any additional hardware that may be required for your specific application. Having everything at hand will streamline the process and prevent unnecessary interruptions.
Next, carefully examine the PCB and the enclosure or chassis where it will be mounted.
Identify the mounting holes on the PCB and ensure they align with the corresponding holes on the enclosure. This step is critical as misalignment can lead to improper mounting, which may cause damage to the PCB or result in poor electrical connections.
Once alignment is confirmed, select the appropriate standoffs from the PCB mounting kit.
Standoffs are used to create a gap between the PCB and the mounting surface, providing insulation and preventing short circuits. The height of the standoffs should be chosen based on the clearance required for components on the PCB. Insert the standoffs into the mounting holes on the PCB, ensuring they are securely fastened.
Following this, position the PCB with the attached standoffs over the corresponding holes on the enclosure or chassis.
Carefully insert screws through the holes in the standoffs and into the mounting surface. It is advisable to use a screwdriver with a magnetic tip to prevent screws from falling into hard-to-reach areas. Tighten the screws just enough to hold the PCB in place without over-tightening, as excessive force can damage the PCB or strip the threads in the standoffs.
In some cases, additional hardware such as nuts and washers may be required to secure the screws.
If so, place a washer over the screw before inserting it into the standoff, and then fasten a nut on the opposite side. Use a pair of pliers to hold the nut in place while tightening the screw with a screwdriver. This ensures a secure and stable mounting.
After the PCB is mounted, it is essential to inspect the assembly for any signs of misalignment or loose components.
Gently shake the enclosure to check for any rattling sounds, which may indicate that a screw or standoff is not properly secured. If any issues are detected, address them immediately to prevent potential damage to the PCB or its components.
Finally, once the PCB is securely mounted and all components are in place, proceed with connecting any necessary cables or wires.
Ensure that all connections are firm and that there is no undue stress on the PCB or its components. This step is crucial for maintaining the integrity of the electrical connections and ensuring the reliable operation of the assembled device.
In conclusion, using a PCB mounting kit involves a series of meticulous steps that require attention to detail and precision. By following this step-by-step guide, you can ensure that your PCB is securely and correctly mounted, thereby enhancing the performance and longevity of your electronic assembly.
Top Benefits of Using a PCB Mounting Kit for Your Projects
A PCB mounting kit is an essential tool for anyone involved in electronics projects, whether you are a hobbyist, a student, or a professional engineer. These kits offer a range of benefits that can significantly enhance the efficiency, reliability, and overall quality of your work. One of the primary advantages of using a PCB mounting kit is the convenience it provides. These kits typically come with all the necessary components and tools required for mounting printed circuit boards, including screws, standoffs, spacers, and sometimes even specialized tools. This means you do not have to spend time sourcing individual parts, which can be both time-consuming and costly.
In addition to convenience, PCB mounting kits also contribute to the structural integrity of your projects.
Proper mounting ensures that the PCB is securely fixed in place, reducing the risk of damage due to movement or vibration. This is particularly important in applications where the device may be subject to physical stress, such as in automotive or industrial environments. By using a PCB mounting kit, you can ensure that your circuit boards remain stable and functional over time, thereby enhancing the durability of your projects.
Another significant benefit of using a PCB mounting kit is the improvement in thermal management.
Effective thermal management is crucial for the optimal performance and longevity of electronic components. Many PCB mounting kits include components designed to facilitate better heat dissipation, such as thermal pads or heat sinks. These elements help to manage the heat generated by electronic components, preventing overheating and potential damage. Consequently, this can lead to improved performance and a longer lifespan for your electronic devices.
Moreover, PCB mounting kits can also enhance the aesthetic appeal of your projects.
A well-organized and neatly mounted PCB not only looks professional but also makes it easier to troubleshoot and maintain. When components are securely and systematically arranged, identifying and addressing issues becomes a more straightforward task. This can be particularly beneficial in educational settings, where clear and organized layouts can aid in the learning process.
Furthermore, using a PCB mounting kit can lead to cost savings in the long run.
While the initial investment in a high-quality kit may seem significant, the benefits of improved reliability, durability, and performance can outweigh the costs. By reducing the likelihood of damage and the need for repairs or replacements, you can save both time and money. Additionally, the convenience of having all necessary components in one kit can reduce the expenses associated with purchasing individual parts.
Lastly, PCB mounting kits often come with detailed instructions and guidelines, making them accessible even to those with limited experience in electronics.
These instructions can provide valuable insights into best practices for mounting and securing PCBs, helping to ensure that your projects are completed to a high standard. This can be particularly advantageous for beginners, who may otherwise struggle with the complexities of PCB mounting.
In conclusion, the use of a PCB mounting kit offers numerous benefits that can enhance the quality, efficiency, and longevity of your electronics projects. From providing convenience and improving structural integrity to facilitating better thermal management and offering cost savings, these kits are a valuable resource for anyone working with printed circuit boards. By investing in a PCB mounting kit, you can ensure that your projects are not only functional but also reliable and professional in appearance.
Common Mistakes to Avoid When Using a PCB Mounting Kit
When utilizing a PCB mounting kit, it is crucial to be aware of common mistakes that can compromise the integrity and functionality of your project. One frequent error is neglecting to thoroughly read the instructions provided with the kit. These instructions are designed to guide you through the assembly process, ensuring that each component is correctly placed and secured. Skipping this step can lead to improper installation, which may result in malfunctioning circuits or even damage to the PCB itself.
Another prevalent mistake is the improper handling of components.
Printed Circuit Boards (PCBs) and their associated parts are often sensitive to static electricity. Failing to use anti-static wrist straps or mats can cause electrostatic discharge (ESD), which can irreparably damage electronic components. Therefore, it is essential to take appropriate ESD precautions to protect your investment and ensure the longevity of your project.
Additionally, incorrect soldering techniques can pose significant issues.
Applying too much solder can create bridges between adjacent pads, leading to short circuits. Conversely, insufficient solder can result in weak joints that may break under stress or fail to conduct electricity properly. It is important to use the right amount of solder and to ensure that it flows smoothly around the joint, creating a reliable connection. Practicing good soldering habits, such as using a clean, well-maintained soldering iron and working in a well-ventilated area, can help mitigate these risks.
Furthermore, misalignment of components is another common pitfall.
Ensuring that each component is correctly oriented and properly seated before soldering is vital. Misaligned components can lead to functional issues and may require desoldering and rework, which can be time-consuming and potentially damaging to the PCB. Double-checking the placement of each part against the schematic or layout diagram can help prevent these errors.
In addition to these technical aspects, overlooking the importance of a clean workspace can also lead to problems
. Dust, debris, and other contaminants can interfere with soldering and the overall assembly process. Maintaining a clean and organized workspace not only facilitates a smoother assembly process but also reduces the likelihood of introducing contaminants that could affect the performance of the PCB.
Moreover, inadequate testing and inspection can result in undetected faults.
After assembling the PCB, it is imperative to conduct thorough testing to ensure that all connections are secure and that the board functions as intended. Using tools such as multimeters and oscilloscopes can help identify any issues that need to be addressed before the final installation.
Lastly, failing to consider thermal management can have detrimental effects on the performance and lifespan of your PCB.
Components that generate significant heat need to be adequately cooled to prevent overheating. This can be achieved through the use of heat sinks, thermal pads, or proper ventilation within the enclosure. Ignoring thermal management can lead to component failure and reduced reliability of the entire system.
In conclusion, avoiding these common mistakes when using a PCB mounting kit can significantly enhance the success and reliability of your project. By carefully following instructions, handling components properly, practicing good soldering techniques, ensuring correct alignment, maintaining a clean workspace, conducting thorough testing, and considering thermal management, you can achieve a high-quality assembly that meets your performance expectations.