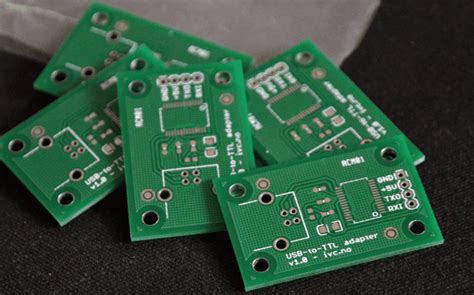
Flex pcb repair
Techniques For Identifying Common Flex PCB Failures
Flex PCBs, or flexible printed circuit boards, are integral components in modern electronic devices due to their versatility and ability to conform to various shapes. However, like any technology, they are susceptible to failures that can compromise device functionality. Identifying these failures is crucial for effective repair and maintenance. Understanding the common issues that afflict flex PCBs is the first step in diagnosing and addressing these problems.
One prevalent issue with flex PCBs is trace damage, which can occur due to excessive bending or mechanical stress.
This damage often manifests as cracks or breaks in the conductive pathways, leading to open circuits. To identify trace damage, technicians typically employ visual inspection techniques, using magnification tools to scrutinize the board for visible signs of wear or breakage. In addition to visual inspection, continuity testing with a multimeter can confirm the presence of open circuits by checking for electrical flow along the suspected damaged traces.
Another common failure in flex PCBs is delamination, where layers of the board separate due to thermal or mechanical stress.
Delamination can lead to a loss of structural integrity and electrical connectivity. To detect this issue, technicians may use ultrasonic scanning, which can reveal internal separations that are not visible to the naked eye. This non-destructive testing method provides a detailed view of the board’s internal structure, allowing for precise identification of delaminated areas.
Flex PCBs are also prone to solder joint failures, often caused by thermal cycling or mechanical stress.
These failures can result in intermittent connections or complete disconnection of components. To identify solder joint issues, technicians often use X-ray inspection, which allows them to see through the board and examine the quality of solder joints without disassembling the device. This technique is particularly useful for detecting voids, cracks, or insufficient solder that may not be apparent through visual inspection alone.
Furthermore, environmental factors such as moisture and contaminants can lead to corrosion on flex PCBs, affecting their performance.
Corrosion typically appears as discoloration or residue on the board’s surface. To identify corrosion, technicians conduct thorough visual inspections and may also employ chemical analysis techniques to determine the extent and type of corrosion present. Addressing corrosion promptly is essential to prevent further degradation of the board.
In addition to these specific techniques, thermal imaging is a valuable tool for identifying areas of excessive heat generation on a flex PCB, which can indicate potential failure points. By capturing the thermal profile of the board during operation, technicians can pinpoint hotspots that may result from faulty components or poor thermal management. This information is crucial for preemptive repairs and ensuring the long-term reliability of the board.
In conclusion, identifying common failures in flex PCBs requires a combination of visual inspection, advanced imaging techniques, and electrical testing. By employing these methods, technicians can accurately diagnose issues such as trace damage, delamination, solder joint failures, and corrosion. Early detection and repair of these problems are vital to maintaining the functionality and longevity of devices that rely on flex PCBs. As technology continues to evolve, so too will the techniques for diagnosing and repairing these critical components, ensuring their continued role in the advancement of electronic devices.
Step-By-Step Guide To Flex PCB Trace Repair
Flex PCBs, or flexible printed circuit boards, are integral components in modern electronics, offering versatility and adaptability in design. However, like any electronic component, they are susceptible to damage, particularly in their delicate traces. Repairing these traces requires precision and a methodical approach to ensure the functionality of the PCB is restored. This guide provides a step-by-step process for repairing flex PCB traces, ensuring that even those with minimal experience can undertake the task with confidence.
To begin with, it is essential to gather the necessary tools and materials.
A magnifying glass or microscope is crucial for inspecting the damage closely. Additionally, a soldering iron with a fine tip, solder, flux, a sharp blade or scalpel, and conductive ink or copper tape are required. Having these tools at hand will facilitate a smoother repair process.
The first step in the repair process is to identify the damaged trace.
This involves a thorough inspection of the PCB under magnification to locate any breaks or discontinuities in the trace. Once identified, it is important to clean the area around the damage. Using isopropyl alcohol and a lint-free cloth, gently clean the surface to remove any dirt, grease, or oxidation that may interfere with the repair.
Following the cleaning, the next step is to prepare the damaged area for repair.
Carefully use a sharp blade or scalpel to scrape away the solder mask covering the trace on either side of the break. This exposes the copper beneath, allowing for a better connection during the repair. It is crucial to be gentle during this process to avoid causing further damage to the trace or the surrounding areas.
Once the trace is exposed, apply a small amount of flux to the area.
Flux is essential as it helps the solder flow more easily and adhere to the copper, ensuring a strong connection. With the soldering iron heated to the appropriate temperature, carefully apply solder to the exposed copper on both sides of the break. It is important to use just enough solder to bridge the gap without creating a bulky connection that could interfere with the PCB’s functionality.
In cases where the gap is too large for solder alone, conductive ink or copper tape can be used to bridge the break.
If using conductive ink, apply it carefully with a fine brush or applicator, ensuring it covers the gap completely. Allow the ink to dry thoroughly before proceeding. Alternatively, if using copper tape, cut a small piece to fit over the break, ensuring it overlaps with the exposed copper on both sides. Press it down firmly and solder the ends to secure it in place.
After completing the repair, it is crucial to test the PCB to ensure the trace is functioning correctly.
Using a multimeter, check for continuity across the repaired trace. If the multimeter indicates a successful connection, the repair is complete. However, if there is no continuity, re-evaluate the repair and make any necessary adjustments.
In conclusion, repairing flex PCB traces requires careful attention to detail and a methodical approach. By following these steps and using the appropriate tools and materials, it is possible to restore the functionality of a damaged flex PCB effectively. This process not only extends the life of the PCB but also contributes to more sustainable electronic practices by reducing waste.

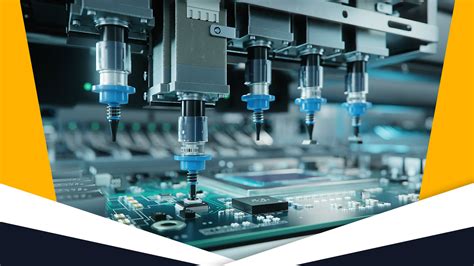
Essential Tools For Effective Flex PCB Repair
Flex PCB repair is a critical process in the electronics industry, requiring precision and the right set of tools to ensure successful outcomes. As flexible printed circuit boards (PCBs) become increasingly prevalent in modern electronic devices due to their lightweight and adaptable nature, the demand for effective repair techniques has grown. Understanding the essential tools for flex PCB repair is crucial for technicians and engineers who aim to maintain the functionality and longevity of these intricate components.
To begin with, a high-quality microscope is indispensable for any flex PCB repair task.
Given the miniature size and complexity of the circuits involved, a microscope allows for detailed inspection and precise work on the board. It enables technicians to identify issues such as broken traces, damaged pads, or faulty components that may not be visible to the naked eye. Furthermore, a microscope with adjustable magnification and good lighting can significantly enhance the accuracy of the repair process.
In addition to a microscope, a soldering station is another vital tool for flex PCB repair.
A soldering station with temperature control is essential, as it allows for the precise application of heat, which is crucial when working with delicate flex PCBs. Excessive heat can damage the board or cause components to fail, so having the ability to adjust the temperature ensures that the soldering process is both effective and safe. Moreover, a soldering iron with a fine tip is recommended for working on the small and densely packed areas typical of flex PCBs.
Transitioning to another essential tool, a hot air rework station is invaluable for removing and replacing surface-mounted components on flex PCBs.
This tool uses a stream of hot air to heat the solder joints, allowing components to be lifted off the board without causing damage. The ability to control the airflow and temperature is crucial, as it provides the flexibility needed to handle various components and board materials. Additionally, a hot air rework station can be used in conjunction with solder paste to reattach components, ensuring a secure and reliable connection.
Furthermore, precision tweezers are necessary for handling small components during the repair process.
These tweezers should be anti-static to prevent any electrostatic discharge that could damage sensitive components. The fine tips of precision tweezers allow technicians to manipulate components with accuracy, which is particularly important when working in confined spaces on a flex PCB.
Another important tool is a multimeter, which is used to test the electrical properties of the circuit before and after repair.
A multimeter can measure voltage, current, and resistance, helping technicians diagnose issues and verify that repairs have been successful. This tool is essential for ensuring that the flex PCB functions correctly and meets the required specifications.
Lastly, a set of cleaning tools, including brushes and isopropyl alcohol, is necessary to remove any flux residues or debris from the board after soldering.
Cleanliness is crucial in PCB repair, as contaminants can lead to short circuits or other failures. By maintaining a clean work environment and using appropriate cleaning tools, technicians can enhance the reliability of their repairs.
In conclusion, the effective repair of flex PCBs relies on a combination of essential tools, each playing a critical role in ensuring precision and reliability. From microscopes and soldering stations to multimeters and cleaning tools, having the right equipment is fundamental to addressing the challenges posed by these complex and delicate components. As technology continues to advance, staying equipped with the appropriate tools will remain a cornerstone of successful flex PCB repair.
Best Practices For Preventing Flex PCB Damage
Flex PCBs, or flexible printed circuit boards, are integral components in modern electronic devices, offering versatility and adaptability in design. However, their delicate nature necessitates careful handling and maintenance to prevent damage. Implementing best practices for preventing flex PCB damage is crucial for ensuring the longevity and reliability of electronic devices. By understanding the common causes of damage and adopting preventive measures, manufacturers and users can significantly enhance the durability of these components.
One of the primary considerations in preventing flex PCB damage is the design phase.
During this stage, it is essential to account for the mechanical stresses that the PCB will encounter in its application. By incorporating appropriate bend radii and avoiding sharp bends, designers can minimize the risk of stress fractures. Additionally, selecting the right materials that offer flexibility and resilience can further enhance the board’s durability. For instance, using polyimide substrates, known for their excellent thermal stability and flexibility, can be beneficial in high-stress environments.
Transitioning from design to manufacturing, it is vital to maintain stringent quality control measures.
Ensuring that the manufacturing process adheres to industry standards can prevent defects that may lead to damage. This includes precise control over etching processes, which can affect the integrity of the circuit traces. Moreover, implementing thorough inspection protocols, such as automated optical inspection (AOI) and X-ray inspection, can help identify potential issues before they escalate into significant problems.
Handling and assembly are other critical stages where flex PCBs are susceptible to damage.
During these processes, it is important to minimize physical stress on the boards. Using appropriate tools and techniques, such as vacuum pick-up tools instead of tweezers, can reduce the risk of mechanical damage. Furthermore, ensuring that the assembly environment is free from contaminants, such as dust and moisture, can prevent issues like corrosion and short circuits. Employing anti-static measures, such as wrist straps and anti-static mats, is also crucial to protect the sensitive components from electrostatic discharge (ESD).
In addition to handling precautions, storage conditions play a significant role in preserving the integrity of flex PCBs.
Storing these components in a controlled environment, with stable temperature and humidity levels, can prevent warping and delamination. Utilizing moisture barrier bags and desiccants can further protect the boards from environmental factors that may compromise their performance.
Finally, regular maintenance and inspection of devices containing flex PCBs can help identify early signs of wear and tear.
By conducting routine checks, users can detect issues such as cracks, delamination, or corrosion before they lead to device failure. Implementing a proactive maintenance schedule can extend the lifespan of the flex PCBs and ensure the continued functionality of the electronic devices.
In conclusion, preventing flex PCB damage requires a comprehensive approach that encompasses design, manufacturing, handling, storage, and maintenance practices. By adhering to these best practices, manufacturers and users can safeguard the performance and reliability of their electronic devices. As technology continues to evolve, the importance of preserving the integrity of flex PCBs will remain a critical aspect of electronic device design and maintenance.