Single-Sided PCB Assembly: A Comprehensive Overview
Printed Circuit Boards (PCBs) are the backbone of modern electronics, providing the necessary platform for electrical connections between components. Among the various types of PCBs, single-sided PCBs are the simplest and most cost-effective, making them a popular choice for a wide range of applications. This article delves into the process of single-sided PCB assembly, its advantages, limitations, and common applications.
What is a Single-Sided PCB?
A single-sided PCB, as the name suggests, has conductive copper traces on only one side of the board. The other side is typically left bare or covered with a solder mask to protect the board from environmental factors. Components are mounted on one side, and the electrical connections are made through the copper traces on the opposite side.
The Single-Sided PCB Assembly Process
The assembly of single-sided PCBs involves several key steps:
- Design and Layout: The first step in single-sided PCB assembly is designing the circuit layout. This involves creating a schematic diagram that outlines the electrical connections and then translating this into a physical layout using PCB design software. The layout must ensure that all components fit within the available space and that the copper traces do not intersect unnecessarily.
- Printing the Circuit: Once the design is finalized, the next step is to print the circuit onto the PCB. This is typically done using a process called photolithography, where a photosensitive material is applied to the copper-clad board. The circuit pattern is then transferred onto the board using UV light, and the exposed copper is etched away, leaving only the desired traces.
- Drilling Holes: After the circuit is printed, holes are drilled into the board to accommodate through-hole components and vias. These holes are later plated with conductive material to ensure electrical connectivity between the layers.
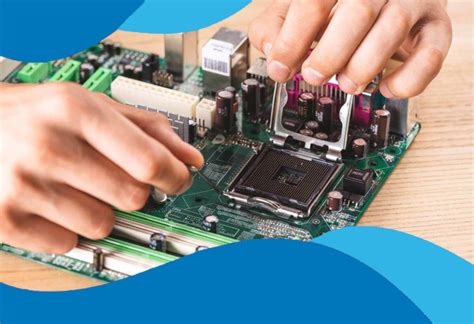
- Component Placement: The next step is to place the components onto the board. For single-sided PCBs, this is typically done using automated pick-and-place machines, which accurately position the components onto the board based on the design specifications.
- Soldering: Once the components are in place, the board undergoes soldering to create permanent electrical connections. For single-sided PCBs, wave soldering is commonly used. In this process, the board is passed over a wave of molten solder, which adheres to the exposed metal pads and component leads, creating a strong bond.
- Inspection and Testing: After soldering, the board is inspected for any defects, such as solder bridges or misaligned components. Automated optical inspection (AOI) systems are often used for this purpose. The board is then tested to ensure that it functions as intended.
- Final Assembly: Once the board passes inspection and testing, it is ready for final assembly. This may involve adding connectors, mounting the board into a housing, or integrating it into a larger system.

Advantages of Single-Sided PCB Assembly
- Cost-Effective: Single-sided PCBs are the most economical option due to their simple design and manufacturing process. They require fewer materials and less complex machinery, which translates to lower production costs.
- Ease of Design and Assembly: The simplicity of single-sided PCBs makes them easier to design and assemble compared to double-sided or multi-layer boards. This is particularly advantageous for low-complexity circuits and prototypes.
- Reliability: With fewer layers and simpler designs, single-sided PCBs are generally more reliable and less prone to manufacturing defects.
Limitations of Single-Sided PCB Assembly
- Limited Complexity: Single-sided PCBs are not suitable for complex circuits that require a high density of components or intricate routing. The single layer of copper limits the number of connections that can be made.
- Size Constraints: Due to the limited routing options, single-sided PCBs may require a larger board size to accommodate all the necessary components and connections, which can be a disadvantage in space-constrained applications.
Common Applications of Single-Sided PCBs
Single-sided PCBs are widely used in a variety of applications, including:
- Consumer Electronics: Simple devices such as calculators, remote controls, and LED lighting often use single-sided PCBs due to their low cost and simplicity.
- Industrial Controls: Many industrial control systems, such as timers and sensors, utilize single-sided PCBs for their reliability and ease of maintenance.
- Automotive Electronics: Single-sided PCBs are commonly found in automotive applications, such as dashboard controls and lighting systems, where cost and reliability are critical.
- Medical Devices: Some medical devices, particularly those with simple circuitry, use single-sided PCBs to keep costs down while maintaining performance.
Conclusion
Single-sided PCB assembly is a fundamental process in the electronics industry, offering a cost-effective and reliable solution for a wide range of applications. While they may not be suitable for highly complex circuits, their simplicity, ease of assembly, and low cost make them an ideal choice for many low-to-moderate complexity designs. As technology continues to evolve, single-sided PCBs will remain a vital component in the world of electronics, providing a solid foundation for countless devices and systems.