Handmade PCB Soldering: A Comprehensive Guide to DIY Circuit Board Assembly
Introduction
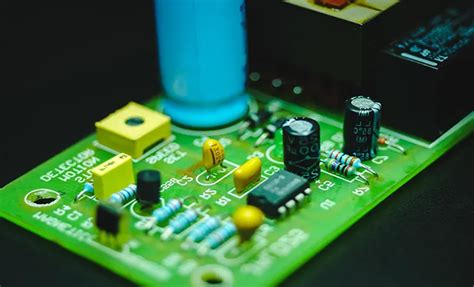
Printed Circuit Boards (PCBs) are the backbone of modern electronics, providing a reliable platform for mounting and interconnecting electronic components. While automated machines dominate mass production, hand-soldering PCBs remains a valuable skill for hobbyists, engineers, and small-scale manufacturers. This guide explores the step-by-step process of hand-soldering a PCB, covering essential tools, techniques, and best practices.
1. Tools and Materials Required
Before starting, gather the necessary tools and materials:
1.1 Soldering Equipment
- Soldering Iron (25W–60W, adjustable temperature preferred)
- Solder Wire (Lead-based 60/40 or lead-free, 0.5mm–1mm thickness)
- Flux (Liquid or paste, improves solder flow)
- Soldering Stand & Sponge (For cleaning the iron tip)
- Desoldering Tools (Solder wick, desoldering pump for corrections)
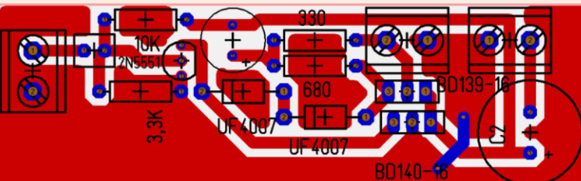
1.2 PCB and Components
- Blank PCB (Single-sided or double-sided, pre-etched)
- Electronic Components (Resistors, capacitors, ICs, connectors, etc.)
- PCB Holder or Clamp (Stabilizes the board during soldering)
1.3 Safety & Auxiliary Tools
- Safety Glasses (Protects eyes from solder splashes)
- Tweezers (For handling small components)
- Magnifying Glass or Microscope (For inspecting solder joints)
- Isopropyl Alcohol & Brush (Cleaning flux residues)
2. Preparing the PCB and Components
2.1 PCB Inspection
- Check for manufacturing defects (scratches, incomplete etching).
- Ensure all holes are properly drilled.
2.2 Component Organization
- Arrange components by type and value for easy access.
- Bend component leads (for through-hole parts) to fit PCB holes.
2.3 Applying Flux (Optional but Recommended)
- Apply a thin layer of flux on PCB pads to improve solder adhesion.
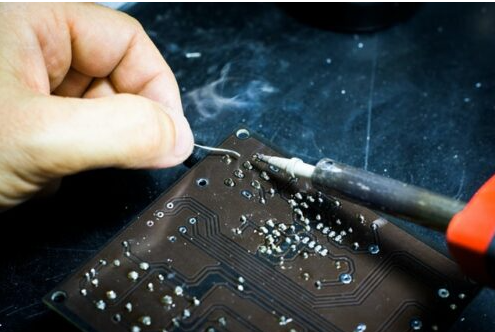
3. Step-by-Step Soldering Process
3.1 Soldering Through-Hole Components (THT)
- Insert the Component – Place the component leads through the PCB holes.
- Bend Leads Slightly – To hold the component in place.
- Heat the Pad & Lead – Touch the soldering iron to both the pad and lead for 1–3 seconds.
- Apply Solder – Feed solder wire into the joint until it melts and forms a smooth fillet.
- Remove Iron & Inspect – A good joint should be shiny and cone-shaped.
3.2 Soldering Surface-Mount Components (SMD)
- Apply Solder Paste (Optional) – For reflow-like hand soldering.
- Place the Component – Use tweezers to position SMD parts.
- Tack One Pad – Solder one pad to hold the component.
- Solder Remaining Pads – Reflow solder on other pads.
- Check for Bridges – Use flux and desoldering wick to fix shorts.
3.3 Soldering Integrated Circuits (ICs)
- For DIP ICs: Solder diagonally opposite pins first to prevent misalignment.
- For SMD ICs: Use drag soldering (applying solder along pins while dragging the iron).
4. Post-Soldering Steps
4.1 Inspection & Testing
- Visual Check: Look for cold joints, bridges, or insufficient solder.
- Continuity Test: Use a multimeter to verify connections.
4.2 Cleaning the PCB
- Remove flux residues with isopropyl alcohol and a brush.
4.3 Troubleshooting Common Issues
- Cold Joints: Reheat and add flux if the joint is dull or cracked.
- Solder Bridges: Use desoldering wick to remove excess solder.
- Lifted Pads: Repair with jumper wires if traces are damaged.
5. Best Practices for Reliable Hand-Soldering
- Temperature Control: Keep the iron at 300–350°C (lead-based) or 350–400°C (lead-free).
- Avoid Overheating: Prolonged heat can damage components or PCB.
- Use Quality Solder: Cheap solder can cause poor joints.
- Work in a Well-Ventilated Area: Solder fumes can be harmful.
Conclusion
Hand-soldering PCBs is a fundamental skill for electronics enthusiasts and professionals. With the right tools, techniques, and patience, anyone can assemble high-quality circuit boards at home. Whether working on prototypes, repairs, or custom projects, mastering manual soldering ensures flexibility and precision in electronic fabrication.
By following this guide, beginners can avoid common mistakes and achieve clean, reliable solder joints, paving the way for successful DIY electronics projects.