How to Automatically Route a PCB: A Comprehensive Guide
Introduction to PCB Auto-Routing
Printed Circuit Board (PCB) design has evolved significantly with the advancement of electronic design automation (EDA) tools. One of the most time-consuming aspects of PCB design—routing the connections between components—can now be largely automated through sophisticated auto-routing algorithms. While manual routing still plays an important role in high-speed or complex designs, auto-routing has become an essential tool for modern PCB designers to improve efficiency and reduce design cycles.
Automatic routing refers to the process where EDA software intelligently determines the optimal paths for electrical connections (traces) between components on a PCB based on predefined design rules and constraints. When implemented properly, auto-routing can save designers countless hours while producing routing solutions that meet all electrical and manufacturing requirements.
Preparing for Auto-Routing
1. Complete Schematic Design
Before even considering auto-routing, you must have a fully completed and error-free schematic:
- Verify all components are properly connected in the schematic
- Ensure each component has an associated footprint
- Confirm there are no unresolved nets or dangling connections
- Run an Electrical Rules Check (ERC) to identify any schematic-level issues
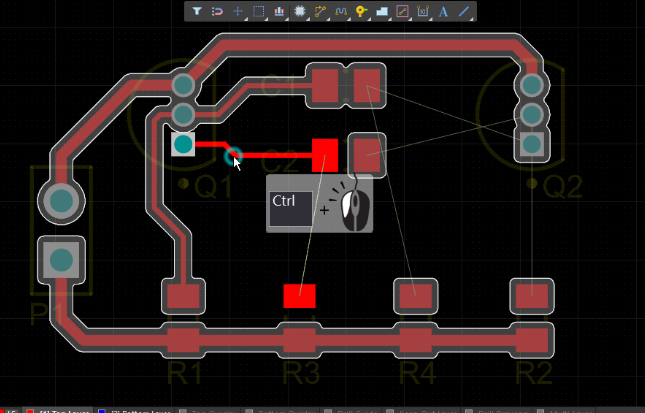
2. Proper Component Placement
The foundation of successful auto-routing begins with intelligent component placement:
- Group related components together to minimize trace lengths
- Consider the flow of signals through your circuit
- Place connectors and fixed components first
- Orient components to facilitate natural routing paths
- Allow adequate space between components for routing channels
- Consider thermal management and mechanical constraints
Remember: Good placement can make routing trivial, while poor placement can make even the best auto-router fail.
3. Define Design Rules and Constraints
Modern auto-routers rely heavily on properly configured design rules:
- Trace width rules: Define appropriate widths for different signal types (power, signal, high-current)
- Clearance rules: Specify minimum spacing between traces, pads, and vias
- Routing layers: Determine which layers are available for routing and their preferred directions
- Via styles: Configure allowed via types and sizes
- Differential pairs: Define rules for tightly coupled differential signals
- Length matching: Set requirements for critical timing-sensitive signals
- Net classes: Group nets with similar requirements for easier rule application
4. Critical Net Pre-Routing
For complex designs, consider manually routing critical nets before auto-routing:
- High-speed signals (clocks, DDR, etc.)
- Sensitive analog signals
- Power and ground distribution
- Any nets with special length or impedance requirements
This ensures the most important connections receive proper attention before the auto-router handles the remaining connections.
Auto-Router Configuration Strategies
1. Choosing the Right Auto-Routing Approach
Most EDA tools offer different auto-routing strategies:
a. Batch Auto-Routing
- Attempts to route the entire board at once
- Best for simpler designs with fewer constraints
- Fastest approach for complete routing
b. Skeletal Routing
- Creates basic connections with minimal optimization
- Useful for early feasibility analysis
- Can be followed by manual refinement
c. Guided Auto-Routing
- Routes nets based on designer-specified hints or paths
- Combines automation with designer intent
d. Incremental Routing
- Routes selected nets or areas while preserving existing routing
- Useful for making changes to completed designs
2. Setting Auto-Router Parameters
Configure these key parameters for optimal results:
Routing Passes:
- Set the number of routing attempts (more passes may find better solutions)
- Configure cleanup passes to optimize the final result
Routing Grid:
- Choose an appropriate grid size (finer grids allow more precision but increase computation time)
- Match grid to your component pin spacing
Layer Directions:
- Typically alternate between horizontal and vertical routing layers
- Follow conventional PCB manufacturing practices
Via Usage:
- Limit via counts to improve manufacturability
- Set maximum via counts per net if needed
Effort Level:
- Balance between routing completion and computation time
- Higher effort may find more complete solutions but takes longer
3. Special Considerations for Different Signal Types
Power Nets:
- Often require wider traces
- May benefit from polygon pours instead of routing
- Consider using dedicated power planes
High-Speed Signals:
- May need length matching
- Often require impedance control
- May need specific routing topologies
Differential Pairs:
- Require tight coupling and consistent spacing
- Need length matching between pair members
- Often need to avoid crossing splits in reference planes
RF Signals:
- May require curved traces instead of 45° angles
- Often need specific substrate materials
- May require shielding considerations

Executing the Auto-Route
1. Initial Routing Attempt
Start with conservative settings:
- Medium routing effort
- Standard cleanup passes
- Basic optimization
Analyze the results:
- Check routing completion percentage
- Identify problem areas
- Examine critical nets for compliance
2. Iterative Improvement
Based on initial results, refine your approach:
- Adjust component placement in congested areas
- Modify design rules for problematic nets
- Increase routing effort for incomplete connections
- Add routing guides or keep-out areas as needed
3. Handling Unrouted Nets
For remaining unrouted connections:
- Identify why they failed (congestion, rule conflicts, etc.)
- Consider manual routing for the last few difficult connections
- Evaluate if slight component movement could resolve issues
- Determine if rule relaxations are acceptable
Post-Routing Verification and Optimization
1. Design Rule Checking (DRC)
Always run a comprehensive DRC after auto-routing:
- Verify all rules are satisfied
- Check for unconnected nets
- Identify any manufacturing issues
- Confirm copper clearances meet requirements
2. Signal Integrity Analysis
For high-speed designs, perform additional verification:
- Run impedance calculations on critical traces
- Check for excessive crosstalk
- Verify timing constraints are met
- Analyze power distribution network
3. Manufacturing Optimization
Improve manufacturability:
- Minimize acute angles in traces
- Reduce via counts where possible
- Ensure adequate solder mask clearance
- Verify silkscreen clarity
4. Thermal Considerations
Check for potential thermal issues:
- Ensure adequate copper for high-current paths
- Verify thermal relief connections
- Consider adding thermal vias if needed
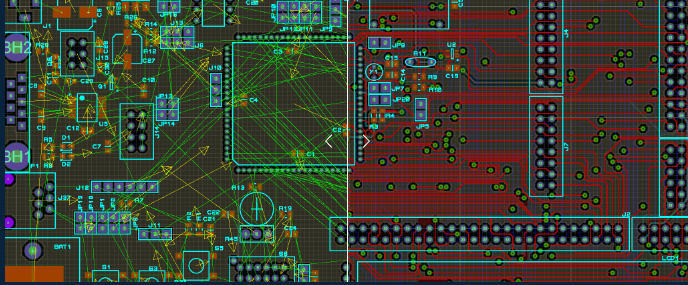
Advanced Auto-Routing Techniques
1. Hierarchical Routing
For complex designs, implement hierarchical strategies:
- Route critical subsystems separately
- Define routing channels between blocks
- Use abstraction to manage complexity
2. Constraint-Driven Routing
Modern tools support sophisticated constraints:
- Relative propagation delay constraints
- Matched length groups
- Topology-specific routing requirements
- Net class-specific rules
3. Interactive Auto-Routing
Combine manual and automatic approaches:
- Route critical sections manually, then auto-route the rest
- Use push-and-shove features during manual routing
- Employ auto-completion for difficult connections
4. Multi-Board Routing
For systems with multiple PCBs:
- Coordinate interfaces between boards
- Consider system-level signal integrity
- Manage cross-board timing constraints
Common Auto-Routing Pitfalls and Solutions
1. Incomplete Routing
Causes:
- Overly restrictive design rules
- Poor component placement
- Insufficient routing layers
Solutions:
- Review and adjust design rules
- Optimize component placement
- Consider adding routing layers
2. Excessive Via Usage
Causes:
- Inefficient routing algorithms
- Poor layer stackup planning
- Inadequate routing direction alternation
Solutions:
- Set via reduction optimization passes
- Review layer stackup and routing directions
- Implement via-count constraints
3. Signal Integrity Issues
Causes:
- Inadequate consideration of high-speed effects
- Poor return path management
- Excessive stub lengths
Solutions:
- Implement proper high-speed design rules
- Ensure solid reference planes
- Use appropriate termination strategies
4. Manufacturing Problems
Causes:
- Violation of fab house capabilities
- Insufficient clearances
- Acute trace angles
Solutions:
- Consult manufacturer design guidelines
- Run comprehensive DRC with proper rules
- Use DFM analysis tools
The Future of PCB Auto-Routing
Emerging technologies are advancing auto-routing capabilities:
AI-Powered Routing:
- Machine learning algorithms that improve with experience
- Pattern recognition for optimal routing solutions
- Adaptive routing based on historical success data
Cloud-Based Routing:
- Distributed processing for complex designs
- Collaborative routing solutions
- Access to constantly updated routing algorithms
3D PCB Routing:
- Accounting for mechanical constraints in real-time
- Integration with enclosure design
- Multi-board system optimization
Constraint-Aware Algorithms:
- More sophisticated handling of complex constraints
- Better trade-off analysis between competing requirements
- Improved high-speed routing automation
Conclusion
Automatic PCB routing has become an indispensable tool in modern electronic design, dramatically reducing development time while maintaining high quality standards. However, successful auto-routing requires careful preparation, including proper schematic design, thoughtful component placement, and comprehensive design rule configuration. By understanding the capabilities and limitations of auto-routing tools, designers can effectively combine automated and manual techniques to produce optimal PCB layouts.
Remember that auto-routing is not a “set it and forget it” process—it requires supervision, iterative refinement, and thorough verification. As auto-routing technology continues to advance with AI and cloud computing, designers will be able to tackle increasingly complex designs while focusing their creative efforts on innovation rather than repetitive routing tasks.
The most effective PCB designers are those who master both manual routing techniques and auto-routing optimization, knowing when to apply each approach for the best possible results. By following the guidelines outlined in this article, you can significantly improve your auto-routing outcomes and streamline your PCB design workflow.