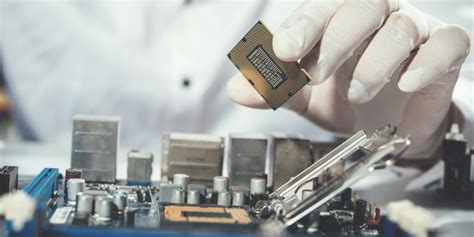
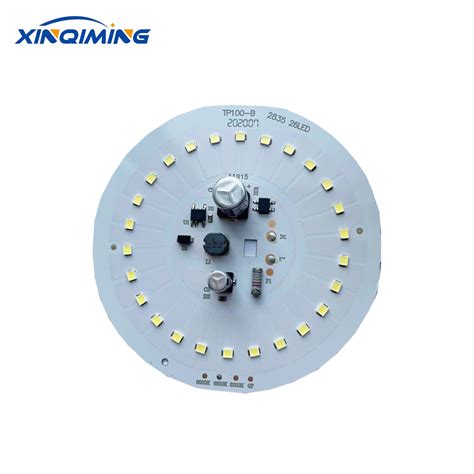
How to Clean a Circuit Board: A Comprehensive Guide
Circuit boards are the backbone of modern electronics, found in everything from smartphones and computers to household appliances and industrial machinery. Over time, these boards can accumulate dust, dirt, grease, and other contaminants that may affect their performance. Cleaning a circuit board is an essential maintenance task that can extend its lifespan and ensure optimal functionality. However, cleaning a circuit board requires caution, as improper techniques or materials can cause damage. This guide will walk you through the steps and best practices for safely and effectively cleaning a circuit board.
1. Understanding the Importance of Cleaning Circuit Boards
Before diving into the cleaning process, it’s important to understand why cleaning circuit boards is necessary. Contaminants such as dust, moisture, and oils can lead to several issues:
- Short Circuits: Dust and conductive debris can create unintended connections between components, leading to short circuits.
- Corrosion: Moisture and contaminants can cause corrosion on metal traces and components, degrading performance over time.
- Overheating: Dust buildup can insulate heat, causing components to overheat and fail.
- Signal Interference: Contaminants can interfere with electrical signals, leading to malfunctions or reduced efficiency.
Regular cleaning helps prevent these issues, ensuring the reliability and longevity of your electronic devices.
2. Safety Precautions
Cleaning a circuit board involves working with sensitive electronic components and potentially hazardous materials. Follow these safety precautions:
- Power Off and Unplug: Always disconnect the device from its power source and remove any batteries before cleaning.
- Discharge Capacitors: Some circuit boards store electrical charge in capacitors. Discharge them to avoid shocks.
- Wear Protective Gear: Use gloves and safety glasses to protect yourself from chemicals and debris.
- Work in a Well-Ventilated Area: Many cleaning solvents emit fumes, so ensure proper ventilation.
- Avoid Static Electricity: Use an anti-static wrist strap or work on an anti-static mat to prevent electrostatic discharge (ESD), which can damage components.
3. Tools and Materials Needed
Gather the following tools and materials before starting:
- Isopropyl Alcohol (IPA): A high-purity (90% or higher) alcohol solution is ideal for cleaning circuit boards.
- Distilled Water: For rinsing or diluting cleaning solutions.
- Compressed Air: To blow away loose dust and debris.
- Soft-Bristle Brush: A brush with non-conductive bristles for scrubbing.
- Lint-Free Cloths or Swabs: For wiping and drying the board.
- Plastic or Wooden Tools: For removing stubborn debris without scratching the board.
- Cleaning Solution: Commercial circuit board cleaners are available, but IPA is often sufficient.
- Baking Soda and Vinegar: For cleaning corrosion (optional).
- Soldering Iron and Desoldering Tools: For repairing damaged components after cleaning.
4. Step-by-Step Cleaning Process
Step 1: Inspect the Circuit Board
Before cleaning, inspect the board for visible damage, such as burnt components, broken traces, or corrosion. Document any issues for repair after cleaning.
Step 2: Remove Loose Debris
Use compressed air to blow away loose dust and debris. Hold the can upright and use short bursts to avoid moisture buildup. Alternatively, use a soft-bristle brush to gently sweep away dirt.
Step 3: Apply Cleaning Solution
Dampen a lint-free cloth or swab with isopropyl alcohol. Gently wipe the surface of the board, focusing on areas with visible contamination. Avoid excessive moisture, as it can seep into components and cause damage.
Step 4: Scrub Stubborn Contaminants
For stubborn grime, use a soft-bristle brush dipped in IPA. Gently scrub the affected areas, taking care not to dislodge or damage components. For hard-to-reach areas, use cotton swabs.
Step 5: Clean Corrosion
If the board has corrosion, create a paste using baking soda and distilled water. Apply the paste to the corroded areas and gently scrub with a brush. Rinse with distilled water and dry thoroughly.
Step 6: Rinse (If Necessary)
For heavily soiled boards, you may need to rinse with distilled water after cleaning. Ensure all cleaning solutions are removed to prevent residue buildup.
Step 7: Dry the Board
Use a lint-free cloth to pat the board dry. Allow it to air dry completely in a well-ventilated area for at least 24 hours. Alternatively, use a low-heat hairdryer to speed up the process, but avoid high heat, which can damage components.
Step 8: Reassemble and Test
Once the board is completely dry, reassemble the device and test its functionality. If issues persist, further inspection or repair may be necessary.
5. Tips for Effective Cleaning
- Avoid Harsh Chemicals: Avoid using household cleaners, acetone, or abrasive materials, as they can damage the board.
- Be Gentle: Apply minimal pressure when scrubbing to avoid damaging delicate components.
- Focus on Connectors: Pay special attention to connectors and sockets, as these areas are prone to contamination.
- Regular Maintenance: Clean circuit boards periodically to prevent buildup and prolong their lifespan.
- Document the Process: Take photos or notes during disassembly and cleaning to ensure proper reassembly.
6. Common Mistakes to Avoid
- Using Tap Water: Tap water contains minerals that can leave residue or cause corrosion. Always use distilled water.
- Over-Saturating the Board: Excessive moisture can damage components and lead to short circuits.
- Ignoring Safety Precautions: Failing to discharge capacitors or work in a static-free environment can result in injury or damage.
- Rushing the Drying Process: Inadequate drying can lead to moisture-related issues. Be patient and allow the board to dry completely.
7. When to Seek Professional Help
While many circuit board cleaning tasks can be performed at home, some situations require professional assistance:
- Severe Damage: If the board has extensive corrosion, burnt components, or broken traces, professional repair may be necessary.
- Complex Devices: Cleaning circuit boards in high-end electronics like smartphones or medical equipment may require specialized tools and expertise.
- Warranty Concerns: Cleaning a board yourself may void the device’s warranty. Check the manufacturer’s guidelines before proceeding.
8. Conclusion
Cleaning a circuit board is a straightforward but delicate process that can significantly improve the performance and lifespan of your electronic devices. By following the steps outlined in this guide and adhering to safety precautions, you can effectively remove contaminants and prevent potential issues. Regular maintenance and proper cleaning techniques will ensure your circuit boards remain in optimal condition, saving you time and money in the long run.
Remember, when in doubt, consult the device’s manual or seek professional assistance to avoid causing further damage. With the right tools and knowledge, you can keep your electronics running smoothly for years to come.