How to Cut PCB: A Comprehensive Guide
Printed Circuit Boards (PCBs) are essential components in modern electronics, providing the foundation for mounting and connecting electronic components. Whether you’re a hobbyist or a professional, knowing how to properly cut PCBs is a crucial skill for modifying, repairing, or creating custom circuit boards. This 2000-word guide will walk you through various methods, tools, safety precautions, and best practices for cutting PCBs effectively.
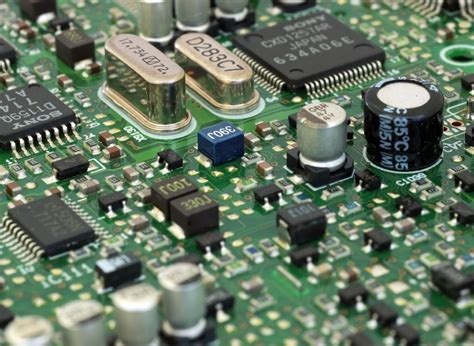
Understanding PCB Composition
Before cutting any PCB, it’s important to understand its structure. A standard PCB consists of:
- Substrate Material: Typically FR-4 (fiberglass-reinforced epoxy laminate)
- Copper Layers: Thin copper foil laminated to the substrate
- Solder Mask: Protective coating over the copper
- Silkscreen: Text and symbols printed on the board
The fiberglass content makes PCBs durable but also creates challenges when cutting, as it can dull tools quickly and produce harmful dust.
Safety Precautions When Cutting PCBs
Working with PCBs requires several safety measures:
- Respiratory Protection: Wear a NIOSH-approved dust mask or respirator to avoid inhaling fiberglass particles
- Eye Protection: Safety goggles prevent dust and debris from entering your eyes
- Skin Protection: Wear gloves and long sleeves to prevent skin irritation from fiberglass
- Ventilation: Work in a well-ventilated area or use a fume extractor
- Hearing Protection: Some cutting methods generate significant noise
Tools for Cutting PCBs
Several tools can be used for cutting PCBs, each with advantages and limitations:
1. PCB Shear (Best for Straight Cuts)
- Description: Specialized scissors designed for cutting PCBs
- Advantages:
- Clean, straight cuts
- No dust generation
- Portable and easy to use
- Limitations:
- Limited to straight cuts only
- Not suitable for thick PCBs (>2mm)
- Can leave slightly rough edges
- Best For: Quick straight cuts on thin to medium PCBs
2. Rotary Tool (Dremel) with Cutting Wheel
- Description: High-speed rotary tool with reinforced cutting discs
- Advantages:
- Can make straight or curved cuts
- Good for intricate shapes
- Works on various thicknesses
- Limitations:
- Generates significant dust
- Requires steady hand for precise cuts
- Cutting wheels wear out quickly
- Best For: Complex shapes and quick modifications
3. Hacksaw or Jeweler’s Saw
- Description: Manual saw with fine-toothed blade
- Advantages:
- Low cost
- Good control for straight cuts
- Minimal equipment needed
- Limitations:
- Time-consuming
- Requires physical effort
- Can produce rough edges
- Best For: Occasional cuts when other tools aren’t available
4. CNC Router
- Description: Computer-controlled cutting machine
- Advantages:
- Extremely precise cuts
- Can handle complex shapes
- Repeatable results
- Limitations:
- Expensive equipment
- Requires programming knowledge
- Setup time
- Best For: Professional settings and production work
5. Laser Cutter
- Description: Uses focused laser beam to cut material
- Advantages:
- High precision
- No physical contact with PCB
- Clean edges
- Limitations:
- Expensive
- Can produce toxic fumes
- May discolor edges
- Best For: High-precision work in well-equipped labs
6. Guillotine Cutter
- Description: Lever-operated cutting device with sharp blade
- Advantages:
- Very clean straight cuts
- Fast operation
- Minimal dust
- Limitations:
- Only for straight cuts
- Limited to certain thicknesses
- Bulky equipment
- Best For: Repetitive straight cuts in production environments
Step-by-Step Guide to Cutting PCBs
Method 1: Using a PCB Shear
- Mark Your Cut Line: Use a permanent marker and straightedge to mark where you want to cut
- Position the PCB: Place the board in the shear with the cut line aligned with the blades
- Apply Even Pressure: Squeeze the handles firmly and evenly to make the cut
- Inspect the Edge: Check for any rough spots and deburr if necessary
Method 2: Using a Rotary Tool
- Secure the PCB: Clamp the board firmly to a work surface
- Mark Your Cut: Clearly indicate your cut line
- Choose the Right Bit: Use a reinforced cutoff wheel (1-1.5″ diameter)
- Make the Cut:
- Start the tool at medium speed
- Approach the PCB at a shallow angle
- Follow your marked line steadily
- Clean Up: File or sand rough edges
Method 3: Using a Hacksaw
- Secure the PCB: Clamp in a vise with the cut line near the edge
- Start the Cut: Begin with light strokes to establish a groove
- Continue Cutting: Use full strokes with moderate pressure
- Support the PCB: As you near the end, support the cutoff piece to prevent breaking
- Finish the Edge: Use a file to smooth rough areas

Advanced Cutting Techniques
Cutting Along Complex Traces
When you need to preserve specific traces near the edge:
- Map out the critical traces using the PCB schematic
- Leave at least 2mm margin from any important traces
- Consider scoring the PCB first with a utility knife before final cutting
Creating Notches and Internal Cutouts
For internal cutouts (like slots or unusual shapes):
- Drill starter holes at corners
- Use a jeweler’s saw or rotary tool to connect the holes
- File the edges to final dimensions
V-Groove Scoring for Breakaway Boards
For creating breakaway tabs in panelized boards:
- Use a V-groove cutter or rotate the PCB 45° when using a saw
- Cut about 1/3 of the thickness from both sides
- The board can then be snapped cleanly along the scored line
Post-Cutting Processing
After cutting your PCB:
- Deburring: Remove sharp edges with:
- Fine-grit sandpaper (220-400 grit)
- A deburring tool
- A small file
- Cleaning:
- Remove all dust with compressed air or a soft brush
- Wipe with isopropyl alcohol to remove oils and residues
- Edge Protection (Optional):
- Apply conformal coating to exposed fiberglass edges
- Use edge connector protectors if needed
Troubleshooting Common Cutting Problems
Problem: Rough, splintered edges
Solution: Use a sharper tool, reduce cutting speed, or apply masking tape along the cut line first
Problem: Delamination of copper layers
Solution: Ensure your tool is appropriate for the material, avoid excessive heat buildup
Problem: Inaccurate cuts
Solution: Use guides or jigs, mark lines more clearly, consider CNC methods for precision work
Problem: Excessive tool wear
Solution: Use carbide-tipped tools, reduce cutting speed, or switch to a more appropriate tool
Alternative Approaches for Special Situations
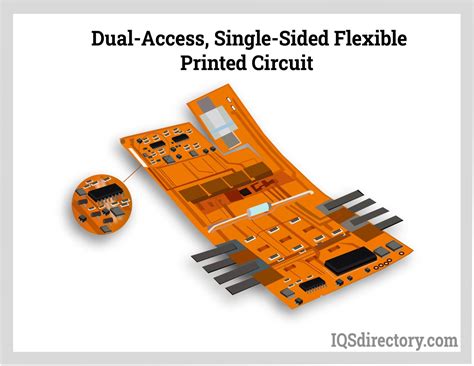
Cutting Flexible PCBs
- Use sharp scissors or a rotary cutter
- Avoid tools that might stretch or deform the material
- Consider laser cutting for complex shapes
Cutting High-Frequency PCBs (RF/Microwave)
- Be extra cautious about edge quality
- Consider professional milling services
- Pay attention to any special substrate requirements
Cutting Metal-Core PCBs
- Requires specialized tools (diamond-coated or carbide)
- May need coolant to prevent overheating
- Often best handled by professional PCB services
Professional PCB Cutting Services
For complex projects or high-volume needs, consider:
- PCB Manufacturers: Most offer board cutting to custom dimensions
- Machine Shops: With proper CNC or laser equipment
- Prototype Services: Many offer cutting along with fabrication
Advantages include:
- Higher precision
- Better edge quality
- No investment in expensive tools
- Time savings
Environmental Considerations
PCB cutting generates waste that requires proper handling:
- Fiberglass Dust: Collect using a HEPA vacuum, dispose as hazardous waste
- Copper Particles: Recycle when possible
- Used Cutting Tools: Recycle metal components appropriately
Maintenance of Cutting Tools
To ensure longevity of your PCB cutting tools:
- Clean blades after each use
- Store in dry conditions to prevent corrosion
- Sharpen or replace dull blades promptly
- Lubricate moving parts as recommended
Future Trends in PCB Cutting
Emerging technologies that may impact PCB cutting:
- Water Jet Cutting: Precise, cool cutting with minimal dust
- Plasma Cutting: For thick or metal-core boards
- Improved Laser Systems: Faster, cleaner cuts with less heat impact
- Automated Vision Systems: For ultra-precise trace-following cuts
Conclusion
Cutting PCBs properly requires the right tools, techniques, and safety precautions. Whether you choose manual methods like shears and saws, power tools like rotary cutters, or professional solutions like CNC routers, understanding the strengths and limitations of each approach will help you achieve clean, precise cuts. Always prioritize safety, especially when dealing with fiberglass dust, and don’t hesitate to seek professional services for complex or high-volume cutting needs. With practice and the proper approach, PCB cutting can become a straightforward part of your electronics fabrication and modification workflow.
Remember that the method you choose should depend on:
- The complexity of the cut needed
- The tools available to you
- The number of boards you need to process
- The required precision of the final product
By mastering PCB cutting techniques, you’ll gain greater flexibility in your electronic projects and prototypes, enabling you to create custom solutions tailored to your specific needs.