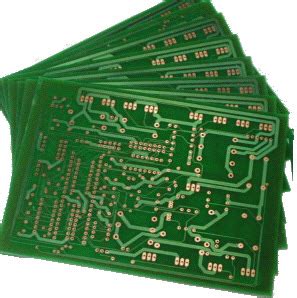
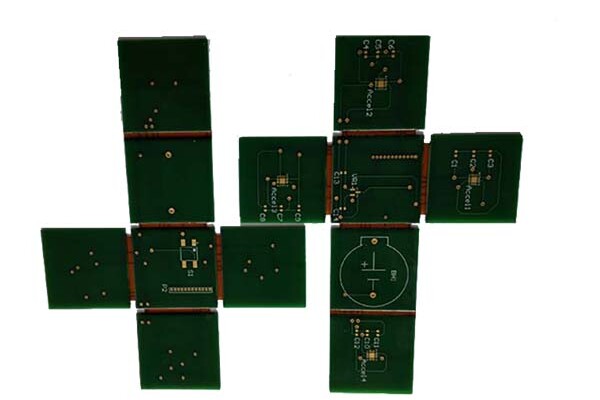
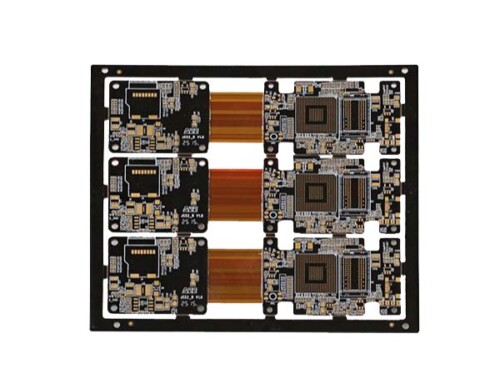
How to solder flex pcb
Essential Tools And Materials For How to solder flex pcb
Soldering flexible printed circuit boards (flex PCBs) requires a specific set of tools and materials to ensure a successful and reliable connection. The unique properties of flex PCBs, such as their ability to bend and twist, necessitate careful handling and precise techniques. To begin with, a high-quality soldering iron is indispensable. It is advisable to use a soldering iron with adjustable temperature control, as flex PCBs are sensitive to excessive heat. Maintaining the correct temperature is crucial to avoid damaging the delicate circuits and substrate.
In addition to the soldering iron, a fine-tipped soldering iron tip is essential.
The fine tip allows for precise application of solder, which is particularly important given the small and intricate nature of flex PCB components. Alongside the soldering iron, solder wire is another critical material. Lead-free solder is recommended due to its environmental benefits and compliance with modern electronic manufacturing standards. The solder wire should have a flux core, which helps in cleaning the surfaces to be soldered and ensures a strong bond.
Flux is another vital material in the soldering process.
While flux-core solder wire contains some flux, additional flux may be necessary for optimal results. Liquid flux or flux pens can be used to apply flux directly to the soldering area, enhancing the solder’s ability to flow and adhere to the components. It is important to choose a flux that is compatible with the materials used in the flex PCB to prevent any adverse reactions.
A soldering mat or heat-resistant work surface is also essential.
This provides a safe and stable area to work on, protecting both the flex PCB and the workbench from heat damage. Additionally, a pair of tweezers is invaluable for handling small components and positioning them accurately on the flex PCB. Tweezers with a fine, pointed tip offer the best control and precision.
To ensure a clean and professional finish, solder wick or desoldering braid is necessary for removing excess solder.
This material is used to absorb unwanted solder, preventing short circuits and ensuring a neat appearance. A solder sucker can also be used for this purpose, particularly for larger amounts of excess solder.
Magnification tools, such as a magnifying glass or a microscope, are highly recommended for inspecting the solder joints.
Given the small size of the components and the fine detail required, magnification helps in identifying any issues that may need correction. Proper lighting is equally important, as it ensures that the work area is well-illuminated, reducing the risk of errors.
Lastly, personal protective equipment (PPE) should not be overlooked. Safety glasses protect the eyes from accidental splashes of solder or flux, while a fume extractor or a well-ventilated workspace is necessary to avoid inhaling harmful fumes generated during the soldering process.
In conclusion, soldering flex PCBs demands a combination of specialized tools and materials to achieve a reliable and high-quality result. By using a temperature-controlled soldering iron, fine-tipped soldering iron tip, lead-free solder wire with flux core, additional flux, a heat-resistant work surface, precision tweezers, solder wick or desoldering braid, magnification tools, proper lighting, and personal protective equipment, one can ensure a successful soldering process. Each of these elements plays a crucial role in addressing the unique challenges posed by flex PCBs, ultimately contributing to the creation of durable and efficient electronic devices.
Step-By-Step Guide To Soldering Components On Flex PCB
Soldering components onto a flexible printed circuit board (flex PCB) requires precision and a methodical approach to ensure a reliable and durable connection. The process, while similar to soldering on rigid PCBs, involves additional considerations due to the unique properties of flex PCBs. This guide will walk you through the essential steps to achieve a successful soldering job on a flex PCB.
To begin with, it is crucial to prepare your workspace and gather the necessary tools.
Ensure that your work area is clean and well-lit, as this will help you see the small components and fine details of the flex PCB. The tools you will need include a soldering iron with a fine tip, solder wire, flux, tweezers, a magnifying glass or microscope, and a heat-resistant mat. Additionally, having a pair of anti-static gloves can help prevent any static discharge that could damage sensitive components.
Before you start soldering, it is important to clean the flex PCB to remove any contaminants that could interfere with the soldering process.
Use isopropyl alcohol and a lint-free cloth to gently wipe the surface of the PCB. This step ensures that the solder will adhere properly to the pads and components. Once the PCB is clean, apply a small amount of flux to the pads where you will be soldering the components. Flux helps to clean the metal surfaces and improve the flow of solder, resulting in stronger joints.
Next, position the components on the flex PCB.
Due to the flexible nature of the board, it is advisable to use tweezers to place the components accurately. Ensure that each component is aligned correctly with its corresponding pads. If necessary, use a small amount of adhesive to temporarily hold the components in place. This can be particularly helpful for components with multiple leads or for working on a densely populated board.
With the components in place, it is time to start soldering.
Heat your soldering iron to the appropriate temperature, typically around 350°C (662°F) for most soldering tasks. Touch the tip of the soldering iron to the pad and the lead of the component simultaneously, and then introduce the solder wire. Allow the solder to flow and form a smooth, shiny joint. Be careful not to apply too much solder, as this can create bridges between adjacent pads and cause short circuits. If you are working with particularly small or delicate components, consider using a microscope to inspect your work and ensure that each joint is properly formed.
After soldering all the components, it is essential to inspect the entire board for any soldering defects.
Look for cold joints, which appear dull and grainy, as well as any solder bridges or excess solder. If you find any issues, reheat the joint and apply a small amount of additional solder or use a desoldering tool to remove excess solder. Once you are satisfied with the soldering, clean the board again with isopropyl alcohol to remove any residual flux.
Finally, test the flex PCB to ensure that all components are functioning correctly. Use a multimeter to check for continuity and verify that there are no short circuits. If the board passes all tests, it is ready for integration into your project.
By following these steps and taking the necessary precautions, you can achieve a high-quality soldering job on a flex PCB. The key is to work carefully and methodically, paying close attention to detail at each stage of the process.
Common Mistakes To Avoid When Soldering Flex PCB
Soldering flex PCBs, or flexible printed circuit boards, requires a meticulous approach to ensure the integrity and functionality of the final product. One of the most common mistakes to avoid is applying excessive heat. Flex PCBs are more sensitive to heat compared to their rigid counterparts, and prolonged exposure can damage the substrate and the conductive traces. To mitigate this risk, it is crucial to use a temperature-controlled soldering iron and to work swiftly but carefully. Additionally, preheating the flex PCB can help in reducing thermal shock and ensuring a more uniform soldering process.
Another frequent error is the use of inappropriate soldering tools and materials.
Flex PCBs often require finer tips on soldering irons and smaller gauge solder wire to accommodate their delicate nature. Using tools designed for larger, rigid PCBs can lead to imprecise solder joints and potential damage to the board. Furthermore, selecting the right type of flux is essential. A no-clean flux is generally recommended for flex PCBs as it minimizes the need for post-soldering cleaning, which can be challenging and potentially harmful to the flexible substrate.
Inadequate preparation of the flex PCB surface is another pitfall.
Ensuring that the surface is clean and free of contaminants is vital for achieving strong solder joints. Any residue, dust, or oils can impede the solder’s ability to bond with the pads and traces. Therefore, it is advisable to clean the flex PCB with isopropyl alcohol before beginning the soldering process. This step helps in removing any unwanted particles and ensures a more reliable connection.
Moreover, improper handling of the flex PCB can lead to mechanical stress and damage.
Flex PCBs are designed to be flexible, but they are not indestructible. Excessive bending or twisting can cause micro-cracks in the conductive traces or delamination of the substrate. To avoid this, it is important to handle the flex PCB with care, using appropriate fixtures or supports to hold the board in place during soldering. This practice not only prevents damage but also provides a stable working surface, which is essential for precision soldering.
Another common mistake is neglecting to use proper ESD (Electrostatic Discharge) precautions.
Flex PCBs, like all electronic components, are susceptible to damage from static electricity. Failing to use ESD-safe tools and workstations can result in latent defects that may not be immediately apparent but can lead to failures in the field. Therefore, it is imperative to use ESD wrist straps, mats, and other protective measures to safeguard the flex PCB during the soldering process.
Lastly, insufficient inspection and testing post-soldering can lead to undetected issues that compromise the functionality of the flex PCB.
Visual inspection under magnification can help identify cold solder joints, bridges, or other defects. Additionally, electrical testing should be conducted to verify the integrity of the connections. Skipping these steps can result in costly rework or failures in the final application.
In conclusion, soldering flex PCBs demands a careful and methodical approach to avoid common mistakes. By controlling heat application, using appropriate tools and materials, preparing the surface adequately, handling the board with care, employing ESD precautions, and conducting thorough inspections, one can achieve reliable and high-quality solder joints. These practices not only enhance the performance and longevity of the flex PCB but also contribute to the overall success of the electronic device in which it is used.
Tips And Tricks For Achieving Perfect Solder Joints On Flex PCB
Achieving perfect solder joints on flexible printed circuit boards (flex PCBs) requires a combination of precision, technique, and the right tools. Flex PCBs, known for their ability to bend and twist, are increasingly used in modern electronics due to their versatility and space-saving properties. However, their unique characteristics also present specific challenges during the soldering process. To ensure optimal results, it is essential to follow a series of tips and tricks that cater to the delicate nature of flex PCBs.
First and foremost, selecting the appropriate soldering iron is crucial.
A temperature-controlled soldering iron with a fine tip is recommended, as it allows for precise control over the heat applied to the flex PCB. Excessive heat can damage the flexible substrate, leading to potential circuit failures. Therefore, maintaining a consistent and moderate temperature is vital. Additionally, using a fine tip ensures that the solder is applied accurately to the small and intricate pads commonly found on flex PCBs.
Equally important is the choice of solder. Lead-free solder is often preferred due to its environmental benefits and compliance with industry standards.
However, it has a higher melting point compared to leaded solder, which necessitates careful temperature management. Flux is another essential component in the soldering process. It helps to clean the surfaces, remove oxidation, and improve the flow of solder. Using a no-clean flux is advisable, as it eliminates the need for post-soldering cleaning, which can be particularly challenging on flex PCBs.
Before beginning the soldering process, it is imperative to prepare the flex PCB and components thoroughly.
This involves cleaning the surfaces to remove any contaminants that could hinder solder adhesion. Isopropyl alcohol is commonly used for this purpose. Once cleaned, the components should be positioned accurately on the flex PCB. Using a pair of fine-tipped tweezers can aid in the precise placement of small components.
When applying solder, it is essential to use the right amount.
Too much solder can create bridges between adjacent pads, while too little can result in weak joints. A common technique is to apply a small amount of solder to the tip of the iron before bringing it into contact with the pad and component lead. This helps to transfer heat efficiently and ensures a strong bond. Additionally, it is advisable to use a magnifying glass or microscope to inspect the solder joints for any defects.
To further enhance the quality of solder joints, preheating the flex PCB can be beneficial.
Preheating helps to reduce thermal shock and ensures a more uniform temperature distribution across the board. This can be achieved using a preheating plate or a hot air rework station. By gradually increasing the temperature, the risk of damaging the flex PCB is minimized.
Finally, it is important to allow the solder joints to cool naturally.
Rapid cooling, such as using compressed air, can induce thermal stress and potentially damage the flex PCB. Once cooled, a thorough inspection should be conducted to ensure that all joints are secure and free from defects. Any necessary rework should be performed with the same level of care and precision as the initial soldering.
In conclusion, achieving perfect solder joints on flex PCBs requires meticulous attention to detail and adherence to best practices. By selecting the right tools, preparing the surfaces, applying the correct amount of solder, and ensuring proper cooling, one can achieve reliable and high-quality solder joints. These tips and tricks are essential for anyone working with flex PCBs, ensuring the longevity and performance of the final product.