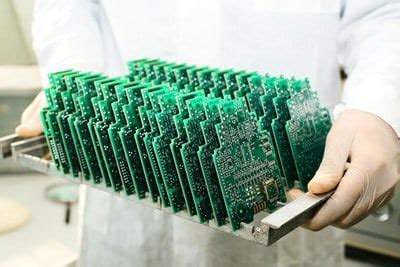
Mastering BGA PCB Assembly: Tips for Success in Electronics
Key Takeaways
Mastering BGA PCB assembly is vital for anyone involved in electronics, especially when working with compact and high-performance devices. Understanding the intricacies of pcb assembly can significantly enhance the quality and durability of your projects. One critical insight is the importance of using the right materials and tools. Investing in high-quality equipment and following meticulous procedures can help ensure a successful assembly process.
Moreover, maintaining a clean work environment cannot be overstated; any contaminant can lead to substandard solder joints. Always adhere to best practices for soldering BGA components, which include working in a controlled atmosphere and implementing proper thermal management techniques during the soldering process. Recognizing common pitfalls such as insufficient preheating or improper alignment will not only save time but also improve the reliability of your assemblies.
Lastly, conducting thorough testing and inspection of the assembled pcba is crucial for identifying potential issues early on. Utilizing advanced inspection techniques, like X-ray imaging, can help detect hidden defects in BGA connections that might otherwise go unnoticed. By integrating these insights into your workflow, you will undoubtedly elevate your skills and enhance your electronics projects significantly.
Introduction to BGA PCB Assembly: Understanding the Basics
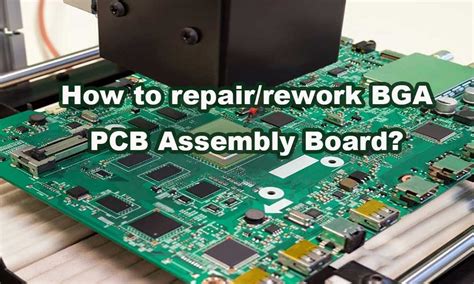
BGA (Ball Grid Array) PCB assembly represents a crucial method in modern electronics, allowing designers to create compact and efficient circuit boards. At its core, BGA enables significant connectivity through a grid of solder balls, which are integral to ensuring reliable PCBA (Printed Circuit Board Assembly). Understanding the fundamentals of this assembly process involves recognizing the unique characteristics of BGA components, such as their heat dissipation properties and the necessity for precision in both placement and soldering techniques.
The essential concept behind BGA PCB assembly lies in its ability to support high pin-count devices in a smaller footprint compared to traditional layouts. This contributes directly to improved performance and reduced electromagnetic interference, which are vital in today’s electronic devices. When approaching BGA PCBA, one must become familiar with several key aspects:
| Key Concept | Description |
|---|---|
| Solder Balls | Small spheres used as connection points |
| Thermal Management | Essential for heat dissipation |
| Alignment | Critical for ensuring accurate placement |
“In BGA assemblies, precision is not just a preference; it’s a necessity.”
When beginning with BGA assembly, knowledge about soldering processes and component layout considerations is essential. The combination of effective design tools and best practices will not only streamline the assembly process but also reduce the likelihood of common issues such as bridging or cold joints. This foundational understanding sets the stage for mastering more advanced techniques in BGA PCB assembly, leading to higher quality assemblies that meet rigorous performance standards.
Thoroughly grasping these basics is instrumental for enthusiasts and professionals alike who aim to bolster their skills in PCB fabrication, ensuring that each project reaches its full potential through well-executed assembly techniques.
Key Tools and Equipment for BGA PCB Assembly
In the realm of BGA PCB assembly, having the right tools and equipment is crucial for achieving high-quality results. At the core of this process are soldering stations that provide precise temperature control, essential for properly soldering Ball Grid Array (BGA) components onto the printed circuit board (PCB). A hot air rework station is also indispensable, as it allows for the delicate removal or replacement of BGA components without damaging surrounding circuitry. Additionally, utilizing a reliable stencil printer ensures that solder paste is applied evenly and accurately onto the pads, which is vital for effective solder joint formation during the pcba process.
To enhance precision further, a control microscope helps in inspecting tiny features on the BGA components and pads, ensuring alignment before soldering. Furthermore, a BGA reballing kit can be invaluable for repairing or refreshing BGA connections when necessary. Each of these tools plays a fundamental role in streamlining the assembly process and minimizing errors that could lead to performance issues later on.
Lastly, investing in quality solder materials, such as lead-free solder paste and flux, ensures reliability in connections and compliance with industry standards. By equipping yourself with these essential tools for BGA PCB assembly, you can significantly improve your chances of creating functional and durable electronic assemblies while also avoiding common pitfalls associated with subpar equipment.
Step-by-Step Process of BGA PCB Assembly
The BGA PCB assembly process is intricate and requires precision to ensure reliable connections and optimal performance. First, the process begins with careful pcb assembly, where a suitable printed circuit board (PCB) is selected based on the design specifications. This involves cleaning the substrate to remove any contaminants that may impair adhesion during soldering. Subsequently, the next step is to apply solder paste onto the pads of the PCB, which is critical for later steps. Utilizing a stencil can facilitate uniform paste application, ensuring that each pad receives an adequate amount of solder.
Following solder paste application, components should be accurately positioned on the board. The BGA components have a unique design with an array of solder balls on their underside, which requires careful alignment over their respective pads on the PCB. Attention to detail at this stage enhances the effectiveness of connections and ensures integrity in electrical performance. Once all components are placed, reflow soldering comes into play—it heats the assembly to a temperature where the solder paste melts and bonds the BGA to its pads.
After reflowing, cooling occurs naturally or via controlled cooling methods to solidify the solder joints effectively. This ensures a robust mechanical connection between BGA components and PCB surfaces. The final steps involve rigorous inspection methods such as X-ray imaging or Automated Optical Inspection (AOI) to detect any possible defects in solder joints or component placement errors. Each phase in this pcba journey contributes significantly to achieving a high-quality final product, marking advancements in modern electronics development while elevating project outcomes to new heights through efficient BGA assembly practices.
Best Practices for Soldering BGA Components
Soldering BGA (Ball Grid Array) components requires precision and attention to detail to ensure reliable pcb assembly. One of the primary best practices is to ensure that the PCB is clean and free from contaminants before soldering. This can be achieved by using a suitable cleaning solution and cloths. Additionally, maintaining the correct temperature during soldering is crucial; employing a thermal profile is recommended to achieve optimal solder joint quality. It’s also essential to use the right solder paste, ensuring that it is appropriate for the specific BGA components being utilized in your pcba (printed circuit board assembly).
Proper alignment of components during placement can significantly impact the effectiveness of solder joints. Optical inspection tools can assist in verifying alignment before proceeding with soldering. When applying heat, it’s vital to distribute it evenly across the area to prevent thermal stress on both the BGA and surrounding components; this can be achieved by utilizing a reflow oven or a hot air rework station. Moreover, allowing sufficient time for effective reflow ensures that solder balls melt adequately and form solid connections with the pads.
Finally, once you have completed your BGA PCB assembly, conduct thorough inspections using both visual checks and advanced tools such as X-ray or automated optical inspection systems to confirm joint integrity and overall quality of your pcba. Following these best practices will help mitigate common issues associated with BGA component soldering, thus enhancing your project’s success in electronics manufacturing.
Common Pitfalls in BGA PCB Assembly and How to Avoid Them
When engaging in BGA PCB assembly, it’s crucial to be aware of common pitfalls that can hinder the success of your project. One frequent issue is inadequate thermal management. Failing to design proper heat dissipation can lead to uneven soldering of BGA components, resulting in poor connections. To counter this, consider using thermal vias in your PCB layout to distribute heat effectively. Additionally, misalignment during assembly is a common challenge; when placing PCB components, ensure precise alignment and use tools such as a PCB assembly fixture to guide placement.
Another critical error is overlooking the importance of proper soldering techniques. Using incorrect solder types or applying excessive heat can damage your components or the PCB itself. Always opt for appropriate solder paste and adjust your reflow settings based on industry guidelines to avoid overheating. It’s also advisable to conduct regular inspections of your work environment, as contamination can lead to defects in solder joint quality. A clean workspace prevents particles from interfering with the electronics and enhances overall outcomes.
Lastly, neglecting comprehensive testing post-assembly can result in unseen defects that might go unnoticed during the development phase. Implement rigorous testing techniques, such as X-ray inspection and electrical testing, to identify any issues with solder joints or structural integrity early on. By recognizing these pitfalls and incorporating best practices into your PCBA process, you will significantly enhance the quality and reliability of your innovations in electronics.
Testing and Inspection Techniques for BGA Assemblies
When it comes to BGA PCB assembly, effective testing and inspection techniques are crucial for ensuring the reliability and performance of the final product. One common method for inspecting BGA assemblies is the use of Automated Optical Inspection (AOI) systems, which can quickly identify defects such as misalignment, insufficient solder, or excessive solder bridging. In addition to AOI, X-ray inspection is often employed due to its ability to provide a detailed view of hidden joints beneath the BGA package. This technique is particularly valuable because many defects in BGA solder joints cannot be detected visually.
Another important aspect of testing is the use of functional testing methods after assembly. By conducting these tests, engineers can ensure that the assembled board meets its intended performance criteria. It’s also essential to establish a robust methodology for manual inspections, which can complement automated methods by catching errors that machines might miss. Documenting inspection results can help in tracking quality over time and identifying trends in issues that might arise during pcb assembly.
Furthermore, employing thermal imaging cameras can assist in detecting overheating components within a PCBA, thereby preventing potential failures due to thermal stress. All these strategies combined — AOI, X-ray inspections, functional tests, manual checks, and thermal analysis — form an extensive toolkit for achieving high-quality BGA assemblies. By implementing these techniques effectively, teams can enhance their skill set and ensure their electronics projects not only meet specifications but also stand the test of time in various operational environments.
Advanced Techniques for Improving BGA Assembly Quality
To achieve optimal BGA PCB assembly results, it is imperative to adopt advanced techniques that minimize potential issues and enhance the overall quality of the assembled board. One such technique is the implementation of reflow profiles tailored specifically to the materials and components being used. This involves careful monitoring of the heating and cooling rates, ensuring that the PCBA experiences uniform thermal distribution during soldering. Additionally, employing a closed-loop feedback system in your equipment can significantly improve temperature accuracy throughout the process.
Another important aspect is the use of high-quality solder paste with appropriate viscosity to ensure proper wetting on both the PCB pads and BGA balls. This plays a crucial role in maintaining reliable connections. It is equally vital to ensure that all surfaces are meticulously cleaned before assembly; contaminants can lead to cold solder joints and unreliable electrical performance.
Furthermore, consider using sophisticated inspection techniques such as Automated Optical Inspection (AOI) or X-ray inspection to detect defects at early stages. These technologies can verify proper alignment of BGA components and assess solder joint integrity with high precision.
In summary, enhancing your skills in these advanced practices not only boosts your confidence in handling BGA PCB assembly, but it also plays a fundamental role in elevating your electronics projects, ensuring they meet industry standards for quality and reliability. By integrating these strategies into your workflow, you pave the way for smoother operations and better outcomes in your pcba efforts.
Resources and Further Reading on BGA PCB Assembly
For those looking to deepen their understanding of BGA PCB assembly, several resources are available to enhance your knowledge and skills. Books, online courses, and industry-specific websites provide comprehensive information on PCBA techniques, standards, and innovations. Key texts in the field cover the fundamentals of pcb assembly, troubleshooting methods, and advanced soldering techniques that are vital for successful BGA integration. Additionally, forums and communities focused on electronics manufacturing can be invaluable for sharing experiences and discovering best practices. Participating in webinars hosted by industry experts offers the chance to gain insights into the latest trends and tools that can optimize your assembly processes. By leveraging these resources, you not only expand your technical expertise but also connect with a network of professionals who share a passion for advancing their skills in BGA PCB assembly.
Conclusion
In summary, mastering BGA PCB assembly is integral for achieving success in nuanced electronics projects. By focusing on key techniques and avoiding common pitfalls, individuals engaging in pcba processes can optimize their results. Armed with the right tools and a clear understanding of the step-by-step assembly process, electronics enthusiasts can navigate the complexities of this advanced soldering method. This includes learning to handle BGA components effectively and implementing best practices that enhance the reliability and functionality of the final product. As you embark on your journey to refine your pcb assembly skills, remember that continuous learning through practical experience and exploration of advanced techniques will serve to elevate your expertise. Prioritizing quality in every stage of the assembly will not only result in functional assemblies but also contribute to overall project confidence and satisfaction.
FAQs
What is BGA PCB assembly?
BGA PCB assembly refers to the process of soldering Ball Grid Array (BGA) components onto a printed circuit board (PCB). This method provides better heat dissipation and electrical performance compared to traditional soldering techniques.
What are the key tools required for BGA PCBA?
Essential tools for BGA PCB assembly include a hot air rework station, stencil printer, solder paste, and an X-Ray inspection system. Each of these tools plays a critical role in ensuring that the process is executed accurately and efficiently.
How do I prevent common pitfalls in BGA PCB assembly?
To avoid common pitfalls such as insufficient solder or misaligned components, it’s important to ensure proper stencil design, maintain clean surfaces, and conduct pre-assembly inspections. Following these steps will enhance the reliability of your pcba.
What testing methods are used for BGA assemblies?
Common testing methods include visual inspection, flying probe testing, and X-Ray inspection. These techniques help identify potential issues before the final product is deployed.
Can advanced techniques improve my BGA assembly quality?
Yes, implementing advanced techniques such as temperature profiling during soldering and using high-quality materials can significantly improve the quality of BGA assemblies, ensuring durability and reliability.

