PCB Copper Pouring Considerations: A Comprehensive Guide
Introduction to Copper Pouring in PCB Design
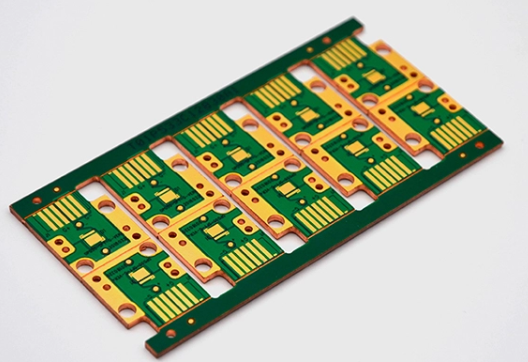
Printed Circuit Board (PCB) design involves numerous critical considerations, and copper pouring (also known as copper fill or copper flooding) stands as one of the most important yet often misunderstood aspects. Copper pouring refers to the process of filling unused areas of a PCB layer with solid copper that is typically connected to a ground or power net. This technique serves multiple purposes in modern PCB design, from improving thermal performance to enhancing signal integrity and reducing electromagnetic interference (EMI).
When executed properly, copper pouring can significantly improve a PCB’s performance and reliability. However, improper implementation can lead to various issues including manufacturing defects, signal integrity problems, and thermal imbalances. This 2000-word guide will explore the essential considerations for effective copper pouring in PCB design, covering technical requirements, design strategies, and common pitfalls to avoid.
Fundamental Considerations for Copper Pouring
1. Purpose Definition
Before implementing copper pouring, designers must clearly define its purpose in their specific design:
- Grounding: Connecting copper pours to ground creates a low-impedance return path
- Thermal Management: Copper acts as a heat spreader for components generating significant heat
- EMI Reduction: Proper copper pouring can shield sensitive circuits from interference
- Structural Stability: Copper helps balance copper distribution across layers, preventing warping
- Manufacturing Benefits: More even copper distribution improves etching consistency
2. Net Selection
The choice of which net to connect your copper pour to is critical:
- Ground nets are the most common and generally safest choice
- Power nets can be used but require careful consideration of voltage levels
- No net connection (floating copper) is generally discouraged due to potential antenna effects
3. Layer Considerations
Copper pouring strategies vary by layer type:
- Signal Layers: Typically use ground copper pours with proper clearance
- Power Planes: Usually solid copper by definition
- Internal Layers: Often benefit from more extensive copper pouring
- Outer Layers: Require more careful consideration of soldermask coverage
Technical Parameters for Effective Copper Pouring
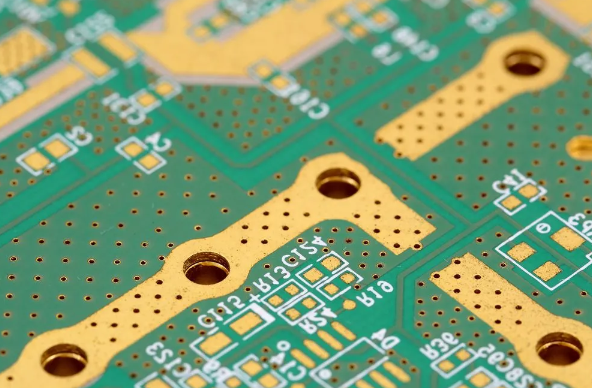
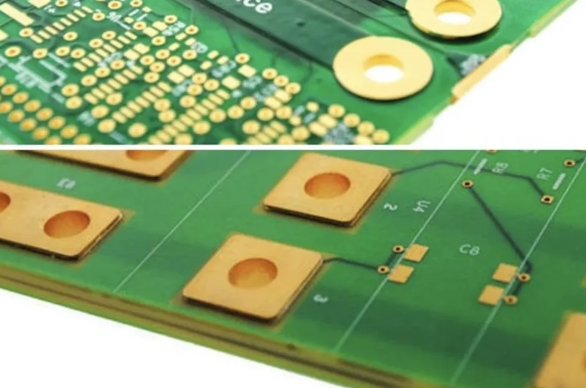
1. Clearance Rules
Proper clearance between copper pours and other elements is essential:
- Trace-to-Pour Clearance: Typically 0.2mm to 0.5mm depending on voltage
- Component Pad Clearance: Often larger than trace clearance (0.5mm or more)
- Via Clearance: Similar to trace clearance but consider via type (tented, plugged)
- Board Edge Clearance: Usually 0.5mm to 1mm to prevent manufacturing issues
2. Thermal Relief Connections
Thermal reliefs are critical for components that require soldering:
- Pad Connections: Use thermal spokes (typically 4) for through-hole components
- Via Connections: Thermal relief often needed for vias in copper pours
- Spoke Width: Generally 0.2mm to 0.3mm for adequate heat transfer balance
- Spoke Count: Typically 4, but may vary based on thermal requirements
3. Grid and Pour Style Settings
- Grid Size: Smaller grids (0.5mm-1mm) for more precise pour boundaries
- Pour Order: Sequence in which pours are applied can affect final results
- Hatch Style: Solid pours are standard; hatched pours are rarely used today
- Island Removal: Critical for eliminating small, isolated copper areas
Signal Integrity Considerations
1. High-Speed Design Implications
Copper pouring affects signal integrity in several ways:
- Return Paths: Ground pours provide critical return paths for high-speed signals
- Impedance Control: Pours affect trace impedance calculations
- Crosstalk: Proper pours can reduce crosstalk between signals
- Skin Effect: Current tends to flow near the surface at high frequencies
2. Mixed-Signal Designs
Special considerations for designs with both analog and digital sections:
- Partitioning: May require separate copper pour regions
- Bridge Connections: Strategic single-point connections between regions
- Analog Ground Pours: Often kept cleaner with fewer disruptions
3. RF Considerations
RF designs have unique copper pouring requirements:
- Continuous Ground: Critical for maintaining proper RF return paths
- Via Stitching: Extensive via placement around pours for 3D current flow
- Edge Treatment: Special attention to board edges and cavities
Thermal Management Aspects
1. Heat Spreading
Copper pours act as heat spreaders:
- Component Cooling: Helps dissipate heat from hot components
- Thermal Balancing: Prevents localized hot spots
- Layer Utilization: Multiple connected layers enhance thermal performance
2. Thermal Relief Balance
Finding the right balance in thermal connections:
- Too Much Relief: Can hinder heat dissipation
- Too Little Relief: Makes soldering and rework difficult
- Component-Specific: High-power devices may need custom relief patterns
3. Copper Thickness Impact
- Standard 1oz (35μm): Adequate for most applications
- 2oz or Heavier: For high-current or improved thermal performance
- Thin Copper: May limit current carrying and thermal capacity
Manufacturing Considerations
1. DFM (Design for Manufacturing)
Copper pouring affects manufacturability:
- Copper Balance: Maintain relative symmetry between layers
- Etching Factors: Consider copper distribution for consistent etching
- Mask Alignment: Account for soldermask registration tolerances
2. Copper Thieving
Techniques to ensure even copper distribution:
- Dummy Pads: Small copper features in sparse areas
- Grid Patterns: Regular patterns to balance density
- Layer Matching: Similar copper distribution on opposite layers
3. Panelization Considerations
- Board-to-Board Clearance: Copper shouldn’t extend too close to panel borders
- Tooling Holes: Keep copper clear of tooling areas
- Breakaway Tabs: Consider copper distribution near board edges
Common Pitfalls and How to Avoid Them
1. Acid Traps
Small acute angles in copper pours can trap etchant:
- Solution: Use obtuse angles or rounded corners
- Design Rule Checks: Implement DRC for acute angles
2. Floating Copper Islands
Isolated copper areas can cause various issues:
- Solution: Enable island removal in pour settings
- Manual Review: Visually inspect for small islands
3. Inadequate Clearance
Insufficient spacing can lead to shorts:
- Solution: Implement proper design rules
- Verification: Use DRC and visual inspection
4. Poor Thermal Relief
Improper thermal connections affect soldering:
- Solution: Standardize thermal relief settings
- Component-Specific: Adjust for high-power parts
Advanced Techniques
1. Copper Thieving
Purposeful addition of non-connected copper:
- Applications: For boards with very uneven copper distribution
- Implementation: Typically a manufacturing-side process
2. Via Shielding
Using vias to enhance copper pour effectiveness:
- Via Fencing: Creates EMI barriers
- Via Stitching: Connects pours across layers
3. Selective Pouring
Advanced strategies for complex designs:
- Zone-Based: Different rules for different board areas
- Net-Based: Custom approaches for specific nets
- Layer-Specific: Varied strategies per layer
Best Practices Summary
- Always define a clear purpose for each copper pour
- Connect pours to ground unless there’s a specific reason not to
- Implement proper clearances based on voltage and manufacturing requirements
- Use thermal reliefs appropriately for all through-hole connections
- Maintain copper balance across layers to prevent warping
- Remove copper islands to prevent potential issues
- Consider signal integrity implications, especially in high-speed designs
- Verify manufacturability with your PCB fabricator
- Document special cases where pouring rules deviate from standards
- Review and inspect copper pours before finalizing designs
Conclusion
Copper pouring is a powerful technique in PCB design that offers numerous benefits when implemented correctly. By understanding the various considerations outlined in this guide—from fundamental grounding strategies to advanced thermal management techniques—designers can leverage copper pouring to create PCBs with improved performance, reliability, and manufacturability.
Remember that while general guidelines exist, each design may require specific adaptations based on its unique requirements. Collaboration with manufacturing partners and thorough design verification are essential steps in implementing effective copper pouring strategies. With careful attention to these considerations, designers can fully harness the benefits of copper pouring while avoiding common pitfalls that could compromise board quality or performance.