KiCad and JLCPCB Assembly Guide
Introduction
In modern electronic design, PCB (printed circuit board) is the core of connecting various electronic components. With the advancement of technology, tools and services for designing and manufacturing PCBs have become more and more popular. KiCad is an open source PCB design software, and JLCPCB is a well-known PCB manufacturing and assembly service provider. This article will take a deep look at how to use KiCad for PCB design and combine it with JLCPCB’s assembly services to help electronic engineers and enthusiasts complete projects more efficiently.
1.Introduction to KiCad
KiCad is a powerful open source PCB design tool that supports multi-layer PCB design, schematic drawing, 3D view and other functions. It is suitable for designs ranging from simple single-layer circuit boards to complex multi-layer circuit boards. The main features of KiCad include:
Open source and free: KiCad is completely free and suitable for personal and small business use.
Cross-platform support: Supports Windows, Linux and macOS operating systems.
Strong community support: Due to its open source nature, KiCad has a large user community with rich tutorials and resources.
Export in multiple formats: Supports export in multiple file formats, which is convenient for integration with other tools and services.
2.Introduction to JLCPCB
JLCPCB is a PCB manufacturer located in China, providing high-quality PCB manufacturing and assembly services. Its main features include:
Low cost: JLCPCB has attracted a large number of customers with its competitive prices, especially for small batch production.
Fast delivery: Provides fast production and delivery services, usually completing orders within a few days.
Online ordering: Users can easily upload design files, select production parameters, and place orders online through its website.
Assembly service: In addition to PCB manufacturing, JLCPCB also provides component procurement and PCB assembly services, which simplifies the entire production process.
3.Use KiCad for PCB design
Install KiCad
First, visit KiCad’s official website (https://www.kicad.org/) to download and install the latest version of KiCad. The installation process is simple, just follow the prompts.
Create a new project
Open KiCad, click “New Project”, select a suitable folder and name the project. A schematic and PCB layout file will be automatically generated in the project.
Draw the schematic
In KiCad, double-click the schematic file to open the schematic editor. Using the component library in the toolbar, select the required electronic components and place them on the canvas. Connect the pins between the components to ensure that the circuit logic is correct.
4.Generate a netlist
After completing the schematic, click the “Generate Netlist” button to generate a netlist file. This step is to export the connection information in the schematic for use in the PCB layout.
5.PCB layout design
In the KiCad main interface, open the PCB layout file. Click “Import Netlist” to import the previously generated netlist into the PCB layout. Adjust the position of the components as needed and perform routing.
6.DRC check
After completing the PCB layout, perform a design rule check (DRC) to ensure that there are no design errors. KiCad will automatically detect common problems such as short circuits, unconnected pins, etc.
7.Export Gerber Files
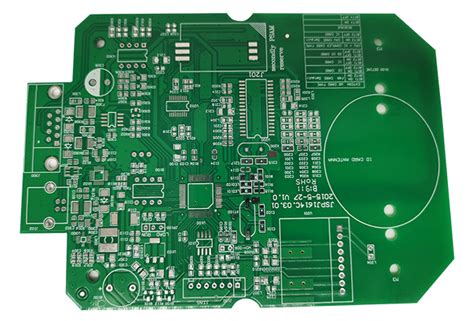
Once the design is complete, click “File” -> “Export” -> “Gerber” to export the Gerber files. These files are the standard format used by PCB manufacturers to produce circuit boards.
8.Place an order at JLCPCB
- Register an account
Visit the JLCPCB website (https://jlcpcb.com/) and register an account. After registration, log in to the account for order processing.
- Upload Gerber Files
On the homepage of JLCPCB, click the “Quick Quote” button to enter the upload page. Select the previously exported Gerber file, and the system will automatically recognize the file and display a preview.
- Set Production Parameters
According to the project requirements, set the production parameters of the PCB, including:
Number of layers: single, double or multi-layer.
Board type: FR-4, aluminum substrate, etc.
Thickness: Usually 1.6mm, but can be selected as needed.
Surface treatment: Select surface treatment such as HASL, ENIG, etc.
Quantity: Enter the required number of PCBs.
4.Select Assembly Service (Optional)
If you need JLCPCB to provide assembly service, you can select the “PCB Assembly” option. In this step, you need to upload the BOM (Bill of Materials) and CPL (Component Location File).
BOM file: Lists all components and their specifications, including model, quantity, and package type.
CPL file: Indicates the specific location of each component on the PCB.
5.Order and Payment
After confirming that all settings are correct, click the “Order” button to enter the payment page. Select the appropriate payment method, and the system will generate an order after completing the payment.
5. Assembly Process
(1)Component Procurement
JLCPCB will purchase components based on the BOM file you provide. You can choose to use JLCPCB’s component library or provide components yourself.
(2)PCB Assembly
Once the component procurement is completed, JLCPCB will assemble the PCB. The assembly process includes:
Patch: Use a patch machine to place surface mount components (SMD) on the PCB.
Reflow soldering: Place the PCB into the reflow oven to complete the soldering process.
Inspection: Perform automated optical inspection (AOI) to ensure soldering quality.
6.Shipping
After assembly, JLCPCB will conduct a final inspection of the PCB and package it for shipment. You can view the order status and logistics information in your account.
7.Summary
By using KiCad for PCB design and combining JLCPCB’s manufacturing and assembly services, electronic engineers and enthusiasts can greatly simplify the process from design to production. Whether it is a personal project or a small business, using these tools and services can effectively reduce costs and improve production efficiency. I hope this article can help you better understand the use of KiCad and JLCPCB and successfully complete your electronic projects.