
PCB Overall Layout and Component Placement: A Comprehensive Guide
Introduction
Printed Circuit Board (PCB) design is a complex process that requires careful consideration of both electrical and mechanical factors. Among the most critical aspects of PCB design are the overall layout strategy and the precise placement of components. These elements fundamentally determine the board’s functionality, reliability, manufacturability, and performance. This 2000-word article explores the essential principles, techniques, and best practices for effective PCB layout and component placement.
Fundamental Principles of PCB Layout
1. Understanding the Design Requirements
Before beginning the layout process, designers must thoroughly understand:
- The circuit’s electrical requirements (voltage, current, frequency)
- Mechanical constraints (board size, shape, mounting points)
- Environmental factors (operating temperature, humidity, vibration)
- Regulatory standards (EMC/EMI, safety requirements)
- Manufacturing capabilities and limitations
2. Signal Flow Consideration
An optimal PCB layout follows the natural signal flow:
- Inputs should be located near board connectors
- Signal processing components follow the logical flow
- Output stages connect to output connectors
- Power supplies should be positioned to minimize interference
3. Partitioning Functional Blocks
Divide the board into functional sections:
- Analog and digital areas (with proper isolation)
- Power supply section
- High-speed circuitry
- RF sections (if applicable)
- I/O interfaces
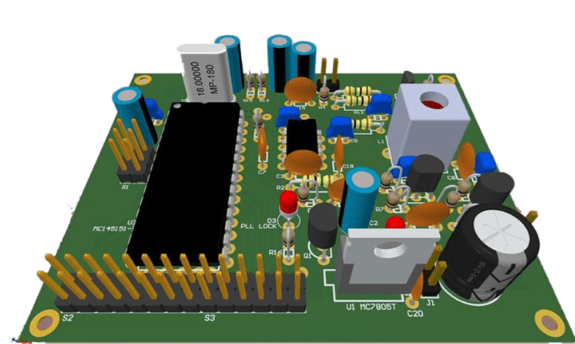
Component Placement Strategies
1. Primary Component Placement
Start with critical components:
- Microcontrollers/Processors: Central to the design, place first with consideration for heat dissipation
- Memory Devices: Position close to processors to minimize trace lengths
- Power Components: Place considering thermal management and input/output paths
- Connectors: Fixed by mechanical design, place early in the process
2. Supporting Component Placement
After placing primary components:
- Position supporting ICs near their primary components
- Place passive components (resistors, capacitors) close to their associated active parts
- Consider orientation for automated assembly processes
3. Thermal Considerations
Proper thermal management through placement:
- Heat-generating components should be spaced appropriately
- Position temperature-sensitive devices away from heat sources
- Consider airflow in the enclosure
- Use thermal relief patterns for high-current pads
4. Mechanical Considerations
- Heavy components may need mechanical support or placement near mounting points
- Tall components should not interfere with other parts or enclosure
- Consider serviceability for field-replaceable components
PCB Stackup and Layer Utilization
1. Determining Layer Count
Factors affecting layer count:
- Circuit complexity and component density
- Signal integrity requirements
- Power distribution needs
- Cost constraints
2. Layer Stackup Strategy
Typical layer arrangements:
- 4-layer board: Top (signals), Inner1 (ground), Inner2 (power), Bottom (signals)
- 6-layer board: More specialized with additional ground/power or signal layers
- High-speed designs may require specific dielectric materials
3. Power and Ground Planes
- Use solid planes for low-impedance power distribution
- Multiple voltage rails may require split planes
- Ground planes provide return paths and reduce EMI
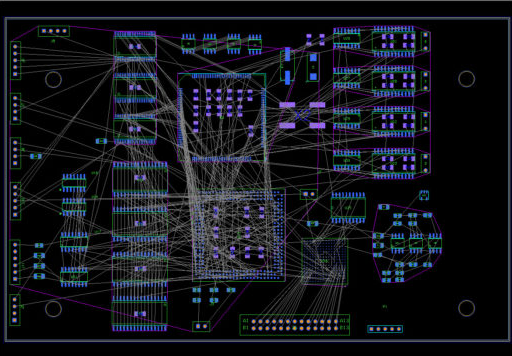
High-Speed Design Considerations
1. Signal Integrity
Critical for high-speed layouts:
- Controlled impedance traces
- Proper termination techniques
- Minimizing crosstalk through careful spacing
2. Clock Distribution
- Place clock generators centrally to minimize skew
- Use tree structures or buffers for multiple loads
- Keep clock traces short and away from noisy areas
3. Differential Pairs
- Route differential pairs close together with consistent spacing
- Maintain equal length to preserve timing
- Avoid discontinuities and sharp bends
Power Distribution Network (PDN) Design
1. Decoupling Capacitor Placement
- Place bypass capacitors close to power pins
- Use multiple values to cover different frequency ranges
- Follow manufacturer recommendations for quantity and value
2. Power Plane Strategies
- Use star topologies for analog sections
- Consider separate regulators for sensitive circuits
- Minimize loop areas in high-current paths
Manufacturing and Assembly Considerations
1. Design for Manufacturing (DFM)
- Follow component spacing rules for the fabrication process
- Provide adequate clearance for soldering
- Include fiducial markers and tooling holes
2. Design for Assembly (DFA)
- Standardize component orientations
- Consider pick-and-place machine requirements
- Provide sufficient space for rework
3. Testability
- Include test points for critical signals
- Consider bed-of-nails fixture requirements
- Allow access for probes
EMC/EMI Considerations
1. Board-Level Shielding
- Identify potential EMI sources and victims
- Use partitioning and shielding techniques
- Proper grounding of shields
2. Filter Placement
- Position filters at board interfaces
- Use proper grounding for filters
- Select appropriate filter types for the frequency range
Advanced Placement Techniques
1. 3D Component Placement
- Consider component heights and clearances
- Account for heatsinks and mechanical parts
- Verify with 3D models when possible
2. Mixed-Signal Layout
- Careful separation of analog and digital sections
- Proper grounding strategies
- Attention to sensitive analog components
3. RF and Microwave Layout
- Transmission line considerations
- Component placement for impedance matching
- Shielding and isolation requirements
Verification and Optimization
1. Design Rule Checking (DRC)
- Verify against manufacturing capabilities
- Check for spacing violations
- Confirm layer stackup compliance
2. Signal Integrity Analysis
- Simulate critical signals
- Verify power distribution network
- Check for crosstalk and timing issues
3. Thermal Analysis
- Identify hot spots
- Verify component operating temperatures
- Assess cooling solutions
Conclusion
Effective PCB layout and component placement require a balance of electrical performance, mechanical constraints, and manufacturing requirements. By following systematic approaches to partitioning, placement, and routing, designers can create boards that meet all functional requirements while being reliable and manufacturable. As technology advances with higher speeds, denser components, and more stringent requirements, the importance of proper layout and placement only increases. Continuous learning and adaptation to new techniques and tools are essential for modern PCB designers to create successful products in today’s competitive electronics industry.
Remember that PCB layout is both an art and a science—while there are established rules and guidelines, each design presents unique challenges that may require creative solutions. The most successful layouts come from designers who understand the fundamental principles while remaining flexible enough to adapt to specific project requirements.