PCB Component Placement Area Restrictions: Design Considerations and Best Practices
Introduction
Printed Circuit Board (PCB) design is a complex process that involves multiple stages, including schematic design, component placement, routing, and manufacturing. One of the most critical steps in PCB design is component placement, as it directly impacts signal integrity, thermal management, manufacturability, and overall performance. However, designers must adhere to specific placement area restrictions to ensure the board functions correctly and can be assembled efficiently.
This article explores the key restrictions and guidelines for PCB component placement, including mechanical constraints, electrical considerations, thermal management, and manufacturing limitations. By understanding these factors, designers can optimize PCB layouts for reliability, performance, and cost-effectiveness.
1. Mechanical Constraints in Component Placement
1.1 Board Edge Clearance
Components placed too close to the PCB edge risk damage during manufacturing, assembly, or handling. Common restrictions include:
- Minimum keep-out zones (typically 0.1–0.3 inches from the edge) to prevent breakage during depaneling (e.g., V-scoring, routing).
- Mounting holes and fixtures require additional clearance to avoid interference with screws or enclosures.
1.2 Component Height Restrictions
- Enclosure limitations dictate maximum component height to prevent mechanical interference.
- Stacked PCBs (in multi-board systems) must account for vertical spacing to avoid collisions.
1.3 Connector and Interface Placement
- Connectors (USB, HDMI, power jacks) must align with enclosure cutouts, requiring precise placement.
- Moving parts (switches, buttons) must be accessible and not obstructed by other components.
2. Electrical and Signal Integrity Considerations
2.1 High-Speed Signal Routing
- Critical components (CPUs, FPGAs, memory chips) must be placed close to minimize trace lengths and reduce signal delays.
- Differential pairs and RF components require controlled impedance routing, influencing placement near PCB layers with proper reference planes.
2.2 Power Distribution Network (PDN)
- Decoupling capacitors must be placed as close as possible to IC power pins to minimize inductance.
- Voltage regulators should be near their load components to reduce voltage drop and noise.
2.3 Electromagnetic Interference (EMI) Mitigation
- Noisy components (switching regulators, oscillators) should be kept away from sensitive analog circuits.
- Shielding cans or ground planes may require designated keep-out zones.
3. Thermal Management Restrictions
3.1 Heat-Generating Components
- Power components (MOSFETs, voltage regulators) must have adequate spacing for heat dissipation or heatsink attachment.
- Thermal relief pads should be used for soldering but must not obstruct heat flow.
3.2 Airflow and Ventilation
- In forced-air cooling systems, components should not block airflow paths.
- High-power components should be placed near vents or cooling fans.
3.3 Thermal Expansion and Warping
- Large components (BGAs, transformers) should be distributed evenly to prevent PCB warping during reflow soldering.
4. Manufacturing and Assembly Limitations
4.1 Pick-and-Place Machine Constraints
- Component spacing must allow robotic placement heads to access each part without collisions.
- Fine-pitch components (QFN, BGA) require precise placement tolerances.
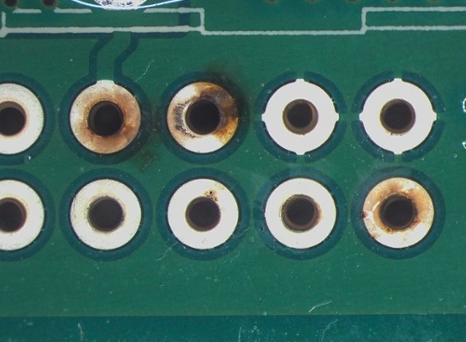
4.2 Soldering Process Requirements
- Wave soldering: Through-hole components must be oriented in the direction of solder flow.
- Reflow soldering: Components must not shadow others, leading to uneven heating.
4.3 Testability and Rework
- Test points and probe access must be unobstructed for in-circuit testing (ICT).
- Rework areas should allow soldering iron or hot-air gun access without damaging nearby components.
5. Design for Manufacturing (DFM) Best Practices
To comply with placement restrictions, designers should follow these guidelines:
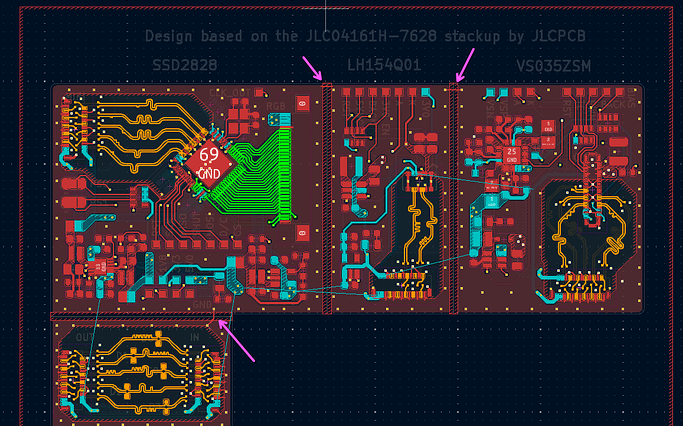
- Define Keep-Out Zones Early: Use CAD tools to mark restricted areas for connectors, mounting holes, and high-voltage sections.
- Group Related Components: Place analog, digital, and power sections in separate zones to minimize interference.
- Optimize for Assembly: Ensure components are aligned in a way that minimizes soldering defects (e.g., tombstoning).
- Simulate Thermal and Signal Performance: Use thermal analysis and signal integrity tools to validate placement before fabrication.
- Consult PCB Fabrication Guidelines: Manufacturers often provide specific design rules for component spacing, solder mask clearance, and silkscreen placement.
Conclusion
PCB component placement is a balancing act between electrical performance, thermal management, mechanical constraints, and manufacturability. By understanding and adhering to placement area restrictions, designers can avoid costly redesigns, improve product reliability, and streamline the assembly process.
Following best practices—such as defining keep-out zones, optimizing high-speed signal paths, managing heat dissipation, and ensuring manufacturability—will lead to a robust and efficient PCB design. As PCB technology evolves with higher component densities and advanced materials, adhering to these placement restrictions becomes even more critical for success