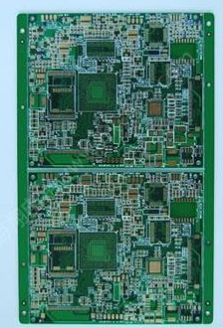
How to Rely on Long PCBs for Antenna Design and Prevent Distortions on PCBs
Antenna Applications Long PCBs
Modern wireless applications require robust antennas, which often means a long PCB is needed to integrate and support these applications. The design of the antenna can make or break your application, but relying on long PCBs can help you get it right.
Antennas can be mounted directly on long PCBs, and copper optimization can boost their performance.
Antennas are often a very difficult area to design, and working with an expert can help you optimize the impact your board has.
Antenna Application Uses
A wireless antenna is used in almost every modern device that arrives in our homes. From cell phones and coffee makers to new washing machines and televisions, there is an antenna, and it may be placed directly on the circuit board.
PCB antenna applications vary significantly based on signal strength and requirements, so you will see a variety of different antenna designs in today’s PCBs.
The loop is the most basic iteration of a long PCB antenna, where the manufacturer creates a closed loop of copper wire that connects to the antenna terminals. The loops don’t have to be circular, but they do need to be as large in circumference as possible, as larger means more efficiency and better operation. You will find loops in places where there is no need for efficient signaling, such as your garage door opener.
Patch antennas are suitable for coaxial cable or microstrip line production and are a relatively efficient choice. Copper area designs are common in WLAN networks due to strong support and narrow bandwidth. The thicker the dielectric material, the better the bandwidth.
The meander line allows the conductor to move left and right to improve strength while limiting the size of the antenna. It has some reduction in radiation resistance and efficiency due to the design, but it may be good if size is the main concern.
The slot antenna is a slot cut in a metal sheet or directly in the copper plane on the PCB. It is a complex design that needs to be matched because its impedance averages around a few hundred ohms. This is a design that is often used in phased arrays.
Preventing Bow and Twist on PCB Circuit Boards
Bow and twist issues on the printed circuit board can cause components and parts to shift during the PCB assembly process if the surface mount and through-hole component x/y and z coordinates do not match the pcb, and then it will make the PCB assembly process very time-consuming and difficult.
IPC-6012 defines a maximum bow and twist of 0.75% on a circuit board, but some strict designs only allow bow and twist of no more than 0.5%. See below for IPC guidelines on how to measure bow and twist.

Prevent bow and twist on circuit boards:
- PCB design: PCB designers should use copper traces to balance the design between layers if necessary to evenly distribute copper.
- Lamination: Unless there are specific impedance requirements, the prepreg between PCB layers must be symmetrical.
- Multilayer printed circuit boards should use cores and prepregs from the same material manufacturer, as different manufacturers may cause problems during the lamination process.
- Very thin printed circuit boards can be easily warped and twisted, so they should be observed in each process.
- Bake the printed circuit boards, make sure there is no moisture, and place on a flat surface during the cooling process.
- The circuit board will be blind and buried vias are more likely to bend and bend, so they must be carefully handled and controlled during the manufacturing process.
Bow and twist issues not only occur during PCB manufacturing, but are also caused by uneven copper distribution in the Gerber file.
If impedance or special requirements are not required, board designers should design multi-layer PCBs using symmetrical stacking. The copper weight should be symmetrical as well as the thickness of the prepreg and core.