How to Deal with Burrs After PCB Separation: A Comprehensive Guide
Printed Circuit Board (PCB) manufacturing involves multiple processes, including separation (also known as depanelization), where individual PCBs are cut from a larger panel. One common issue encountered during this process is the formation of burrs—rough edges or excess material left after cutting. These burrs can affect the functionality, reliability, and aesthetics of the PCB. This article explores the causes of burrs, their impact, and various methods to effectively remove and prevent them.
1. Understanding PCB Burrs: Causes and Effects
1.1 What Are Burrs?
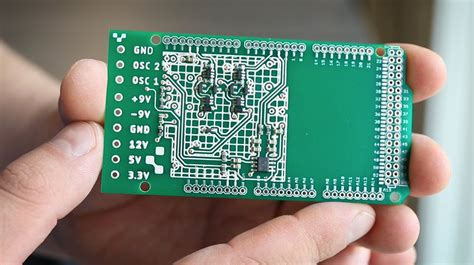
Burrs are unwanted raised edges or small pieces of material that remain after PCB separation. They typically occur along the cut edges due to mechanical stress during the separation process.
1.2 Common Causes of Burrs
Several factors contribute to burr formation:
- Cutting Method: V-scoring, punching, laser cutting, and routing can leave burrs if not optimized.
- Tool Wear: Dull blades or router bits tear rather than cut cleanly, increasing burr formation.
- Material Properties: FR-4, ceramic, and flexible PCBs behave differently under stress, affecting burr formation.
- Cutting Parameters: Incorrect speed, feed rate, or depth of cut can exacerbate burring.
1.3 Impact of Burrs on PCBs
- Electrical Shorts: Metal burrs can cause unintended connections.
- Mechanical Issues: Rough edges may interfere with component placement or assembly.
- Aesthetic Defects: Burrs reduce the professional appearance of the PCB.
- Reliability Concerns: Sharp edges can damage traces or cause delamination.
2. Methods for Removing PCB Burrs
Several techniques can be employed to eliminate burrs after PCB separation. The choice depends on the PCB material, production volume, and required precision.
2.1 Manual Deburring
- Using Hand Tools: Files, sandpaper, or deburring knives can manually remove burrs.
- Pros: Low cost, suitable for prototypes.
- Cons: Labor-intensive, inconsistent results, risk of damaging the PCB.
2.2 Mechanical Deburring
- Abrasive Brushing: Rotary brushes with nylon or ceramic bristles smooth edges.
- Tumbling/Vibratory Finishing: PCBs are placed in a tumbler with abrasive media to remove burrs.
- Pros: Effective for high-volume production.
- Cons: May not be suitable for fragile PCBs.
2.3 Thermal Deburring (Laser or Flame)
- Laser Deburring: A focused laser beam vaporizes burrs without mechanical contact.
- Pros: High precision, no tool wear.
- Cons: Expensive equipment, risk of heat damage.
- Flame Polishing: Used for certain materials, but rare in PCB manufacturing.
2.4 Chemical Deburring
- Etching Solutions: Mild acids or alkaline solutions dissolve burrs.
- Pros: Uniform results, good for complex shapes.
- Cons: Requires chemical handling, potential over-etching.
2.5 Ultrasonic Deburring
- High-frequency sound waves remove burrs in a liquid medium.
- Pros: Non-abrasive, good for delicate PCBs.
- Cons: Limited to small burrs, requires specialized equipment.
3. Preventing Burrs During PCB Separation
The best approach is to minimize burr formation during the separation process itself. Here are key strategies:
3.1 Optimizing Cutting Methods
- V-Scoring: A partial-cut method that reduces burring but requires breaking.
- Punching: Suitable for thin PCBs but may cause deformation.
- Laser Cutting: High precision with minimal burrs but slower and costlier.
- Router Cutting: Adjusting spindle speed and feed rate reduces burring.
3.2 Using High-Quality Tools
- Sharp Blades & Bits: Regularly replace worn-out tools.
- Diamond-Coated Cutters: Provide cleaner cuts for rigid PCBs.
3.3 Adjusting Process Parameters
- Optimal Feed Rate: Too fast causes tearing; too slow increases heat.
- Proper Depth of Cut: Prevents excessive stress on the material.
- Coolant Use: Reduces heat buildup in mechanical cutting.
3.4 Choosing the Right PCB Material
- FR-4 vs. Flexible PCBs: Different materials require tailored cutting techniques.
- Copper Thickness: Thicker copper layers may need slower cutting speeds.
4. Automated Solutions for Burr Removal
For high-volume production, automated deburring systems improve efficiency and consistency.
4.1 CNC Deburring Machines
- Programmable systems ensure uniform edge finishing.
- Pros: High precision, repeatability.
- Cons: Initial setup cost.
4.2 Robotic Deburring
- Industrial robots with vision systems detect and remove burrs.
- Pros: Adaptable to different PCB designs.
- Cons: Requires advanced programming.
4.3 In-Line Deburring Systems
- Integrated into the PCB manufacturing line for continuous processing.
- Pros: Reduces manual handling.
- Cons: Higher capital investment.
5. Quality Control and Inspection
After deburring, inspection ensures no residual burrs remain.
5.1 Visual Inspection
- Magnifying lenses or microscopes detect small burrs.
5.2 Automated Optical Inspection (AOI)
- Cameras and AI algorithms identify burrs and edge defects.
5.3 Electrical Testing
- Ensures no conductive burrs cause short circuits.
6. Conclusion
Burrs after PCB separation can compromise functionality and reliability. While manual and mechanical deburring methods are common, advanced techniques like laser deburring and automated systems offer higher precision. Preventing burrs through optimized cutting parameters and high-quality tools is the most cost-effective approach. Manufacturers should select the appropriate deburring method based on production volume, PCB material, and quality requirements.
By implementing these strategies, PCB manufacturers can ensure smooth, burr-free edges, enhancing product performance and customer satisfaction.