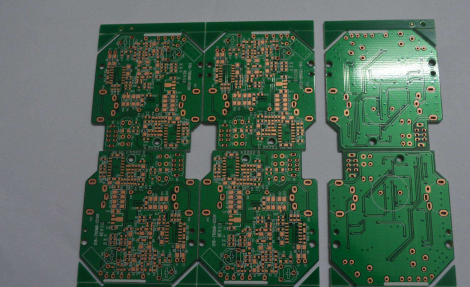
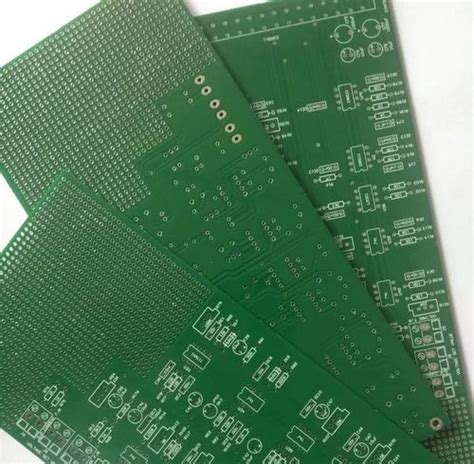
Kicad no valid pcb assembly
Understanding KiCad’s Design Rules: Avoiding Common PCB Assembly Errors
KiCad, an open-source software suite for electronic design automation, has become a popular choice among engineers and hobbyists for designing printed circuit boards (PCBs). However, despite its robust features, users often encounter issues related to PCB assembly, particularly when design rules are not properly understood or applied. Understanding these design rules is crucial to avoiding common errors that can lead to costly manufacturing mistakes or non-functional boards.
To begin with, it is essential to comprehend the role of design rules in KiCad.
These rules serve as guidelines that ensure the manufacturability and functionality of a PCB. They encompass various parameters, such as trace width, clearance, and via sizes, which must be adhered to during the design process. By setting these parameters correctly, designers can prevent issues such as short circuits, signal integrity problems, and mechanical failures. Therefore, a thorough understanding of these rules is the first step in avoiding assembly errors.
One common mistake in PCB design is neglecting to set appropriate clearance values.
Clearance refers to the minimum distance between different conductive elements on a PCB, such as traces, pads, and vias. Insufficient clearance can lead to short circuits, especially in high-density designs. KiCad allows users to define clearance rules for different net classes, which can be customized based on the specific requirements of the project. By carefully setting these values, designers can ensure that their boards meet the necessary electrical isolation standards.
Another frequent issue arises from improper trace width selection.
Trace width is critical for ensuring that the PCB can handle the required current without overheating. KiCad provides tools to calculate the appropriate trace width based on the current-carrying capacity and the desired temperature rise. By using these tools, designers can avoid potential failures due to trace overheating, which can compromise the reliability of the entire circuit.
Moreover, via sizes and types are also significant considerations in PCB design.
Vias are used to connect different layers of a PCB, and their dimensions must be chosen carefully to ensure reliable connections. KiCad offers options for defining via sizes and types, such as through-hole and blind vias, which can be tailored to the specific needs of the design. Selecting the correct via parameters is crucial for maintaining signal integrity and mechanical stability, particularly in multi-layer boards.
In addition to these technical parameters, it is also important to consider the manufacturability of the design.
This involves ensuring that the PCB can be produced using standard manufacturing processes without incurring additional costs or delays. KiCad’s design rule checker (DRC) is a valuable tool in this regard, as it can identify potential violations of the defined rules before the design is sent for fabrication. By running the DRC and addressing any flagged issues, designers can significantly reduce the risk of assembly errors.
In conclusion, understanding and applying KiCad’s design rules is essential for avoiding common PCB assembly errors. By setting appropriate clearance values, selecting the correct trace widths, and choosing suitable via sizes, designers can ensure that their boards are both functional and manufacturable. Utilizing KiCad’s built-in tools, such as the design rule checker, further aids in identifying and resolving potential issues early in the design process. Through careful attention to these details, users can leverage KiCad’s capabilities to produce high-quality PCBs that meet their project requirements.

Best Practices for Schematic Design in KiCad to Ensure Successful PCB Assembly
In the realm of electronic design automation, KiCad has emerged as a powerful and versatile tool for creating schematics and printed circuit board (PCB) layouts. However, the journey from schematic design to successful PCB assembly is fraught with potential pitfalls. To ensure a seamless transition, it is crucial to adhere to best practices during the schematic design phase. By doing so, designers can mitigate errors and enhance the manufacturability of their PCBs.
To begin with, clarity and organization in schematic design are paramount.
A well-organized schematic not only facilitates understanding but also aids in error detection. Designers should employ a consistent naming convention for components and signals, which helps in maintaining uniformity across the design. Additionally, grouping related components logically and using hierarchical sheets can significantly enhance readability. This approach not only simplifies the design process but also assists in troubleshooting and future modifications.
Moreover, attention to detail in component selection is essential.
Selecting the right components involves considering factors such as availability, cost, and compatibility with the intended application. It is advisable to use components from reputable manufacturers and to verify their footprints and specifications. This step is crucial in preventing mismatches during the PCB layout phase, which could lead to assembly issues. Furthermore, maintaining an up-to-date library of components can streamline the design process and reduce the likelihood of errors.
Transitioning to the electrical aspect, ensuring proper connectivity is vital.
Designers should meticulously check for open or short circuits, as these can lead to functional failures. Utilizing KiCad’s Electrical Rules Check (ERC) tool can help identify such issues early in the design process. Additionally, incorporating test points in the schematic can facilitate debugging and testing of the final PCB. These test points provide convenient access to critical signals, enabling easier verification of the board’s functionality.
Another critical consideration is the assignment of designators and reference numbers.
Consistent and logical assignment of these identifiers aids in the assembly process by providing clear guidance for component placement. It is beneficial to follow a systematic approach, such as assigning designators based on the component type or location on the board. This practice not only enhances the assembly process but also simplifies communication with manufacturers and assemblers.
Furthermore, designers should be mindful of the power distribution network within the schematic.
Ensuring adequate power supply to all components is crucial for the board’s functionality. This involves careful planning of power and ground connections, as well as the inclusion of decoupling capacitors to mitigate noise and voltage fluctuations. Proper power distribution can prevent issues such as voltage drops and electromagnetic interference, which could compromise the board’s performance.
In addition to these technical considerations, documentation plays a pivotal role in successful PCB assembly.
Comprehensive documentation, including a bill of materials (BOM), assembly drawings, and fabrication notes, provides essential information to manufacturers. Clear and detailed documentation minimizes the risk of misinterpretation and errors during assembly, thereby enhancing the overall quality of the final product.
In conclusion, adhering to best practices in schematic design within KiCad is instrumental in ensuring successful PCB assembly. By focusing on clarity, component selection, connectivity, designator assignment, power distribution, and thorough documentation, designers can significantly reduce the likelihood of errors and enhance the manufacturability of their PCBs. These practices not only streamline the design process but also contribute to the production of reliable and high-quality electronic products.
Troubleshooting KiCad Projects: Identifying and Fixing PCB Assembly Issues
In the realm of electronic design automation, KiCad stands out as a powerful, open-source tool for creating printed circuit boards (PCBs). However, like any complex software, users may occasionally encounter issues that can impede the successful assembly of a PCB. One such issue is the “no valid PCB assembly” error, which can be perplexing for both novice and experienced users. Understanding the root causes of this problem and knowing how to address them is crucial for ensuring a smooth design-to-production workflow.
To begin with, it is essential to recognize that the “no valid PCB assembly” error often arises from discrepancies between the schematic and the PCB layout.
This can occur when components are not correctly linked between the two stages of design. For instance, if a component is added to the schematic but not transferred to the PCB layout, or vice versa, the software may flag this inconsistency. Therefore, a thorough review of the schematic and layout to ensure all components are correctly synchronized is a fundamental step in troubleshooting this issue.
Moreover, another common cause of this error is the misconfiguration of design rules.
KiCad allows users to set specific design constraints, such as trace width, clearance, and layer stack-up, which must be adhered to during the design process. If these rules are not properly configured or if the design violates them, it can lead to assembly errors. Consequently, revisiting the design rules and ensuring they align with the intended specifications is a prudent approach to resolving such issues.
In addition to design rule checks, it is also advisable to perform a comprehensive electrical rules check (ERC).
This process helps identify potential errors in the schematic, such as unconnected pins or incorrect net assignments, which could translate into assembly problems. By systematically addressing the warnings and errors highlighted by the ERC, designers can mitigate the risk of encountering the “no valid PCB assembly” error.
Furthermore, it is important to consider the role of component libraries in this context.
KiCad relies on libraries to provide accurate representations of components, including their footprints and symbols. If a component’s library is outdated or incorrectly configured, it can lead to mismatches between the schematic and PCB layout. Therefore, ensuring that all libraries are up-to-date and correctly referenced in the project settings is another critical step in troubleshooting assembly issues.
Transitioning from design to production, generating accurate manufacturing files is paramount.
The Gerber files, bill of materials (BOM), and pick-and-place files must be meticulously reviewed to ensure they reflect the intended design. Any discrepancies in these files can lead to assembly errors, as manufacturers rely on them to fabricate and assemble the PCB. Thus, verifying the accuracy of these files before submission is an essential practice.
In conclusion, while encountering a “no valid PCB assembly” error in KiCad can be frustrating, it is often a symptom of underlying issues that can be systematically addressed. By ensuring synchronization between the schematic and PCB layout, adhering to design rules, performing thorough checks, and maintaining accurate libraries and manufacturing files, designers can effectively troubleshoot and resolve these issues. Through diligent attention to detail and a methodical approach, the path from design to a successfully assembled PCB can be navigated with confidence..
Optimizing KiCad Layouts for Efficient and Error-Free PCB Assembly
In the realm of electronic design automation, KiCad has emerged as a powerful and versatile tool for creating printed circuit board (PCB) layouts. However, ensuring that these layouts are optimized for efficient and error-free assembly is crucial for both hobbyists and professionals alike. The process of optimizing KiCad layouts involves several key considerations that, when addressed, can significantly enhance the manufacturability and reliability of the final product.
To begin with, component placement is a fundamental aspect of PCB design that directly impacts assembly efficiency.
It is essential to arrange components in a manner that minimizes the complexity of the assembly process. Grouping related components together not only simplifies routing but also reduces the likelihood of errors during assembly. For instance, placing decoupling capacitors close to their respective integrated circuits can improve performance and reduce electromagnetic interference. Moreover, aligning components in a consistent orientation can facilitate automated assembly processes, thereby reducing the potential for human error.
Transitioning from component placement to routing, it is important to consider the trace width and spacing.
These parameters must adhere to the design rules specified by the manufacturer to ensure the board’s electrical integrity and manufacturability. Utilizing KiCad’s design rule checker can help identify potential issues early in the design process, allowing for timely corrections. Additionally, employing a hierarchical design approach can aid in managing complex layouts by breaking them down into more manageable sections. This not only streamlines the design process but also enhances the clarity and organization of the PCB layout.
Another critical factor in optimizing KiCad layouts is the consideration of thermal management.
As electronic components generate heat during operation, it is vital to design the PCB in a way that facilitates effective heat dissipation. Incorporating thermal vias and copper pours can help distribute heat more evenly across the board, preventing localized hotspots that could lead to component failure. Furthermore, ensuring adequate spacing between heat-generating components and sensitive circuitry can mitigate the risk of thermal interference.
In addition to thermal considerations, signal integrity is another aspect that must not be overlooked.
High-speed signals are particularly susceptible to issues such as crosstalk and signal reflection, which can degrade the performance of the PCB. To address these challenges, designers can employ techniques such as controlled impedance routing and differential pair routing. KiCad offers tools that assist in maintaining signal integrity by allowing designers to define specific routing constraints and verify them throughout the design process.
Moreover, the use of design for manufacturability (DFM) principles can greatly enhance the assembly process.
By considering factors such as panelization, solder mask clearance, and silkscreen placement, designers can create layouts that are not only easier to manufacture but also less prone to defects. KiCad’s ability to generate comprehensive fabrication outputs, including Gerber files and assembly drawings, further supports the seamless transition from design to production.
In conclusion, optimizing KiCad layouts for efficient and error-free PCB assembly requires a holistic approach that encompasses component placement, routing, thermal management, signal integrity, and manufacturability. By leveraging the tools and features available within KiCad, designers can create robust and reliable PCB layouts that meet the demands of modern electronic applications. Through careful planning and attention to detail, the potential for assembly errors can be minimized, resulting in a successful and efficient production process.