Moto m pcb
Understanding the Design and Layout of Moto M PCB
The design and layout of the Moto M Printed Circuit Board (PCB) are critical to the functionality and performance of the device. Understanding the intricacies of this component requires a comprehensive examination of its various elements and how they interconnect to form a cohesive system.
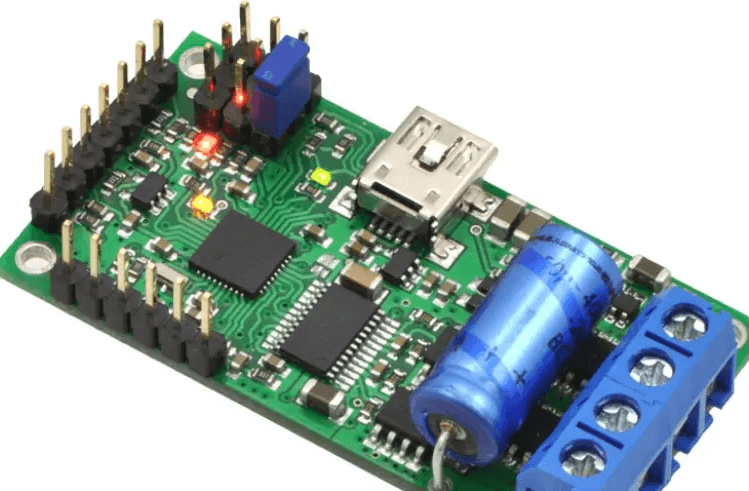
The Moto M PCB serves as the backbone of the smartphone, housing and interlinking all the essential electronic components that enable the device to operate efficiently.
To begin with, the Moto M PCB is meticulously designed to accommodate a multitude of components, including the central processing unit (CPU), memory chips, power management units, and various sensors.
Each of these components is strategically placed to optimize space and ensure efficient signal transmission. The layout is a result of extensive planning and simulation, aimed at minimizing electromagnetic interference and ensuring thermal management. This careful arrangement is crucial, as any misalignment or interference can lead to performance degradation or even device failure.
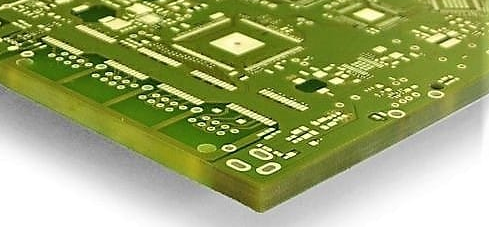
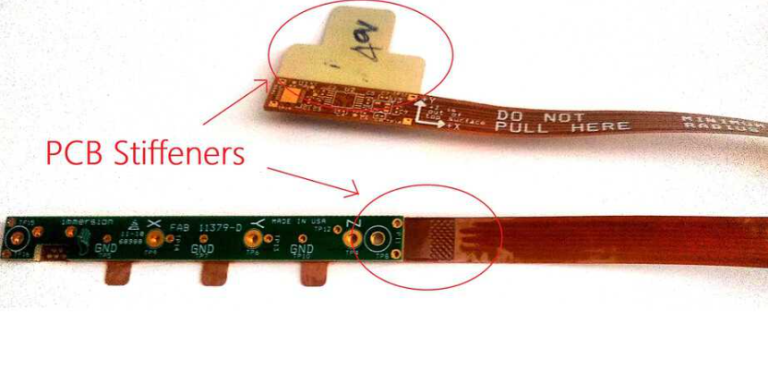
Transitioning to the materials used, the Moto M PCB is typically constructed from high-quality fiberglass reinforced epoxy laminate, known as FR4.
This material is chosen for its excellent electrical insulation properties and mechanical strength. The copper traces etched onto the PCB serve as the pathways for electrical signals, connecting different components and enabling communication between them. These traces are designed with precision, taking into account factors such as signal integrity and impedance matching, which are vital for maintaining the integrity of high-speed data transmission.
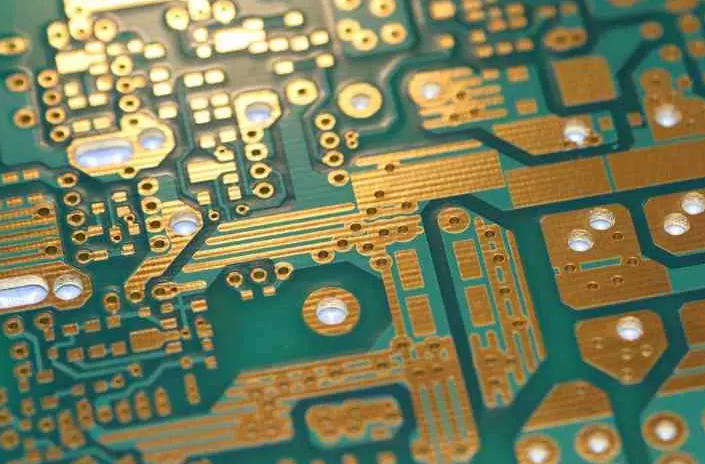
Furthermore, the Moto M PCB incorporates multiple layers to accommodate the complex circuitry required for modern smartphones.
These layers are separated by insulating materials and are interconnected through vias, which are small holes drilled through the board and filled with conductive material. The use of multiple layers allows for a more compact design, reducing the overall size of the device while still providing ample space for all necessary components. This multi-layer approach also helps in managing the thermal performance of the PCB, as heat generated by the components can be dissipated more effectively.
In addition to the physical layout, the Moto M PCB design also involves extensive software simulation and testing.
Engineers use advanced computer-aided design (CAD) tools to create detailed models of the PCB and simulate its performance under various conditions. These simulations help identify potential issues such as signal crosstalk, power distribution problems, and thermal hotspots. By addressing these issues during the design phase, engineers can ensure that the final product meets the required performance standards and reliability criteria.
Moreover, the assembly process of the Moto M PCB is equally critical.
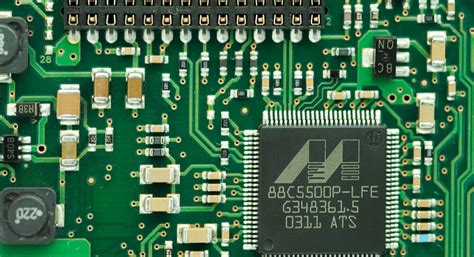
Surface-mount technology (SMT) is commonly used to place components onto the PCB with high precision. This process involves the use of automated machines that place components onto the board and solder them in place. The accuracy of this process is paramount, as even a slight misalignment can affect the performance of the device. Quality control measures, such as automated optical inspection (AOI) and X-ray inspection, are employed to ensure that the assembly process meets the stringent quality standards.
In conclusion, the design and layout of the Moto M PCB are fundamental to the overall performance and reliability of the device. From the careful placement of components to the use of high-quality materials and advanced simulation tools, every aspect of the PCB design is meticulously planned and executed. This attention to detail ensures that the Moto M smartphone delivers the performance and reliability that users expect.
Common Issues and Troubleshooting Tips for Moto M PCB
The Moto M, a popular smartphone model, is known for its sleek design and robust performance. However, like any electronic device, it is not immune to issues, particularly those related to its Printed Circuit Board (PCB). The PCB is the heart of the device, housing essential components that ensure its functionality. Understanding common issues and troubleshooting tips for the Moto M PCB can help users maintain their device’s performance and longevity.
One prevalent issue with the Moto M PCB is overheating.
Overheating can be caused by various factors, including prolonged usage, running multiple applications simultaneously, or a malfunctioning component on the PCB. To troubleshoot this issue, users should first ensure that their device is not exposed to direct sunlight or high temperatures for extended periods. Additionally, closing unnecessary applications and giving the device periodic breaks can help manage its temperature. If overheating persists, it may indicate a deeper issue within the PCB, necessitating professional inspection and potential replacement of faulty components.
Another common problem is the device failing to power on.
This issue can stem from a drained battery, a faulty power button, or a damaged PCB. Initially, users should attempt to charge the device using a different charger and cable to rule out charging accessories as the cause. If the device still does not power on, inspecting the power button for any physical damage or debris is advisable. Should these steps fail to resolve the issue, the problem likely lies within the PCB. In such cases, professional diagnosis and repair are recommended to avoid further damage.
Connectivity issues, such as problems with Wi-Fi, Bluetooth, or cellular signals, can also be traced back to the PCB.
These issues may arise from damaged antennas or faulty connections on the PCB. Users experiencing connectivity problems should first ensure that their device’s software is up to date, as updates often include fixes for connectivity bugs. If the issue persists, resetting network settings or performing a factory reset may help. However, if these measures do not resolve the problem, it is possible that the PCB requires inspection and repair by a qualified technician.
Screen-related issues, such as flickering, unresponsiveness, or display artifacts, can also be linked to the PCB.
These problems may result from loose connections, damaged display components, or software glitches. To troubleshoot, users should start by restarting the device and ensuring that the software is current. If the screen issues continue, gently pressing around the edges of the screen may help re-establish any loose connections. Persistent problems, however, often indicate a need for professional repair, as they may involve intricate PCB components.
Battery drainage is another issue that can be associated with the PCB.
Rapid battery depletion can result from software anomalies, background applications, or a malfunctioning PCB. Users should begin by checking for software updates and closing background applications that may be consuming power. Additionally, enabling battery-saving modes can help extend battery life. If these steps do not alleviate the issue, it may be necessary to have the PCB examined for defects that could be causing excessive power consumption.
In conclusion, while the Moto M is a reliable device, its PCB can encounter various issues that affect its performance. By understanding common problems such as overheating, power failures, connectivity issues, screen malfunctions, and battery drainage, users can take proactive steps to troubleshoot and maintain their device. However, for persistent or complex issues, seeking professional assistance is crucial to ensure proper diagnosis and repair, thereby extending the device’s lifespan and functionality.
Upgrading and Modifying Your Moto M PCB for Better Performance
Upgrading and modifying your Moto M PCB for better performance can significantly enhance your device’s functionality and longevity. The printed circuit board (PCB) is the backbone of any electronic device, including the Moto M, as it houses the essential components and circuitry that enable the device to operate efficiently. Therefore, understanding the intricacies of the Moto M PCB and the potential upgrades can be highly beneficial for tech enthusiasts and professionals alike.
To begin with, one of the most common upgrades involves enhancing the memory capacity of the Moto M.
By replacing the existing memory chips with higher-capacity ones, users can experience a noticeable improvement in the device’s speed and multitasking capabilities. This process, however, requires a meticulous approach, as improper handling of the PCB can lead to irreversible damage. It is advisable to use anti-static tools and follow proper grounding techniques to prevent any electrostatic discharge that could harm the delicate components.
In addition to memory upgrades, another significant modification is the replacement of the processor.
The central processing unit (CPU) is the heart of the Moto M, and upgrading to a more powerful processor can drastically improve the device’s performance. This modification, however, is not for the faint-hearted, as it involves desoldering the old processor and soldering the new one onto the PCB. Precision and expertise are paramount in this process, and it is often recommended to seek professional assistance if one is not confident in their soldering skills.
Moreover, enhancing the power management system of the Moto M PCB can lead to better battery life and overall efficiency.
Upgrading the power management integrated circuits (PMICs) can optimize the power distribution across the device, ensuring that each component receives the appropriate amount of power. This not only improves performance but also reduces the risk of overheating and extends the lifespan of the device. Additionally, incorporating advanced thermal management solutions, such as heat sinks or thermal pads, can further aid in maintaining optimal operating temperatures.
Furthermore, upgrading the connectivity modules on the Moto M PCB can enhance the device’s communication capabilities.
Replacing outdated Wi-Fi and Bluetooth modules with the latest versions can provide faster data transfer rates and more stable connections. This is particularly beneficial for users who rely heavily on wireless connectivity for their daily tasks. Similarly, upgrading the USB ports to support newer standards, such as USB-C, can improve data transfer speeds and charging efficiency.
Another aspect to consider is the audio and visual components of the Moto M PCB.
Upgrading the audio codec and amplifier can result in superior sound quality, making the device more suitable for multimedia applications. Similarly, enhancing the display driver IC can improve the screen’s resolution and refresh rate, providing a better visual experience.
In conclusion, upgrading and modifying your Moto M PCB for better performance involves a series of intricate and precise steps. From memory and processor upgrades to power management and connectivity enhancements, each modification requires careful consideration and expertise. While these upgrades can significantly improve the device’s functionality and longevity, it is crucial to approach each step with caution and, when necessary, seek professional assistance. By doing so, users can unlock the full potential of their Moto M and enjoy a more efficient and powerful device.

A Comprehensive Guide to Repairing Moto M PCB
Repairing the printed circuit board (PCB) of a Moto M smartphone can be a meticulous yet rewarding endeavor. The PCB is the heart of the device, housing essential components that ensure its functionality. Understanding the intricacies of this process is crucial for anyone attempting to undertake such a repair. This guide aims to provide a comprehensive overview of the steps involved, the tools required, and the precautions necessary to successfully repair a Moto M PCB.
To begin with, it is essential to gather the appropriate tools.
A precision screwdriver set, a multimeter, soldering iron, desoldering pump, tweezers, and a magnifying glass are indispensable. Additionally, having a clean, well-lit workspace is vital to avoid any mishaps. Once the tools are assembled, the next step involves disassembling the Moto M. Carefully remove the back cover, battery, SIM card, and any other removable components. It is crucial to keep track of all screws and parts to ensure a smooth reassembly process later.
With the device disassembled, the focus shifts to identifying the issue with the PCB.
Common problems include broken traces, damaged components, or soldering defects. Using a magnifying glass, inspect the PCB for any visible signs of damage. If no obvious issues are found, a multimeter can be employed to test the continuity of the traces and the functionality of individual components. This step is critical as it helps pinpoint the exact location of the fault.
Once the problematic area is identified, the repair process can commence.
If a broken trace is detected, a fine wire can be used to bridge the gap. This requires precision and a steady hand, as improper soldering can cause further damage. For damaged components, desoldering the faulty part and replacing it with a new one is necessary. This involves heating the solder joint with a soldering iron and using a desoldering pump to remove the molten solder. The new component can then be soldered in place, ensuring a secure and reliable connection.
Throughout the repair process, it is imperative to exercise caution.
Overheating the PCB can cause irreparable damage, so it is advisable to use a soldering iron with temperature control. Additionally, static electricity can harm sensitive components, making it essential to use an anti-static wrist strap. These precautions help mitigate the risk of further damage and increase the likelihood of a successful repair.
After completing the necessary repairs, reassembling the Moto M is the final step.
Carefully place all components back in their respective positions, ensuring that all connections are secure. Reattach the back cover, insert the battery, and power on the device to test its functionality. If the repair was successful, the Moto M should operate as expected, restoring its usability.
In conclusion, repairing a Moto M PCB requires a combination of the right tools, a methodical approach, and a keen eye for detail. By following the steps outlined in this guide, one can effectively diagnose and address common issues, thereby extending the lifespan of the device. While the process may seem daunting, with patience and precision, it is entirely possible to restore a faulty Moto M to its former glory.