PCB Layout Design Review Checklist: Key Considerations for Optimal Performance
Introduction
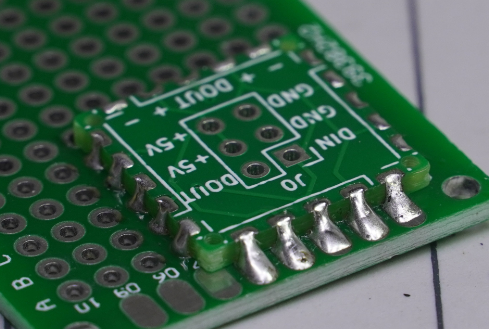
Printed Circuit Board (PCB) layout design is a critical phase in electronics development, directly impacting signal integrity, power distribution, thermal management, and manufacturability. A thorough design review ensures that the PCB meets performance, reliability, and compliance requirements. This article outlines essential PCB layout design review elements, categorized into electrical, mechanical, thermal, and manufacturing considerations.

1. Electrical Considerations
1.1 Signal Integrity
- Trace Routing:
- High-speed signals should follow shortest paths with controlled impedance.
- Avoid sharp angles (use 45° or curved traces).
- Maintain consistent trace widths for impedance matching.
- Crosstalk Mitigation:
- Ensure adequate spacing between parallel traces.
- Use ground planes to separate sensitive signals.
- Apply differential pair routing where necessary.
- Return Paths:
- Verify uninterrupted ground return paths for high-frequency signals.
- Avoid splits or gaps in reference planes under critical traces.
1.2 Power Integrity
- Power Distribution Network (PDN):
- Use sufficient decoupling capacitors near IC power pins.
- Optimize power plane layers to minimize voltage drops.
- Check for proper via stitching in power and ground planes.
- Voltage Drop Analysis:
- Ensure traces carrying high current are wide enough.
- Simulate IR drop for critical power rails.
1.3 Electromagnetic Compatibility (EMC)
- Shielding & Filtering:
- Place ferrite beads or filters near connectors.
- Use ground guards for sensitive analog signals.
- Loop Area Minimization:
- Reduce loop areas in high-frequency circuits to lower EMI.
- Keep high-speed signal traces close to their return paths.

2. Mechanical Considerations
2.1 Component Placement
- Functional Grouping:
- Place related components (e.g., MCU, memory, peripherals) together.
- Separate analog and digital sections to minimize interference.
- Board Edge Clearance:
- Ensure components and traces maintain safe distances from board edges.
- Follow manufacturer’s guidelines for panelization and depaneling.
2.2 Connector & Interface Placement
- Accessibility:
- Position connectors for easy assembly and maintenance.
- Align connectors with enclosure cutouts.
- Stress Relief:
- Reinforce connectors subjected to mechanical stress (e.g., USB, power jacks).
2.3 Mounting & Assembly
- Footprint Accuracy:
- Verify component footprints match datasheet specifications.
- Check pad sizes, spacing, and solder mask openings.
- Assembly Feasibility:
- Ensure adequate clearance for pick-and-place machines.
- Avoid tombstoning risks with balanced pad sizes for passive components.
3. Thermal Considerations
3.1 Heat Dissipation
- Thermal Pads & Vias:
- Use thermal vias under high-power components (e.g., MOSFETs, regulators).
- Ensure proper copper pours for heat spreading.
- Component Spacing:
- Avoid placing heat-sensitive parts near high-power devices.
3.2 Airflow & Cooling
- Natural Convection:
- Orient components to allow unobstructed airflow.
- Place hot components near board edges if no forced cooling is used.
- Heatsink Integration:
- Verify mechanical fit and mounting holes for heatsinks.
4. Manufacturing & Test Considerations
4.1 Design for Manufacturing (DFM)
- Minimum Trace/Space:
- Adhere to PCB fabricator’s capabilities (e.g., 4/4 mil trace/space).
- Solder Mask & Silkscreen:
- Ensure solder mask covers exposed copper adequately.
- Verify legible and non-overlapping silkscreen labels.
- Drill & Annular Ring:
- Confirm via hole sizes meet manufacturer’s specifications.
- Maintain sufficient annular ring to prevent breakout.
4.2 Testability
- Test Points:
- Include test points for critical signals and power rails.
- Ensure probe accessibility for in-circuit testing (ICT).
- Boundary Scan (JTAG):
- Verify JTAG header placement for programming and debugging.
5. Documentation & Final Checks
5.1 Schematic vs. Layout Verification
- Netlist Cross-Check:
- Ensure all connections match the schematic.
- Verify no unconnected or shorted nets.
- Design Rule Check (DRC):
- Run DRC with appropriate constraints (e.g., clearance, impedance).
5.2 Layer Stackup Review
- Material Selection:
- Confirm dielectric materials meet frequency and thermal requirements.
- Impedance Control:
- Verify layer thickness and trace width for controlled impedance signals.
5.3 Final Design Review
- Checklist Compliance:
- Use a standardized PCB review checklist.
- Peer Review:
- Involve multiple engineers for cross-verification.
Conclusion
A comprehensive PCB layout design review minimizes errors, enhances performance, and reduces costly rework. By systematically evaluating electrical, mechanical, thermal, and manufacturing aspects, designers can ensure robust and reliable PCB performance. Implementing a structured review process with checklists and simulations significantly improves first-pass success rates in PCB fabrication and assembly.
By following these guidelines, engineers can optimize PCB designs for functionality, manufacturability, and long-term reliability.


