Pcb prototype kit
Benefits Of Using A PCB Prototype Kit For Rapid Development
The utilization of a PCB prototype kit in the realm of electronics design and development offers a multitude of benefits, particularly in the context of rapid development. These kits, which typically include a variety of essential components such as blank PCBs, connectors, and other necessary materials, serve as invaluable tools for engineers and designers aiming to expedite the development process.
One of the primary advantages of using a PCB prototype kit is the significant reduction in development time.
By providing all the necessary components in a single package, these kits eliminate the need for sourcing individual parts from multiple suppliers, thereby streamlining the initial stages of the design process. This consolidation not only saves time but also reduces the potential for errors that can arise from mismatched or incompatible components.
Moreover, PCB prototype kits facilitate iterative testing and refinement, which is crucial for achieving optimal design performance.
The ability to quickly assemble and test different configurations allows designers to identify and rectify issues early in the development cycle. This iterative approach is particularly beneficial in complex projects where multiple design iterations are often required to meet stringent performance criteria. Additionally, the hands-on nature of working with a prototype kit enhances the designer’s understanding of the circuit’s behavior, leading to more informed design decisions and ultimately, a more robust final product.
Another significant benefit of using a PCB prototype kit is the cost-effectiveness it offers.
Traditional methods of PCB prototyping often involve expensive custom fabrication processes, which can be prohibitive, especially for small-scale projects or startups with limited budgets. In contrast, prototype kits provide a more affordable alternative, allowing designers to experiment and innovate without the financial burden associated with custom manufacturing. This cost efficiency extends to the educational sector as well, where students and hobbyists can gain practical experience in PCB design without incurring substantial expenses.
Furthermore, PCB prototype kits contribute to enhanced design flexibility.
The modular nature of these kits allows for easy modifications and adjustments, enabling designers to explore various design possibilities without being constrained by the limitations of pre-fabricated PCBs. This flexibility is particularly advantageous in the early stages of product development, where design requirements may evolve rapidly based on testing outcomes and feedback. By accommodating these changes seamlessly, prototype kits support a more dynamic and responsive development process.
In addition to these practical benefits, PCB prototype kits also play a crucial role in fostering innovation.
By lowering the barriers to entry, these kits empower a broader range of individuals and organizations to engage in electronics design and development. This democratization of technology not only accelerates the pace of innovation but also leads to a more diverse array of solutions and applications. As more people gain access to the tools needed to bring their ideas to life, the potential for groundbreaking advancements in various fields, from consumer electronics to medical devices, increases exponentially.
In conclusion, the benefits of using a PCB prototype kit for rapid development are manifold. From reducing development time and costs to enhancing design flexibility and fostering innovation, these kits provide a comprehensive solution for modern electronics design challenges. By streamlining the prototyping process and enabling iterative testing and refinement, PCB prototype kits support the creation of high-quality, reliable products while also promoting a more inclusive and dynamic development landscape.
Essential Components Included In A PCB Prototype Kit
A PCB prototype kit is an indispensable tool for electronics enthusiasts, engineers, and designers who are keen on developing and testing their circuit designs before committing to full-scale production. These kits are meticulously curated to include a variety of essential components that facilitate the creation, testing, and refinement of printed circuit boards (PCBs). Understanding the components included in a PCB prototype kit is crucial for maximizing its utility and ensuring a seamless prototyping process.
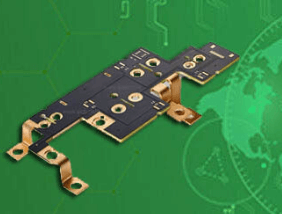
At the heart of any PCB prototype kit is the PCB board itself.
These boards are typically made from materials such as FR4, a type of fiberglass-reinforced epoxy laminate, which provides a sturdy and reliable foundation for mounting electronic components. The boards come in various sizes and configurations, allowing users to select the most appropriate one for their specific project requirements. Additionally, some kits may include pre-drilled holes and pre-etched copper traces, which simplify the process of component placement and soldering.
Transitioning from the PCB board, another critical component found in these kits is the assortment of electronic components.
These components include resistors, capacitors, diodes, transistors, and integrated circuits (ICs), each serving a unique function within the circuit. Resistors, for instance, are used to control the flow of electric current, while capacitors store and release electrical energy as needed. Diodes ensure current flows in a single direction, and transistors act as switches or amplifiers. Integrated circuits, which are essentially miniature circuits within a single package, perform a variety of complex functions, ranging from simple logic operations to advanced signal processing.
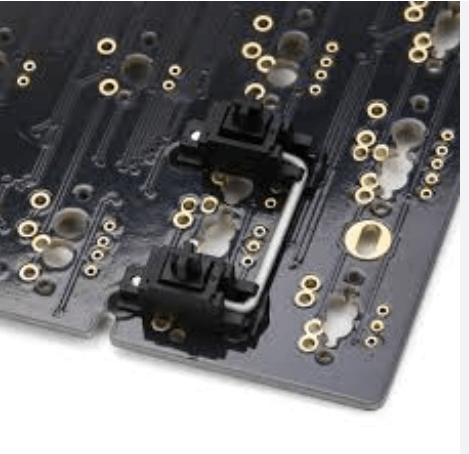
In addition to these fundamental components, PCB prototype kits often include connectors and headers.
These elements are essential for establishing reliable electrical connections between different parts of the circuit. Connectors come in various forms, such as pin headers, sockets, and terminal blocks, each designed to facilitate easy and secure connections. Headers, on the other hand, provide a convenient way to interface the PCB with external devices or other PCBs, enabling modular and expandable designs.
Moving forward, another indispensable component in a PCB prototype kit is the soldering equipment.
Soldering is the process of joining electronic components to the PCB by melting a metal alloy called solder. A typical kit includes a soldering iron, solder wire, and sometimes a soldering stand or sponge for cleaning the iron’s tip. The soldering iron heats the solder wire, allowing it to flow and create a strong electrical and mechanical bond between the components and the PCB. Proper soldering techniques are crucial for ensuring the reliability and performance of the final circuit.
Furthermore, many PCB prototype kits come equipped with various tools and accessories that aid in the assembly and testing process.
These tools may include wire cutters, pliers, tweezers, and screwdrivers, which are essential for manipulating small components and making precise adjustments. Additionally, some kits provide testing equipment such as multimeters and oscilloscopes, which are invaluable for diagnosing and troubleshooting circuit issues. Multimeters measure electrical properties like voltage, current, and resistance, while oscilloscopes visualize electrical signals, allowing users to observe the behavior of their circuits in real-time.
In conclusion, a PCB prototype kit is a comprehensive package that includes a variety of essential components designed to facilitate the development and testing of electronic circuits. From the PCB board and electronic components to connectors, soldering equipment, and various tools, each element plays a crucial role in the prototyping process. By understanding and effectively utilizing these components, users can streamline their workflow, enhance their designs, and ultimately achieve successful and reliable circuit prototypes.
How To Choose The Right PCB Prototype Kit For Your Project
Selecting the appropriate PCB prototype kit for your project is a critical step in ensuring the success of your electronic design endeavors. The process involves a careful evaluation of various factors that can significantly impact the functionality, efficiency, and overall outcome of your project. To begin with, it is essential to understand the specific requirements of your project. This includes the complexity of the circuit, the number of layers needed, and the type of components that will be used. By clearly defining these parameters, you can narrow down the options and focus on kits that are tailored to meet your needs.
One of the primary considerations when choosing a PCB prototype kit is the quality of the materials provided.
High-quality materials not only ensure better performance but also enhance the durability and reliability of the final product. It is advisable to opt for kits that include high-grade copper-clad boards, reliable soldering materials, and robust components. Additionally, the precision of the etching process is crucial, as it directly affects the accuracy of the circuit paths. Therefore, selecting a kit that offers precise etching tools and materials is paramount.
Another important factor to consider is the ease of use of the PCB prototype kit.
For beginners, it is beneficial to choose kits that come with comprehensive instructions and user-friendly tools. This can significantly reduce the learning curve and help avoid common mistakes during the prototyping process. On the other hand, experienced users might prefer kits that offer more advanced features and customization options, allowing for greater flexibility and creativity in their designs.
The availability of support and resources is also a key aspect to consider.
Many reputable manufacturers provide extensive documentation, tutorials, and customer support to assist users throughout the prototyping process. Access to these resources can be invaluable, especially when troubleshooting issues or seeking guidance on best practices. Furthermore, some kits come with software tools that facilitate the design and testing of circuits, making the prototyping process more efficient and streamlined.
Cost is another critical consideration when selecting a PCB prototype kit.
While it is tempting to opt for the cheapest option available, it is important to weigh the cost against the quality and features offered. Investing in a slightly more expensive kit that provides superior materials, better support, and advanced tools can ultimately save time and reduce the likelihood of errors, leading to a more successful project outcome.
Compatibility with your existing tools and equipment is another factor that should not be overlooked.
Ensure that the kit you choose is compatible with your soldering iron, multimeter, and other essential tools. This can prevent unnecessary complications and ensure a smoother prototyping process. Additionally, consider the scalability of the kit. If you anticipate working on more complex projects in the future, it may be worthwhile to invest in a kit that can accommodate more advanced requirements.
In conclusion, choosing the right PCB prototype kit for your project involves a careful assessment of your specific needs, the quality of materials, ease of use, available support, cost, and compatibility with existing tools. By taking these factors into account, you can make an informed decision that will enhance the efficiency and success of your electronic design projects.
Step-By-Step Guide To Assembling Your First PCB Prototype Kit
Assembling your first PCB prototype kit can be an exciting yet daunting task, especially for beginners. However, with a methodical approach and attention to detail, the process can be both educational and rewarding. To begin, it is essential to gather all necessary components and tools. Typically, a PCB prototype kit includes the printed circuit board itself, various electronic components such as resistors, capacitors, and integrated circuits, as well as soldering equipment. Ensuring that you have a well-lit, organized workspace will facilitate a smoother assembly process.
The first step in assembling your PCB prototype is to familiarize yourself with the schematic diagram provided in the kit.
This diagram serves as a blueprint, illustrating the connections and placements of each component on the board. Carefully study the schematic to understand the flow of the circuit and the function of each part. Once you have a clear understanding, you can proceed to the next step, which involves placing the components onto the PCB.
Begin by identifying and placing the smaller components, such as resistors and capacitors, onto the board.
These components are typically mounted on the top side of the PCB, with their leads inserted through the corresponding holes. It is crucial to ensure that each component is placed in its correct position as per the schematic diagram. To secure the components in place, gently bend the leads on the underside of the board. This will prevent them from falling out during the soldering process.
Next, it is time to solder the components to the PCB. Soldering is a critical skill in PCB assembly, requiring precision and care.
Heat your soldering iron to the appropriate temperature, and apply a small amount of solder to the tip. Then, touch the soldering iron to the joint where the component lead meets the PCB pad, and feed a small amount of solder into the joint. The solder should flow smoothly and create a solid connection. Repeat this process for each component, ensuring that all connections are secure and free of cold joints or solder bridges.
After soldering the smaller components, move on to the larger ones, such as integrated circuits and connectors.
These components may require additional care, as they are more sensitive to heat. Use a heat sink or a pair of tweezers to dissipate heat and protect the components during soldering. Once all components are soldered in place, inspect the board for any soldering defects or misplaced parts. Correct any issues before proceeding to the next step.
The final step in assembling your PCB prototype is to test the circuit.
Connect the PCB to a power source and use a multimeter to check for continuity and proper voltage levels at various points in the circuit. This step is crucial to ensure that the circuit functions as intended and to identify any potential issues. If the circuit does not work as expected, refer back to the schematic diagram and troubleshoot the problem areas.
In conclusion, assembling a PCB prototype kit involves a series of meticulous steps, from understanding the schematic diagram to soldering components and testing the circuit. By following this step-by-step guide and paying close attention to detail, you can successfully assemble your first PCB prototype and gain valuable experience in electronics assembly.


