PCB Vibration Testing: Methods, Standards, and Best Practices
1. Introduction
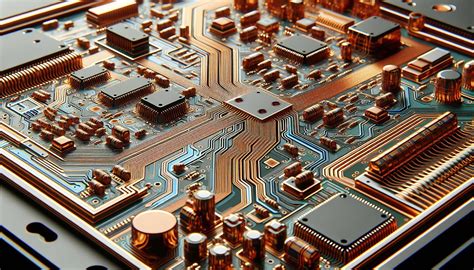
Printed Circuit Boards (PCBs) are integral components in modern electronic devices, ranging from consumer electronics to aerospace systems. However, PCBs are often subjected to mechanical stresses, including vibrations, which can lead to failures such as cracked solder joints, broken traces, or component detachment. Vibration testing is a critical process to ensure PCB reliability under real-world operating conditions.
This article explores the fundamentals of PCB vibration testing, including testing methods, industry standards, equipment, and best practices to enhance PCB durability.
2. Why is Vibration Testing Important for PCBs?
Vibration testing simulates the mechanical stresses a PCB may encounter during transportation, operation, or environmental exposure. Key reasons for conducting vibration testing include:
- Identifying Weaknesses: Detects design flaws, poor solder joints, or insufficient mechanical support.
- Ensuring Reliability: Validates that PCBs can withstand vibrations in automotive, aerospace, or industrial applications.
- Meeting Compliance: Many industries require adherence to vibration testing standards (e.g., MIL-STD, IEC, IPC).
- Preventing Field Failures: Reduces the risk of PCB failure in mission-critical applications.
3. Types of Vibration Testing for PCBs
Vibration testing can be categorized into several types based on the applied forces and objectives:
3.1 Sinusoidal Vibration Testing
- Applies a single-frequency vibration at varying amplitudes.
- Used to identify resonant frequencies and structural weaknesses.
- Common in aerospace and military applications.
3.2 Random Vibration Testing
- Simulates real-world vibration environments with multiple frequencies.
- More realistic for automotive and industrial applications.
- Helps assess fatigue life under continuous vibration.
3.3 Shock Testing
- Evaluates PCB response to sudden impacts (e.g., drops or explosions).
- Important for military and portable electronics.
3.4 Sweep Sine Testing
- Gradually increases frequency to identify natural resonances.
- Helps in optimizing PCB mounting and damping strategies.
4. Industry Standards for PCB Vibration Testing
Several standards govern PCB vibration testing, depending on the application:
4.1 Military & Aerospace (MIL-STD-810, DO-160)
- MIL-STD-810: Covers environmental testing, including vibration for defense equipment.
- DO-160: Specifies vibration testing for avionics.
4.2 Automotive (ISO 16750, SAE J2380)
- ISO 16750-3: Defines vibration resistance for automotive electronics.
- SAE J2380: Focuses on electric vehicle battery vibration testing.
4.3 Consumer Electronics (IEC 60068-2-6, IPC-9701)
- IEC 60068-2-6: General vibration testing for electronic components.
- IPC-9701: Evaluates solder joint reliability under mechanical stress.
5. Vibration Testing Equipment and Setup
5.1 Vibration Shakers (Electrodynamic & Hydraulic)
- Generate controlled vibrations for testing.
- Electrodynamic shakers are common for high-frequency testing.
- Hydraulic shakers are used for high-force, low-frequency tests.
5.2 Fixturing & Mounting
- PCBs must be securely mounted to simulate real-world conditions.
- Non-conductive fixtures prevent interference with electrical signals.
5.3 Accelerometers & Data Acquisition Systems
- Measure vibration response at different PCB locations.
- Help identify resonant frequencies and stress points.
5.4 Environmental Chambers (Optional)
- Combine vibration with temperature/humidity testing (e.g., HALT/HASS).
6. Step-by-Step PCB Vibration Testing Procedure
6.1 Pre-Test Preparation
- Inspect the PCB for visible defects.
- Define test parameters (frequency range, amplitude, duration) based on standards.
6.2 Mounting the PCB
- Secure the PCB to the shaker table using appropriate fixtures.
- Ensure no additional damping from loose connections.
6.3 Running the Test
- Apply sinusoidal, random, or shock vibrations as required.
- Monitor PCB response using accelerometers.
6.4 Post-Test Inspection
- Check for physical damage (cracks, loose components).
- Perform electrical tests (continuity, functionality).
7. Common PCB Failures During Vibration Testing
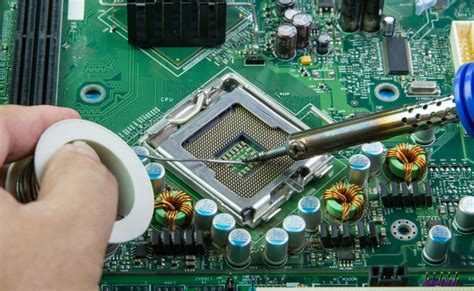
- Solder Joint Cracking: Due to repetitive stress.
- Component Detachment: Weak adhesive or insufficient soldering.
- Trace Fractures: Poor PCB layout or excessive flexing.
- Resonance-Induced Failures: Natural frequencies causing amplified stress.
8. Best Practices to Improve PCB Vibration Resistance
8.1 Design Considerations
- Stiffen the PCB: Use thicker substrates or metal cores.
- Avoid High-Stress Components: Place heavy components near mounting points.
- Use Strain Relief: Flexible connectors to reduce stress.
8.2 Manufacturing Improvements
- Stronger Solder Joints: Use lead-free solder with higher fatigue resistance.
- Conformal Coating: Protects against vibration-induced cracks.
- Underfill for BGAs: Reinforces ball grid array connections.
8.3 Testing Optimization
- Early Prototype Testing: Identify issues before mass production.
- Multi-Axis Testing: Simulate real-world multi-directional vibrations.
- Accelerated Life Testing: Predict long-term reliability.
9. Case Study: Vibration Testing in Automotive Electronics
A leading automotive manufacturer conducted random vibration testing (ISO 16750-3) on an ECU (Engine Control Unit) PCB. The test revealed solder joint fractures near a large capacitor. The solution involved:
- Redesigning the PCB layout to reduce mechanical stress.
- Using reinforced solder paste.
- Implementing conformal coating.
Post-retesting showed a 40% improvement in vibration resistance.
10. Future Trends in PCB Vibration Testing
- AI-Powered Predictive Analysis: Machine learning to predict failure points.
- Miniaturized Sensors: Embedded MEMS accelerometers for real-time monitoring.
- Advanced Simulation Tools: Finite Element Analysis (FEA) for virtual vibration testing.
11. Conclusion
PCB vibration testing is essential for ensuring reliability in harsh environments. By following industry standards, using proper equipment, and implementing robust design practices, manufacturers can significantly improve PCB durability. As technology evolves, advanced testing methods will further enhance PCB performance in aerospace, automotive, and consumer electronics applications.
By integrating vibration testing early in the design phase, companies can reduce costly failures and deliver high-quality electronic products.