
How to Set Up Proper Shielding for PCB Layers
Introduction
Printed Circuit Board (PCB) shielding is a critical aspect of modern electronics design, particularly as devices become more compact and operate at higher frequencies. Proper shielding techniques help mitigate electromagnetic interference (EMI), reduce crosstalk between components, and ensure signal integrity throughout the board. This 2000-word article will explore the fundamental principles, techniques, and best practices for implementing effective shielding in PCB layer stacks.
Understanding the Need for PCB Shielding
Electromagnetic interference has become increasingly problematic in today’s dense electronic environments. Two primary types of interference affect PCB performance:
- Radiated EMI: Electromagnetic waves propagating through the air
- Conducted EMI: Unwanted signals traveling through conductors and PCB traces
Without proper shielding, these interference sources can cause:
- Signal degradation
- Increased bit error rates
- False triggering of digital circuits
- Reduced signal-to-noise ratios
- Compliance failures with regulatory standards (FCC, CE, etc.)
Types of PCB Shielding
1. Layer-based Shielding
Layer shielding involves dedicating entire PCB layers to ground or power planes that act as electromagnetic shields. This is the most common and cost-effective method for multilayer boards.
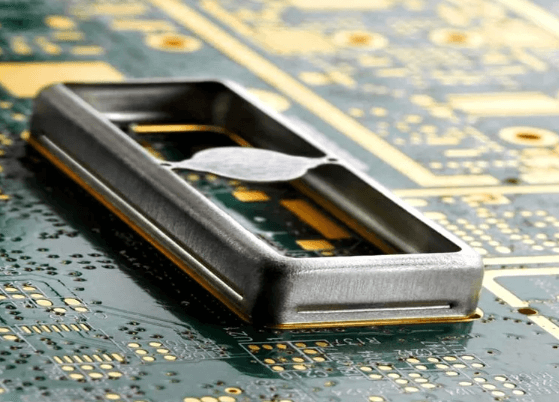
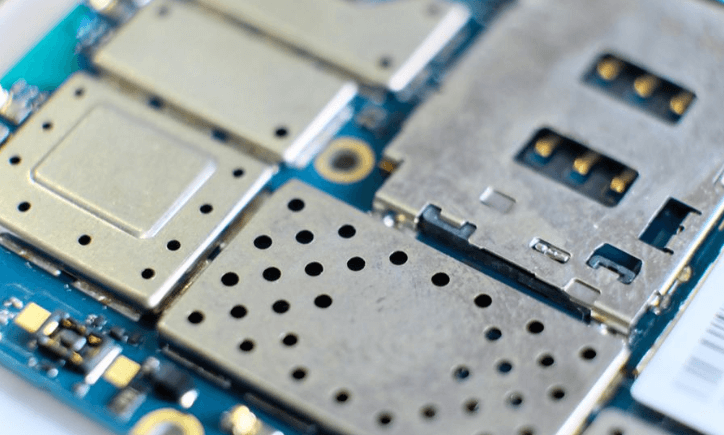
2. Component-level Shielding
Discrete shielding cans or cages placed over specific components or circuit sections. These are typically made of metal and soldered to ground pads on the PCB surface.
3. Conformal Shielding
A sprayed-on or deposited conductive coating that covers either selected areas or the entire board surface.
This article will focus primarily on layer-based shielding techniques as they are fundamental to proper PCB stackup design.
PCB Layer Stackup Fundamentals
A proper layer stackup is the foundation for effective shielding. Key considerations include:
- Layer Count: More layers allow for better shielding but increase cost
- Layer Arrangement: Critical for controlling impedance and crosstalk
- Material Selection: Dielectric materials affect signal propagation and shielding effectiveness
A typical 4-layer stackup might look like:
- Top Signal Layer
- Ground Plane
- Power Plane
- Bottom Signal Layer
As layer counts increase, more sophisticated shielding configurations become possible.
Shielding Layer Configuration Techniques
1. Ground Plane Shielding
Ground planes serve multiple purposes:
- Provide current return paths
- Control impedance for transmission lines
- Shield against electromagnetic interference
Best practices:
- Use continuous ground planes without splits when possible
- Maintain proper clearance around vias and through-holes
- Ensure low-impedance connections between ground layers
2. Power Plane Shielding
Power planes can also function as shields when properly implemented:
- Place power planes adjacent to sensitive signal layers
- Use multiple power planes for different voltage domains
- Implement proper decoupling between power and ground planes
3. Stripline Configuration
Stripline routing sandwiches signal traces between two reference planes (usually ground):
- Provides excellent shielding from both above and below
- Reduces crosstalk between adjacent traces
- Offers consistent impedance control
4. Microstrip Alternatives
Microstrip routing places signals on outer layers with a single reference plane:
- Less effective shielding than stripline
- More susceptible to external interference
- Easier to route and cheaper to manufacture
Advanced Shielding Techniques
1. Faraday Cage Implementation
Create a complete enclosure around sensitive circuits by:
- Using ground planes above and below the signal layer
- Connecting the planes with a perimeter of grounded vias
- Maintaining via spacing less than λ/10 of the highest frequency of concern
2. Split Plane Design
When multiple voltage domains are necessary:
- Carefully partition planes to prevent coupling
- Use moats (isolated areas) between different power sections
- Implement proper bridging components where signals cross domains
3. Embedded Shielding Layers
Some high-end PCBs incorporate dedicated shielding layers:
- Thin copper layers with no signals, only ground connections
- Typically placed between noisy and sensitive circuit sections
- May use special materials like lossy dielectrics for enhanced absorption
Material Considerations for Effective Shielding
1. Copper Weight
Standard PCB copper thicknesses (1oz/ft², 2oz/ft², etc.) affect shielding:
- Thicker copper provides better shielding but increases cost
- May require adjustments to dielectric spacing for impedance control
2. Dielectric Materials
Key properties to consider:
- Dielectric constant (Dk) – affects signal propagation speed
- Loss tangent – impacts high-frequency performance
- Thermal stability – important for reliability
3. Specialized Materials
For extreme shielding needs:
- Ferrite-loaded materials for EMI absorption
- Conductive coatings for edge shielding
- Anisotropic conductive films for z-axis shielding
Via Strategies for Shielding Effectiveness
1. Via Fencing
Create shielding walls by:
- Placing grounded vias along the perimeter of sensitive areas
- Maintaining via spacing based on the highest frequency component
- Using via-in-pad techniques for maximum density when needed
2. Via Stitching
Improve plane connectivity by:
- Distributing ground vias throughout the board
- Placing vias at regular intervals (typically λ/10 spacing)
- Using multiple vias for low-impedance connections at high frequencies
3. Blind and Buried Vias
For complex multilayer boards:
- Blind vias connect outer layers to inner layers without going through the entire board
- Buried vias connect inner layers without reaching outer layers
- Helps maintain shielding continuity while reducing stub effects
Signal Integrity Considerations
Proper shielding must account for:
- Impedance Control: Maintain consistent trace impedance throughout the signal path
- Return Paths: Ensure uninterrupted return current paths, especially at layer transitions
- Crosstalk Mitigation: Use shielding layers to separate potentially interfering signals
Simulation and Verification
Before manufacturing:
- EM Simulation: Use tools like SIwave, HyperLynx, or CST to model shielding effectiveness
- Prototype Testing: Measure actual EMI performance with spectrum analyzers and near-field probes
- Compliance Testing: Verify against relevant standards (FCC Part 15, CISPR 32, etc.)
Common Mistakes to Avoid
- Insufficient Via Connections: Failing to properly stitch ground layers together
- Improper Plane Splitting: Creating slots in planes that block return currents
- Ignoring Edge Effects: Neglecting board edge shielding requirements
- Overlooking Component Placement: Putting noisy components near sensitive circuits
- Frequency Neglect: Not designing for the highest harmonic frequency present
Case Studies
1. High-Speed Digital Board
A 12-layer motherboard for computing applications:
- Dedicated shielding layers between memory buses and analog sections
- Via fencing around RF components
- Careful power plane segmentation for different voltage domains
2. Mixed-Signal Design
An 8-layer industrial controller with both analog and digital sections:
- Separate ground planes for analog and digital sections
- Optical isolation between domains
- Shielded stripline routing for sensitive analog traces
3. RF Communication Module
A 6-layer Bluetooth/Wi-Fi module:
- Complete Faraday cage implementation for the RF section
- Thin dielectric layers between signal and ground planes
- Extensive via stitching throughout the board
Future Trends in PCB Shielding
- 3D Printed Electronics: Additive manufacturing enabling novel shielding geometries
- Nanomaterials: Graphene and other advanced materials for ultra-thin shielding
- Active Shielding: Adaptive systems that respond to changing EMI conditions
- Integrated Shielding: Combining traditional PCB layers with component shielding
Conclusion
Proper PCB layer shielding requires a systematic approach that considers the entire board architecture. By implementing appropriate ground and power plane strategies, via configurations, and material selections, designers can effectively control EMI and ensure reliable operation. As electronic systems continue to push performance boundaries while shrinking in size, mastering PCB shielding techniques becomes ever more critical for successful product development.
Remember that shielding effectiveness should be verified through both simulation and physical testing, as real-world performance may differ from theoretical models. By following the principles outlined in this article and staying current with emerging technologies, engineers can develop PCBs that meet both performance requirements and regulatory standards.