Assembling and Testing Electronic Components on Small PCBs
Key Takeaways
When engaging in pcb assembly for small electronic projects, understanding the fundamental techniques and best practices is crucial for achieving optimal performance. Mastering the assembly and testing of electronic components on small PCBs not only enhances reliability but also ensures longevity. One of the key aspects is to select the right tools, such as precision soldering irons, tweezers, and multimeters, which play significant roles in both assembly and testing.
It is important to pay attention to the layout of your printed circuit board (PCB). Proper component placement can prevent issues during soldering and testing phases. For instance, aligning components according to their functioning can reduce signal interference and enhance circuit performance. As recommended by experienced technicians:
“Plan your layout carefully before starting any pcb assembly; it saves time and mitigates potential errors.”
Moreover, integrating testing methods into your workflow can identify problems early on. Employ techniques such as continuity testing and functional tests to ensure all connections are secure. Proactive troubleshooting can help address common issues effectively.
Here’s a quick reference table summarizing crucial tips for effective pcba:
| Action | Recommended Practice |
|---|---|
| Component Placement | Prioritize layout according to function |
| Soldering Technique | Use small amounts of solder for precision |
| Testing Approach | Implement both visual inspection & tests |
By adhering to these foundational principles, you set yourself on a path toward mastering small PCB assembly while ensuring that your electronic endeavors are successful and reliable. Implementing these techniques will elevate both the quality of your projects and your personal proficiency in electronics work.
Introduction to Small PCBs: Importance and Applications
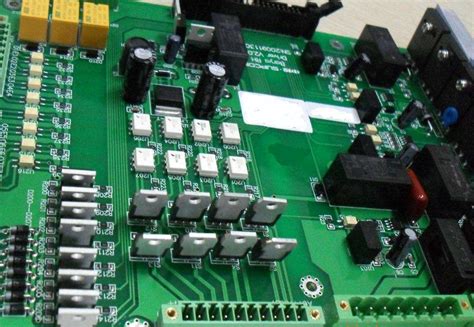
Small printed circuit boards (PCBs) play a crucial role in modern electronics, serving as the backbone for a wide variety of devices. From smartphones and wearable technology to intricate medical instruments, these compact assemblies enable the integration of electronic components in a space-efficient manner. The significance of pcb assembly cannot be overstated; it not only allows for the miniaturization of electronic devices but also enhances performance through optimal design layouts that facilitate better signal integrity and reduced interference. The applications extend beyond consumer electronics, finding crucial uses in industrial automation, automotive systems, and even aerospace technology. As design trends lean towards increased functionality within limited space, mastering PCBA processes becomes essential for engineers and hobbyists alike. Understanding the importance of small PCBs encourages enthusiasts to embrace innovative techniques which ensure quality pcb assembly, ultimately leading to the realization of reliable and efficient electronic projects. The ability to successfully assemble and test components on these boards is paramount, providing both reliability and performance that meet today’s demanding standards.
Essential Tools for Assembling Electronic Components
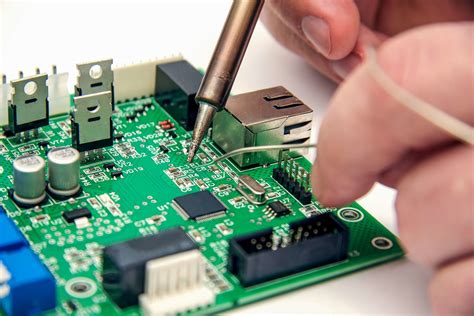
When embarking on the journey of pcb assembly, having the right tools at your disposal is crucial for successful outcomes. The foundation of any effective pcba process begins with the essential tools that facilitate efficient component handling and reliable soldering. One of the primary tools is a quality soldering iron, which comes equipped with various tip sizes to accommodate different types of components. A fine-tipped soldering iron is particularly useful for meticulous work on small printed circuit boards (PCBs). In addition, a reliable soldering station with adjustable temperature settings allows for better control over the heating process, thus preventing damage to sensitive components.
Moreover, precision tweezers play a significant role in assembling electronic components, especially on small PCBs where space is limited. These tweezers enable you to place components accurately without risking damage to nearby elements. Another important tool is a multimeter, which helps verify connections and check for continuity after assembly—a critical step in ensuring that your pcba operates as intended. Furthermore, using a magnifying glass or microscope can greatly aid in inspecting solder joints, enhancing accuracy, and reducing errors during the assembly process. Having these essential tools will not only streamline your assembly workflow but will also enhance the overall quality and reliability of your electronic projects.
Step-by-Step Guide to Assembling Components on Small PCBs
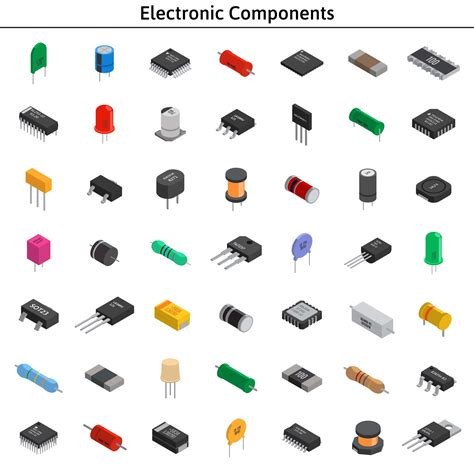
When it comes to pcb assembly, precision and care are paramount, especially on small PCBs where space is limited. Begin by gathering all necessary components, including resistors, capacitors, and integrated circuits, along with the appropriate tools such as soldering irons and wire cutters. Before diving into the actual assembly, it’s crucial to develop a clear layout plan that highlights the placement of each component on the board. This plan will serve as a roadmap throughout the process.
Once you have a solid plan, start by positioning each component according to your layout. For pcba (printed circuit board assembly), ensure that you insert components through their respective holes from the bottom side of the PCB. For surface-mounted components, apply solder paste on designated pads before placing the parts carefully. It is essential to maintain proper orientation and alignment with all components; even a small misalignment can lead to functional issues.
Next comes the soldering phase—a critical step in ensuring a reliable connection between components and the PCB. Use a hot soldering iron, applying just the right amount of solder to create a strong joint without bridging connections between pads. Remember to allow for cooling between solder applications; this ensures durability and reduces stress on heat-sensitive components.
After all components are soldered into place, inspect your work closely for any visible defects or misalignments before proceeding to testing. By carefully following these steps in your pcb assembly, you will maximize performance and reliability in your electronic projects, ultimately leading to more successful outcomes.
Techniques for Effective Soldering and Component Placement
When it comes to pcb assembly, mastering the art of soldering and component placement is vital for achieving high-quality results, particularly on small printed circuit boards (PCBs). Proper soldering techniques not only ensure electrical conductivity but also enhance the reliability of the assembly. Begin by arranging components systematically on the PCB to optimize space and maintain an organized workflow. This can involve utilizing a clear layout plan or schematic that aligns with the intended circuit design.
For effective pcba, it is crucial to use the right amount of solder; too much can lead to bridging between connections, while too little can result in cold solder joints. Adopting a temperature-controlled soldering iron helps maintain precision in heating, thus minimizing damage to sensitive components during assembly. Moreover, it’s essential to properly heat both the pad and the component lead before adding solder to achieve a good connection.
When placing components, ensure they are correctly oriented according to their polarity and footprint specifications. For surface-mount devices (SMD), tweezers or specialized tools can aid in precise placement on small PCBs, reducing risk of misalignment. Additionally, employing techniques such as tack soldering or using a reflow oven can further assist in achieving an even distribution of heat across all components.
In terms of testing post-assembly, visual inspection is an immediate step that helps identify any potential issues with solder joints or misplaced components before moving on to more rigorous testing methods. By systematically applying these techniques during pcb assembly, one can significantly improve both the performance and durability of electronic projects, ensuring they meet rigorous standards for functionality and reliability.
Testing Methods for Small PCB Assemblies
When it comes to pcb assembly, ensuring the functionality and reliability of the final product is crucial. Various testing methods can be employed to assess the performance of small PCBs, each with its specific advantages. One effective approach is visual inspection, which involves closely examining the board for any soldering defects, such as cold joints or bridges between pins. This method is straightforward and can often identify issues before more extensive testing is conducted. Another common technique is in-circuit testing (ICT), where the assembled board is tested while it remains in the circuit. This allows for precise measurements and helps identify faults in individual components by verifying their functionality in context. In addition, functional testing can be performed, meaning that the board is subjected to real operating conditions to ensure it behaves as expected during practical use. Other methods include boundary scan testing, which is particularly useful for higher-density assemblies where access to individual components may be limited due to space constraints on small PCBs. Utilizing a combination of these techniques not only enhances the reliability of pcba but also minimizes potential issues that could arise during operation, ensuring optimal performance in electronic projects.
Troubleshooting Common Issues in PCB Assembly
When engaging in pcb assembly, encountering issues is not uncommon, especially when working with small printed circuit boards (PCBs). One of the most prevalent problems is improper soldering, which can lead to weak connections or shorts. It’s essential to ensure that the solder used is of high quality and that the soldering technique is correct. Pay attention to common signs of poor solder joints, such as cracks or insufficient solder, which can jeopardize the reliability of your PCBA.
Another frustrating challenge is component misplacement. This can stem from a crowded layout or a lack of attention during assembly. Utilizing a magnifying glass or an inspection microscope can help identify and rectify component misalignments early in the process. Additionally, keeping accurate documentation throughout the pcb assembly allows for easier identification of any discrepancies.
Environmental factors can also impact your assembly results. Humidity and temperature fluctuations can cause issues with both solder adhesion and component stability. Maintaining a controlled environment while working on your PCBs mitigates these risks significantly.
If you find that certain components are not functioning as expected post-assembly, comprehensive testing methods should be employed to pinpoint failures. Using multimeters to check for continuity and isolating faulty parts through systematic testing are effective strategies for troubleshooting.
Overall, maintaining awareness of these common challenges and applying suitable troubleshooting techniques will enhance both the efficiency and quality of your PCBA, ensuring optimal performance in your electronic projects. Regular practice and careful attention during each step of assembly will go a long way in building reliable small PCB assemblies that meet your design requirements.
Best Practices for Ensuring Reliability in Electronic Projects
Ensuring reliability in pcb assembly is crucial for the performance and longevity of electronic projects. First and foremost, it’s essential to select high-quality electronic components that meet the required specifications. Components should be sourced from reputable suppliers to avoid discrepancies that may lead to failure. When assembling, always follow the schematic diagram meticulously, as this serves as a blueprint for proper pcba execution. Careful attention should be given to the orientation and placement of each component; incorrectly placed components can compromise the entire circuit’s functionality.
Utilizing appropriate soldering techniques is another critical aspect of enhancing reliability in small PCBs. Ensure that solder joints are smooth and free of cold solder joints, which can lead to intermittent connections. A proper temperature controlled soldering iron can make a significant difference, allowing for consistent results without damaging sensitive components.
In addition, it’s vital to perform thorough testing after assembly. Implementing both visual inspection protocols and functional testing will help identify issues such as shorts or incorrect wiring before the product is deployed. For enhanced reliability, consider using tools such as thermal imaging cameras or continuity testers during this phase.
Last but not least, documenting each step of your pcb assembly process can assist in diagnosing any potential issues in future projects. Regular maintenance checks and revisiting design layouts based on testing results will contribute greatly to achieving successful outcomes in electronic projects, ensuring that your assembled circuits perform at their best under various conditions.
Conclusion: Mastering Small PCB Assembly and Testing Techniques
In the realm of electronics, mastering pcb assembly and testing techniques is crucial for ensuring the longevity and performance of devices. As we’ve explored throughout this article, small printed circuit boards (PCBs) are integral to countless applications, from hobbyist projects to industrial designs. By employing best practices in pcba, such as meticulous component placement and precise soldering techniques, one can significantly reduce the likelihood of common assembly issues. Furthermore, testing methods play a vital role in validating the functionality of completed PCBs; utilizing tools like multimeters and oscilloscopes can help diagnose potential faults effectively. Ultimately, honing these skills not only enhances reliability but also fosters confidence in one’s ability to tackle challenges in electronic design and production. Those who invest time in refining these techniques will be well-prepared to meet both personal and professional goals within the vast landscape of electronics.
Conclusion: Mastering Small PCB Assembly and Testing Techniques
In the realm of electronics, mastering the art of pcb assembly is crucial for achieving optimal performance and reliability in projects involving small printed circuit boards (PCBs). The techniques discussed throughout this article highlight the importance of precise pcba practices, encompassing everything from effective soldering methods to testing strategies that ensure each component functions as intended. A systematic approach to assembling electronic components not only enhances efficiency but also significantly reduces the likelihood of errors during the assembly process. By implementing best practices, such as maintaining a clean working environment and using quality tools, enthusiasts and professionals alike can elevate their pcb assembly projects. Ultimately, dedication to the craft of assembling and testing electronic components on small PCBs will lead to impressive results in any electronic venture, providing a strong foundation for continued exploration and innovation within this exciting field.
FAQs
What is PCB assembly?
PCB assembly, often abbreviated as PCBA, is the process of soldering electronic components onto a printed circuit board (PCB) to create a functional electronic device.
What are the benefits of using small PCBs?
Small PCBs offer significant advantages, such as reduced size and weight, lower manufacturing costs, and enhanced flexibility in design. These factors make them ideal for compact electronic projects.
What essential tools are required for PCB assembly?
The key tools for PCB assembly include a soldering iron, solder wire, tweezers for placing components, a multimeter for testing connections, and sometimes specialized equipment like reflow ovens or pick-and-place machines.
How can one ensure effective soldering on small PCBs?
Effective soldering involves maintaining a steady hand, using the right amount of heat, and ensuring correct placement of components. Always check connections after soldering to prevent issues in the PCBA process.
What testing methods are recommended for small PCB assemblies?
Common testing methods include visual inspections, continuity tests with a multimeter, and functional tests to ensure that all components operate correctly under predefined conditions.
How can I troubleshoot common issues in PCB assembly?
Common issues may include cold solder joints or misplaced components. A careful inspection with magnification can help identify these problems. Additionally, using a multimeter can aid in testing the connectivity of traces on the board.
For further insights into effective pcb assembly, please visit our website: