Diy pcb assembly
Step-by-Step Guide to DIY PCB Assembly
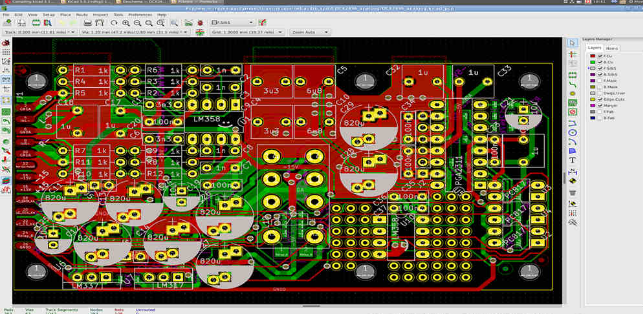
Embarking on the journey of DIY PCB assembly can be both a rewarding and educational experience. To ensure a successful project, it is essential to follow a systematic approach. The first step involves designing the PCB layout using specialized software such as Eagle, KiCad, or Altium Designer. These tools allow you to create a schematic diagram, which serves as a blueprint for your circuit. Once the schematic is complete, you can proceed to design the PCB layout, ensuring that all components are correctly placed and connected.
After finalizing the design, the next step is to procure the necessary materials.
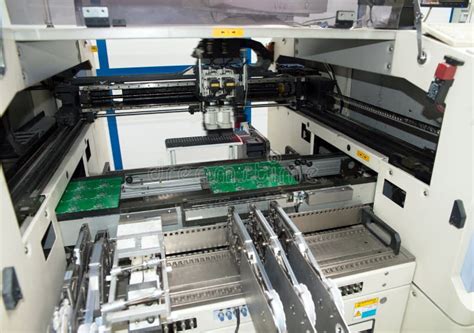
This includes the PCB itself, which can be ordered from a manufacturer based on your design files, as well as the electronic components such as resistors, capacitors, and integrated circuits. It is crucial to double-check the Bill of Materials (BOM) to ensure that all required components are accounted for and that their specifications match the design requirements.
With all materials in hand, the assembly process can begin.
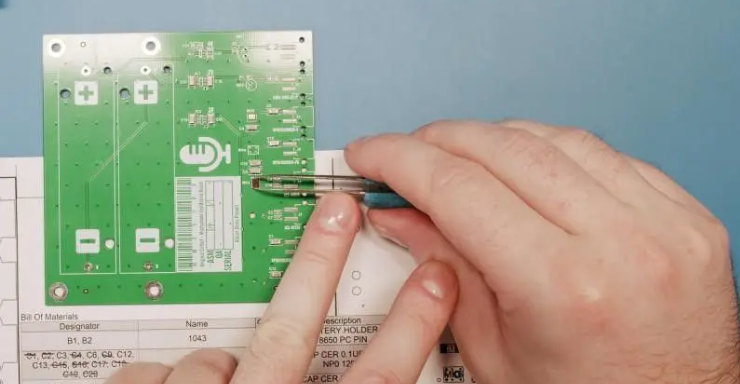
Start by preparing your workspace, ensuring it is clean and well-lit. Gather all necessary tools, including a soldering iron, solder, tweezers, and a magnifying glass. It is also advisable to have a multimeter on hand for testing purposes. Before soldering, it is important to familiarize yourself with the component placement on the PCB. This can be done by referring to the design files and the BOM.
Begin the assembly by soldering the smallest and most low-profile components first, such as resistors and capacitors.
This approach helps to keep the workspace organized and prevents larger components from obstructing access to smaller ones. When soldering, apply a small amount of solder to the tip of the soldering iron and then touch it to the joint where the component lead meets the PCB pad. The solder should flow smoothly and create a solid connection. Be cautious not to apply excessive heat, as this can damage both the component and the PCB.
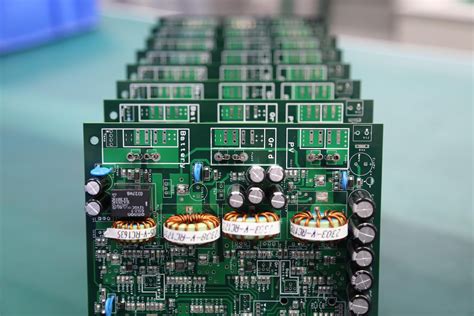
Once the smaller components are in place, proceed to solder the larger components, such as integrated circuits and connectors.
For components with multiple leads, it is helpful to solder one or two leads first to secure the component in place before soldering the remaining leads. This ensures proper alignment and prevents movement during the soldering process.
After all components are soldered, it is essential to inspect the PCB for any solder bridges or cold joints.
Solder bridges occur when excess solder creates an unintended connection between two adjacent pads, while cold joints are characterized by a dull, grainy appearance and indicate a poor electrical connection. Both issues can be resolved by reheating the joint and applying additional solder if necessary.
The final step in the DIY PCB assembly process is testing the assembled board. Use a multimeter to check for continuity and verify that there are no short circuits. Power up the board and test its functionality according to the design specifications. If any issues are detected, troubleshoot by checking the component placement and solder joints.
In conclusion, DIY PCB assembly requires careful planning, attention to detail, and a methodical approach. By following these steps, you can successfully assemble a PCB and gain valuable hands-on experience in electronics.
Essential Tools for DIY PCB Assembly
When embarking on the journey of DIY PCB assembly, having the right tools is paramount to achieving a successful and efficient outcome. The process of assembling a printed circuit board (PCB) involves several intricate steps, each requiring specific tools to ensure precision and reliability. Understanding the essential tools for DIY PCB assembly can significantly enhance the quality of your projects and streamline the assembly process.
To begin with, a soldering iron is indispensable for any PCB assembly task.
This tool is used to melt solder, allowing components to be securely attached to the PCB. A soldering iron with adjustable temperature control is highly recommended, as different components and solder types require varying temperatures. Additionally, a fine-tipped soldering iron is preferable for working with small and delicate components, ensuring accuracy and preventing damage.
Complementing the soldering iron, solder wire is another critical component.
Solder wire, typically made of a tin-lead alloy or a lead-free alternative, acts as the bonding agent between the PCB and its components. The choice of solder wire can impact the ease of soldering and the quality of the connections. Flux-core solder wire is particularly advantageous as it contains a flux core that helps clean the surfaces being soldered, promoting better adhesion and reducing oxidation.
A soldering station, which includes a soldering iron holder and a sponge or brass wool for cleaning the soldering iron tip, is also essential.
Keeping the soldering iron tip clean is crucial for maintaining its efficiency and prolonging its lifespan. A clean tip ensures better heat transfer and more precise soldering, which is vital for the integrity of the PCB assembly.
In addition to soldering tools, a set of tweezers is necessary for handling small components.
Tweezers allow for precise placement of components on the PCB, especially when dealing with surface-mount technology (SMT) components that are too small to be handled with fingers. Anti-static tweezers are particularly beneficial as they prevent static discharge, which can damage sensitive electronic components.
A magnifying tool, such as a magnifying glass or a microscope, is invaluable for inspecting solder joints and ensuring the correct placement of components. This tool helps identify any solder bridges, cold joints, or misaligned components that could compromise the functionality of the PCB. High magnification and good lighting are essential features to look for in a magnifying tool.
For desoldering purposes, a desoldering pump or solder wick is required.
These tools are used to remove excess solder or to correct mistakes during the assembly process. A desoldering pump, also known as a solder sucker, is a mechanical device that creates a vacuum to suck up molten solder. Solder wick, on the other hand, is a braided copper wire that absorbs solder when heated. Both tools are effective, and the choice between them often comes down to personal preference and the specific requirements of the task.
Lastly, a multimeter is an essential diagnostic tool for testing and troubleshooting the assembled PCB.
A multimeter can measure voltage, current, and resistance, allowing you to verify the functionality of the circuit and identify any issues. It is a versatile tool that provides valuable insights into the electrical characteristics of the PCB, ensuring that it operates as intended.
In conclusion, equipping yourself with the essential tools for DIY PCB assembly is crucial for achieving high-quality results. From soldering irons and solder wire to tweezers and multimeters, each tool plays a vital role in the assembly process. By understanding the purpose and proper use of these tools, you can enhance your PCB assembly skills and ensure the success of your electronic projects.
Common Mistakes to Avoid in DIY PCB Assembly
When embarking on the journey of DIY PCB assembly, it is crucial to be aware of common mistakes that can hinder the success of your project. One of the most frequent errors is improper component placement. Ensuring that each component is correctly oriented and positioned according to the design specifications is fundamental. Misplaced components can lead to malfunctioning circuits or even damage to the PCB itself. To avoid this, double-check the orientation of polarized components such as diodes and electrolytic capacitors before soldering them onto the board.
Another prevalent mistake is inadequate soldering techniques.
Poor solder joints can result in unreliable connections, which may cause intermittent failures or complete circuit breakdowns. It is essential to use the right amount of solder and ensure that it flows smoothly to form a solid connection between the component lead and the PCB pad. Additionally, using a soldering iron with an appropriate temperature setting can prevent overheating, which might damage sensitive components or the PCB substrate.
Furthermore, neglecting to clean the PCB before assembly can lead to significant issues.
Dust, oils, and other contaminants can interfere with solder adhesion and electrical conductivity. Therefore, it is advisable to clean the PCB with isopropyl alcohol and a lint-free cloth before starting the assembly process. This step ensures that the surface is free from contaminants that could compromise the integrity of the solder joints.
Equally important is the oversight of thermal management.
Components that generate significant heat, such as power transistors and voltage regulators, require adequate heat dissipation to function correctly. Failing to provide proper heat sinks or thermal pads can result in overheating, which may lead to component failure or reduced lifespan. Incorporating thermal management solutions in the design phase and ensuring their correct implementation during assembly is vital for the longevity and reliability of the PCB.
In addition, insufficient testing and inspection can be a critical mistake in DIY PCB assembly. Skipping these steps can result in undetected faults that may cause the circuit to fail during operation. It is essential to perform thorough visual inspections to identify any solder bridges, cold joints, or misplaced components. Moreover, using a multimeter to check for continuity and correct voltage levels can help verify that the circuit is functioning as intended before powering it up.
Another common pitfall is the use of substandard components.
While it may be tempting to cut costs by purchasing cheaper parts, this can lead to reliability issues and potential failures. Investing in high-quality components from reputable suppliers ensures that the PCB will perform reliably over time. Additionally, verifying the specifications of each component to ensure they meet the design requirements is crucial for the overall success of the project.
Lastly, overlooking the importance of proper documentation can lead to confusion and errors during assembly.
Maintaining clear and detailed documentation, including schematics, bill of materials (BOM), and assembly instructions, is essential for a smooth assembly process. This practice not only helps in identifying the correct components and their placement but also aids in troubleshooting any issues that may arise.
In conclusion, avoiding these common mistakes in DIY PCB assembly requires careful attention to detail, proper techniques, and thorough preparation. By ensuring correct component placement, mastering soldering skills, maintaining cleanliness, addressing thermal management, conducting rigorous testing, using quality components, and keeping detailed documentation, you can significantly enhance the success and reliability of your DIY PCB projects.
Cost-Effective Tips for DIY PCB Assembly
Embarking on a DIY PCB assembly project can be both an exciting and cost-effective endeavor, provided you approach it with the right strategies. One of the primary considerations in such projects is managing costs without compromising on quality. To achieve this, it is essential to adopt a series of cost-effective tips that can streamline the process and ensure a successful outcome.
First and foremost, careful planning is crucial.
Before diving into the assembly, take the time to design your PCB layout meticulously. Utilizing free or low-cost PCB design software can significantly reduce initial expenses. These tools often come with extensive libraries of components, which can help you avoid costly mistakes and ensure that your design is both functional and efficient. Additionally, many of these software options offer simulation features, allowing you to test your design virtually before committing to physical components.
Once your design is finalized, sourcing components becomes the next critical step.
To keep costs down, consider purchasing components in bulk from reputable suppliers. Bulk buying often comes with significant discounts, which can be particularly beneficial for commonly used parts such as resistors, capacitors, and diodes. Furthermore, it is advisable to compare prices across multiple suppliers to ensure you are getting the best deal. Online marketplaces and electronic component distributors frequently offer competitive prices and occasional sales, which can further reduce your expenses.
Another cost-effective tip is to opt for standard-sized PCBs whenever possible.
Custom-sized PCBs can be significantly more expensive due to the additional manufacturing processes involved. By designing your project to fit within standard dimensions, you can take advantage of lower production costs and faster turnaround times. Additionally, many PCB manufacturers offer discounts for standard sizes, making this an economical choice.
When it comes to the actual assembly process, investing in a few essential tools can save both time and money in the long run.
A good quality soldering iron with adjustable temperature control is indispensable for precise and reliable soldering. Additionally, a set of fine-tipped tweezers, a magnifying glass or microscope, and a multimeter are invaluable tools that can enhance the accuracy and efficiency of your assembly work. While these tools may require an initial investment, they will pay off by reducing the likelihood of errors and rework.
Moreover, practicing good soldering techniques is vital for a successful DIY PCB assembly.
Poor soldering can lead to faulty connections and potential damage to components, resulting in additional costs for replacements and repairs. To avoid this, ensure that you use the appropriate soldering temperature and technique for each component. Taking the time to practice on scrap boards or inexpensive kits can help you develop the necessary skills and confidence.
In addition to these practical tips, it is also beneficial to stay informed about the latest trends and advancements in PCB assembly.
Joining online forums, participating in workshops, and following industry publications can provide valuable insights and tips from experienced hobbyists and professionals. This knowledge can help you make informed decisions and adopt best practices that can further enhance the cost-effectiveness of your DIY projects.
In conclusion, by carefully planning your design, sourcing components wisely, opting for standard-sized PCBs, investing in essential tools, practicing good soldering techniques, and staying informed, you can significantly reduce the costs associated with DIY PCB assembly. These strategies not only help manage expenses but also contribute to the overall success and satisfaction of your project.